
How Much Does it Cost to Remodel a Basement in the Twin Cities?
Are you thinking about a basement remodel and wondering how much you’ll need to invest? See the cost breakdown for remodeling a basement in the Twin Cities.
Follow along as we remodel an unfinished basement inside this South Minneapolis home.
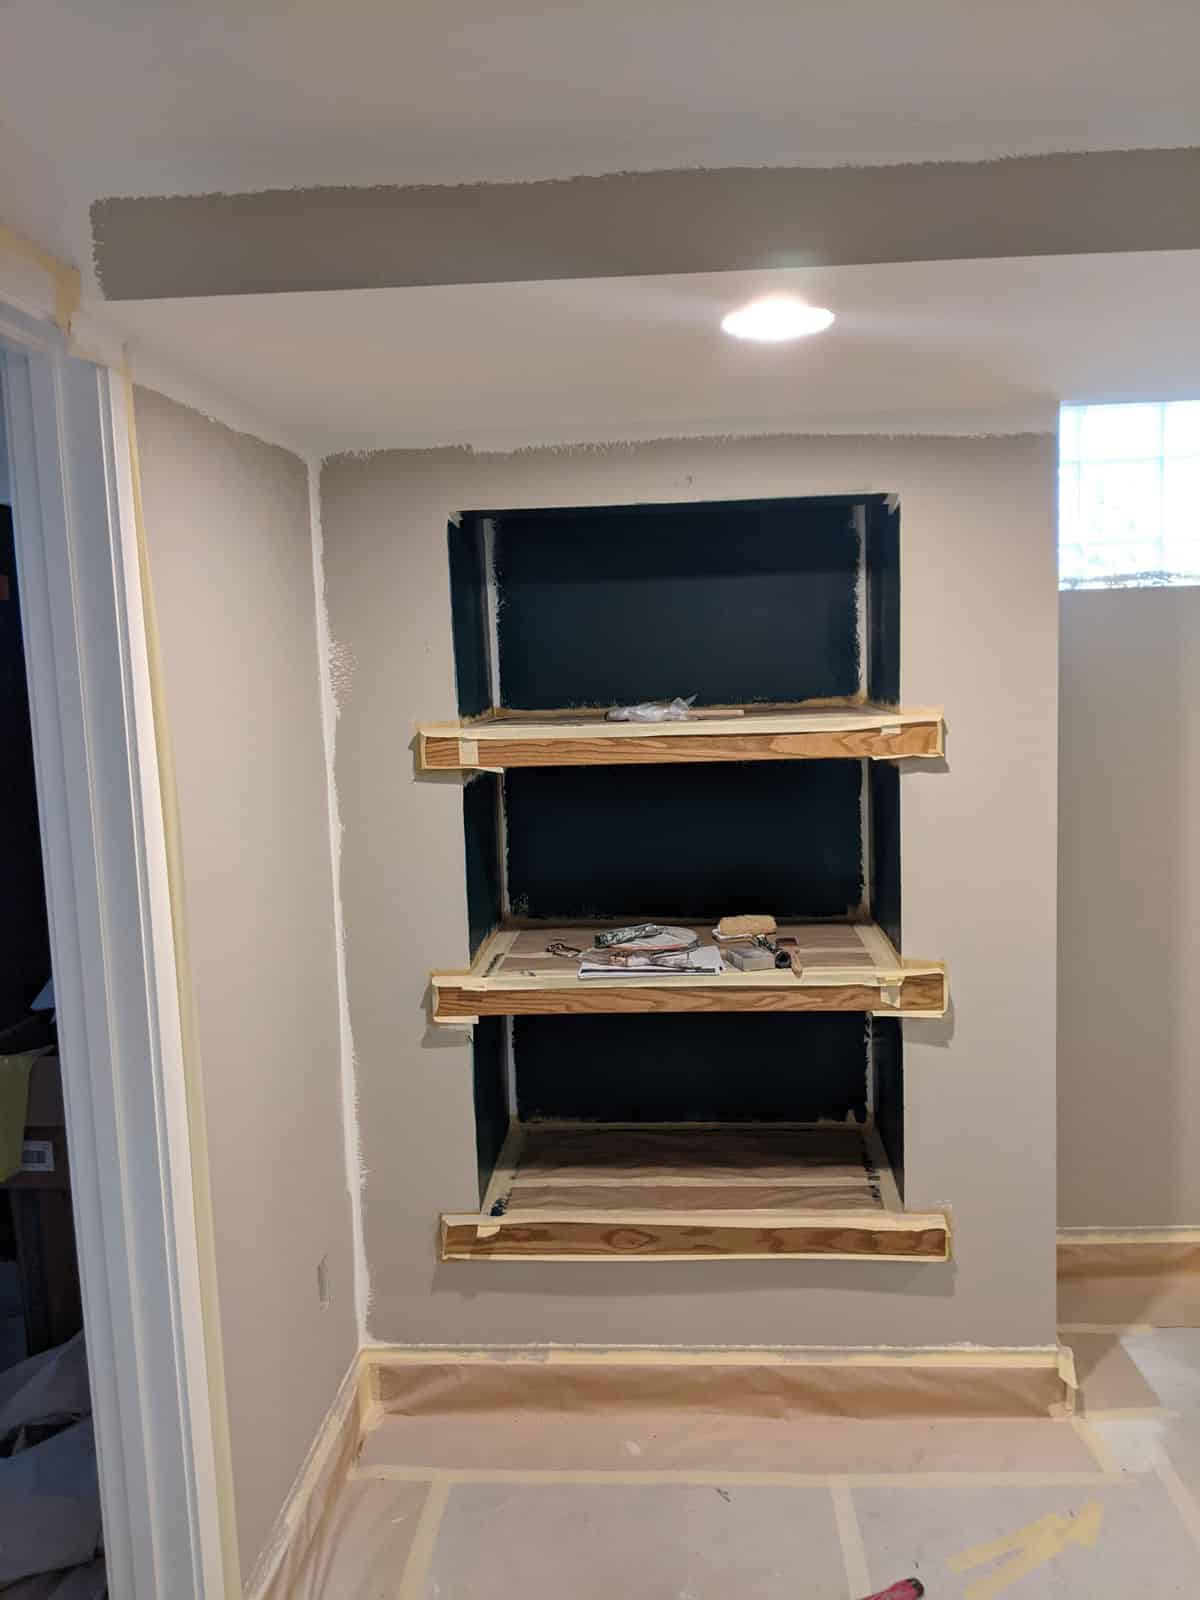
The custom living room shelves are a signature design element in this remodeled leisure space. The 3″ thick shelving adds a pop of color and cozy wood tones with two noticeable benefits to the family. Firstly, more storage is an asset for any family, especially one looking to create an open floor plan. Another significant aspect of the shelving nook is in hiding an unsightly pipe from the original 1930’s layout, one that we were able to avoid with careful planning. The custom shelving is made by installing a ledger board along the walls with a secondary 1×3 board along the outside edge and finely sanded plywood along the top and bottom of these supports. With the right stain and sealant, the wood shelving is a perfect compliment to the new laminated vinyl tile flooring.
Sherwin Williams Cascades is rolled into the back portion of the storage nook for a surprising blast of color along the back of the living room.
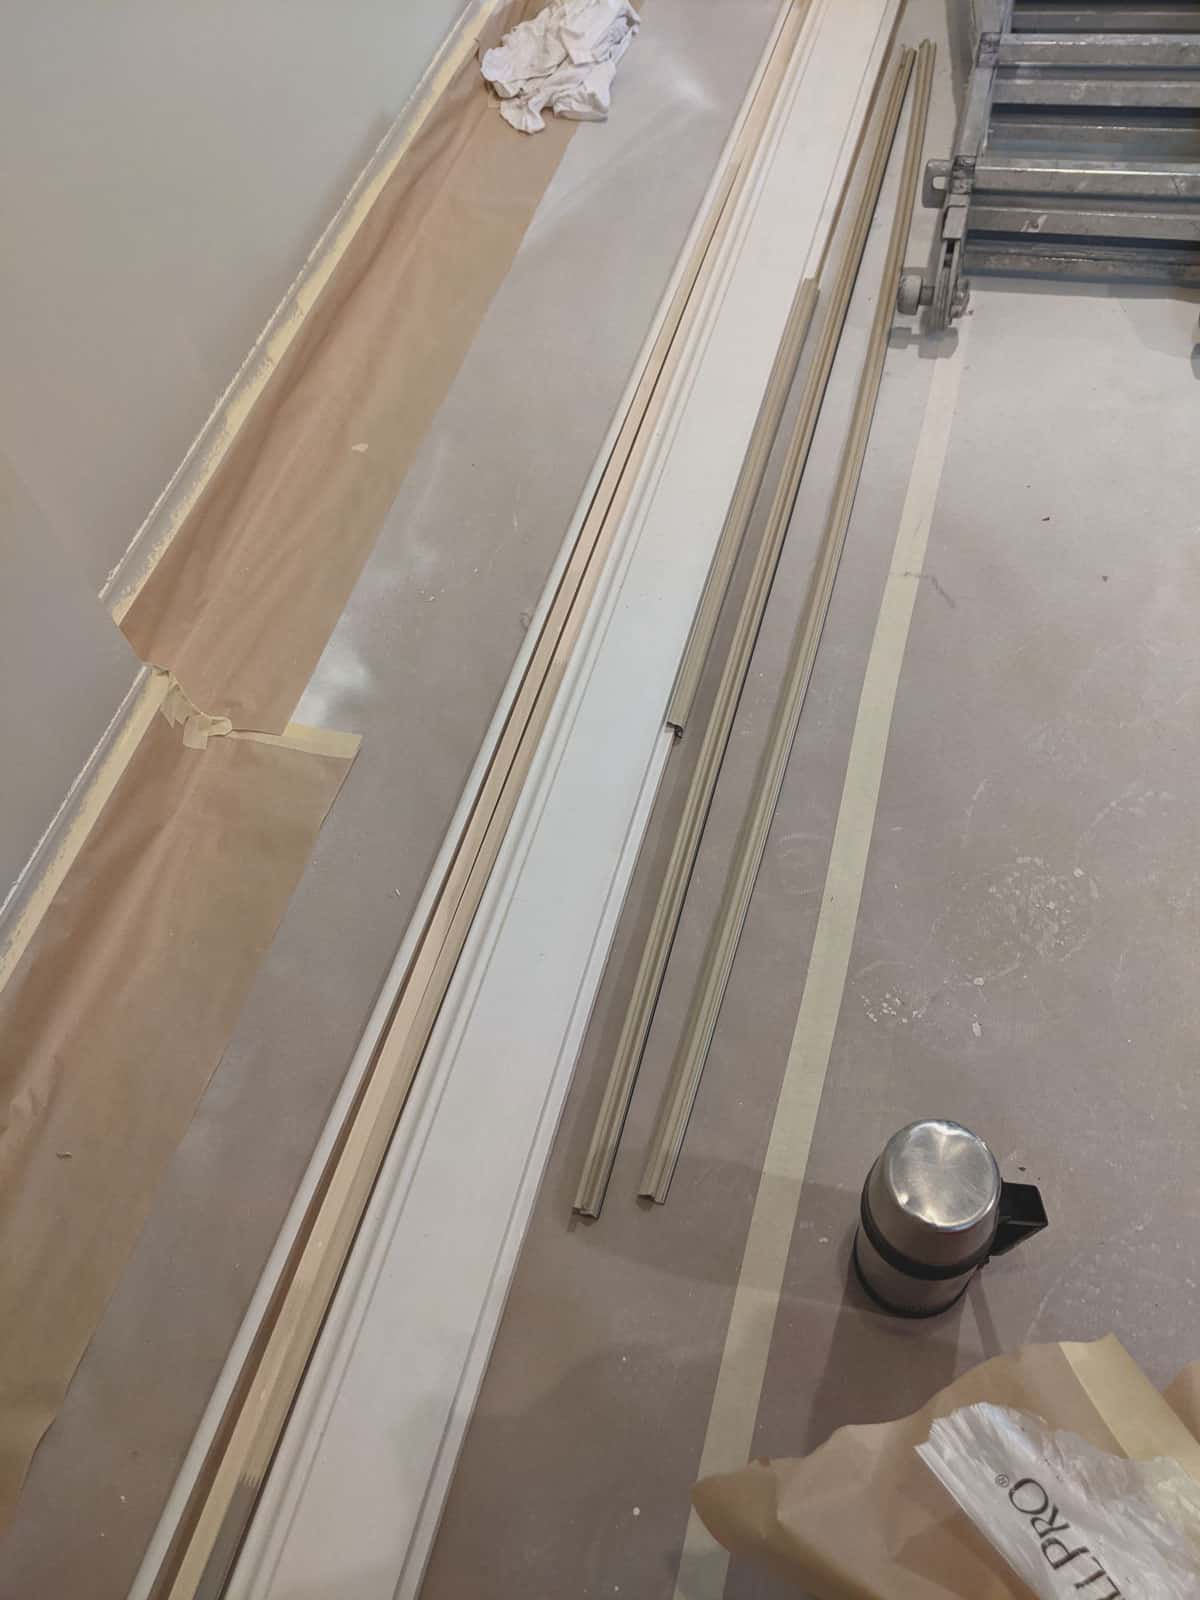
This two-piece base is composed of a flat back panel and a secondary, rounded profile called a shoe. Once installed, we painted all the new casing in the lower level, including the new baseboards.
To make sure the refreshed basement still feels united with the floors above, millwork profiles for the baseboards as well as those used for window and door profiles were carefully selected during the design phase. Before painting could begin, our installers nailed the two-piece baseboards to the bottom of the sheetrock walls. New doors and openings for the living, bedroom, bathroom, stair, and storage room all received paint grade casing as well, giving the rooms a much more refined and charming aesthetic.
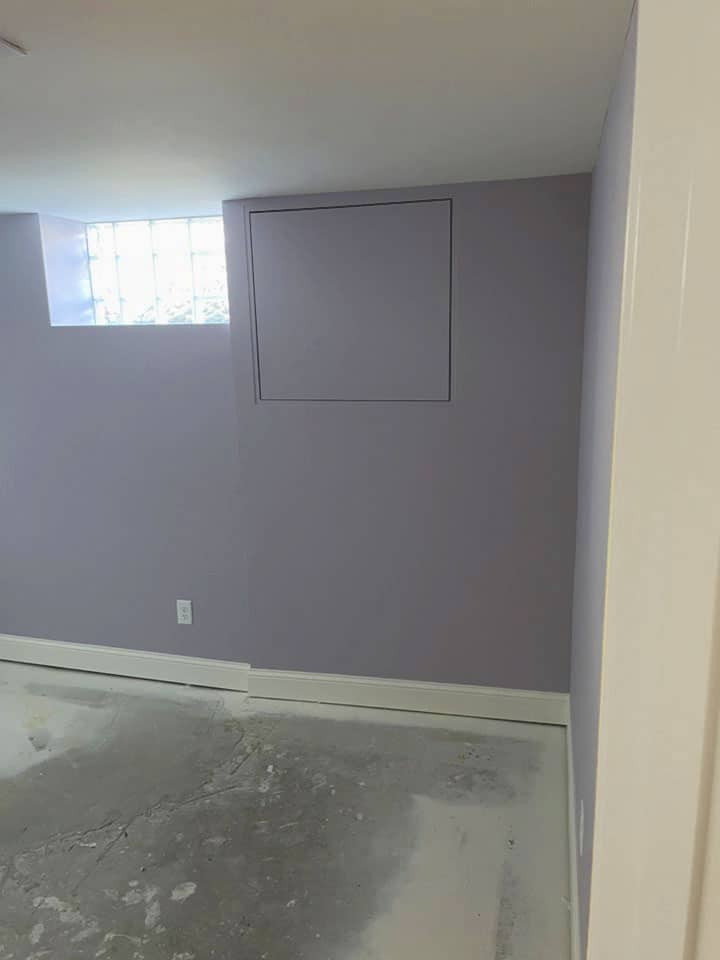
Our clients weren’t afraid to be bold in their paint selections, which created dynamic opportunities for the design team. Having finished priming the lower level, we rolled the final paint selections onto each basement wall. In the living room, we’re featuring a vivid Sherwin Williams blue called Cascades alongside a warm and relaxing neutral, another Sherwin Williams selection, Shiitake 9173. The bold colors continue in the new bedroom with a relaxing shade of light purple picked by the family’s children. The muted purple named, Grape Mist, is an excellent choice to keep the room bright and welcoming.

For darker paint selections, be prepared for at least 2-3 coats to get the full-bodied color and even finish. This shade of blue provides the basement with a unique and engaging focal point.
Typically tile installation occurs before painting begins – a timing decision made to prevent additional paint touch ups. Knowing there was a possibility of delayed tile installation, we preemptively arranged the construction schedule with tile install after painting to maintain the completion date without disruption to the quality of the work! Managing a remodel takes forward thinking to anticipate potential issues before they happen. However, doing a great job also means being flexible to necessary changes. In this case, pushing the timeline out on tile installation kept the whole project moving forward.
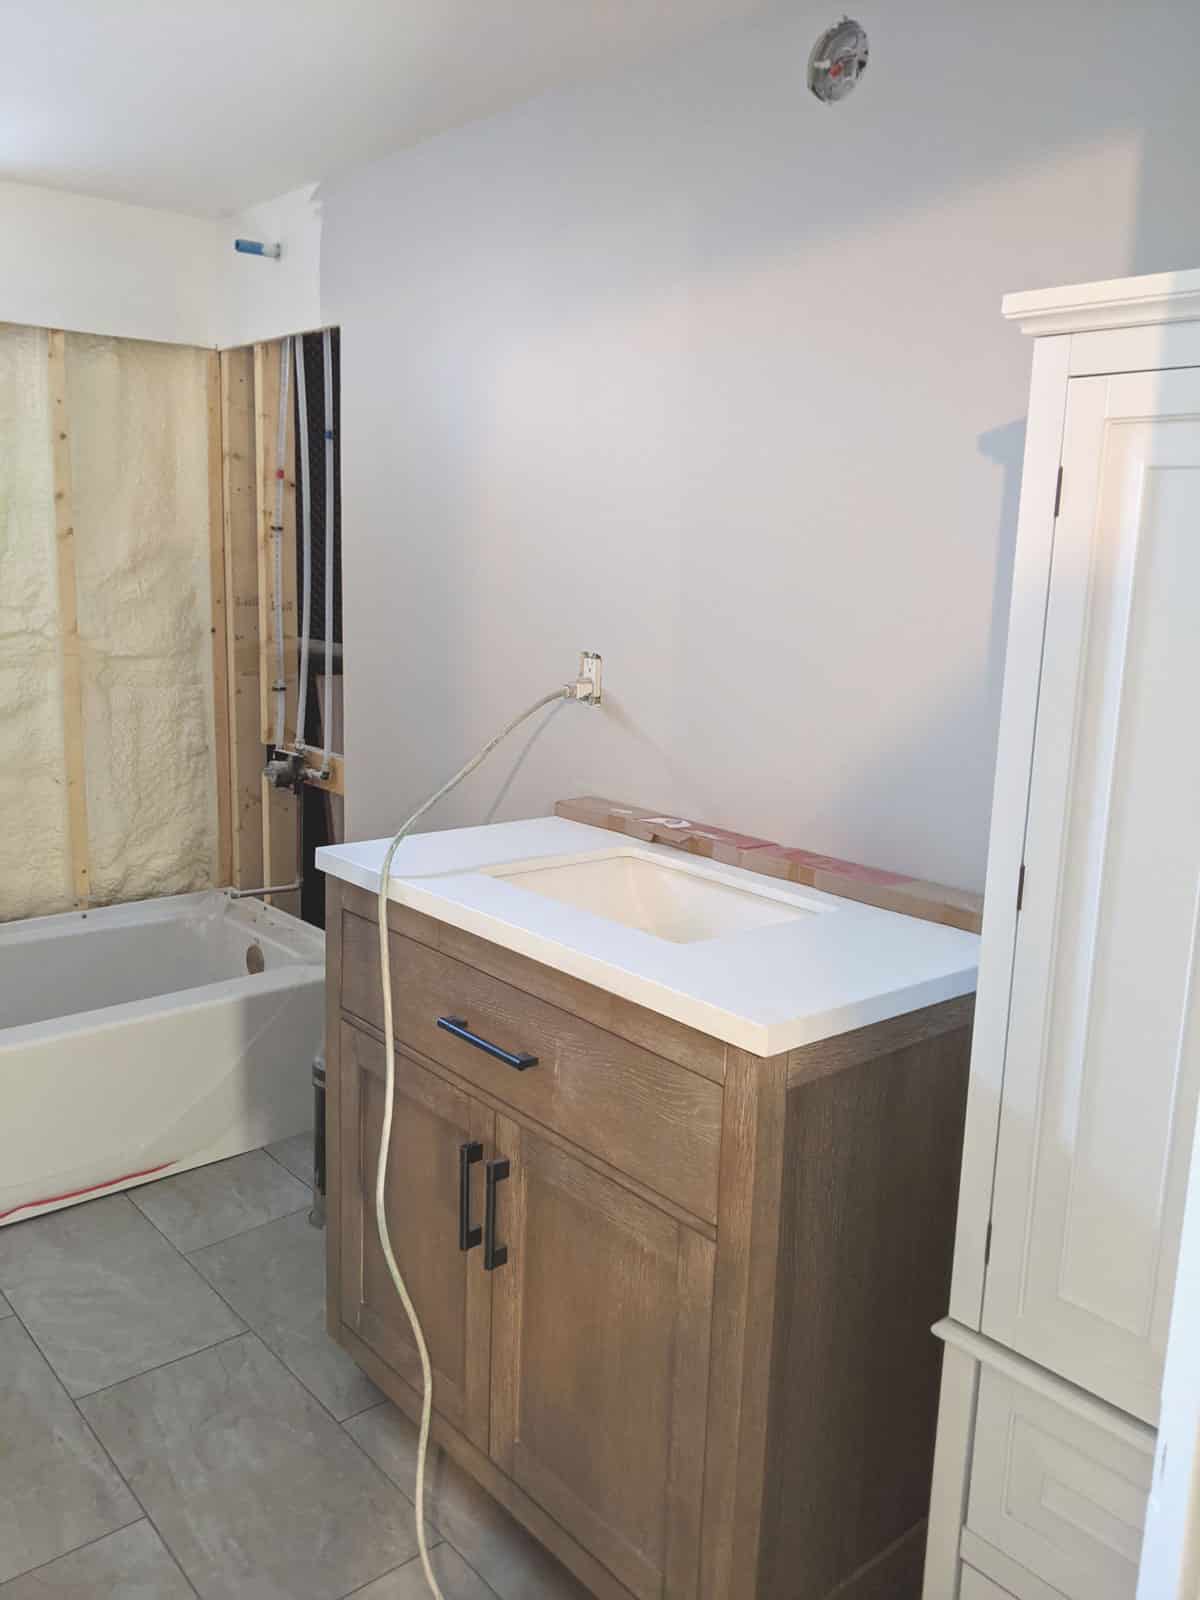
In the bathroom, we held off on installing tile, moving forward with getting the new vanity and storage cabinet in place. This flexibility kept our construction timeline progressing without slowing down the entire job!
We’re here to help! Check out our planning resources below, or reach out to us here.
Are you thinking about a basement remodel and wondering how much you’ll need to invest? See the cost breakdown for remodeling a basement in the Twin Cities.

So you’d love to upgrade your kitchen or add a shed dormer with a primary suite, but you’re not sure how to pay for it? Learn about three ways to finance your remodel.

Here's the step-by-step process that ensures you’ll have a remodel you love.