
Ten Steps to the Home You Love
Here's the step-by-step process that ensures you’ll have a remodel you love.
Follow along as we create a dormer addition for a homeowner in Southwest Minneapolis who is looking for an updated bedroom with an adjacent bathroom and primary closet.

Despite dreaming of something more comfortable and fun, the homeowner of this St. Paul Cape Cod held off on updating her upper level for decades, prioritizing other home projects instead. That’s all changing with a dormer addition off the back of the home. We’re trading the cramped 1/2-story for a generous bedroom suite with ample windows, a full-height closet, and a spacious bathroom, plus a bonus room our homeowner calls “the snug.”
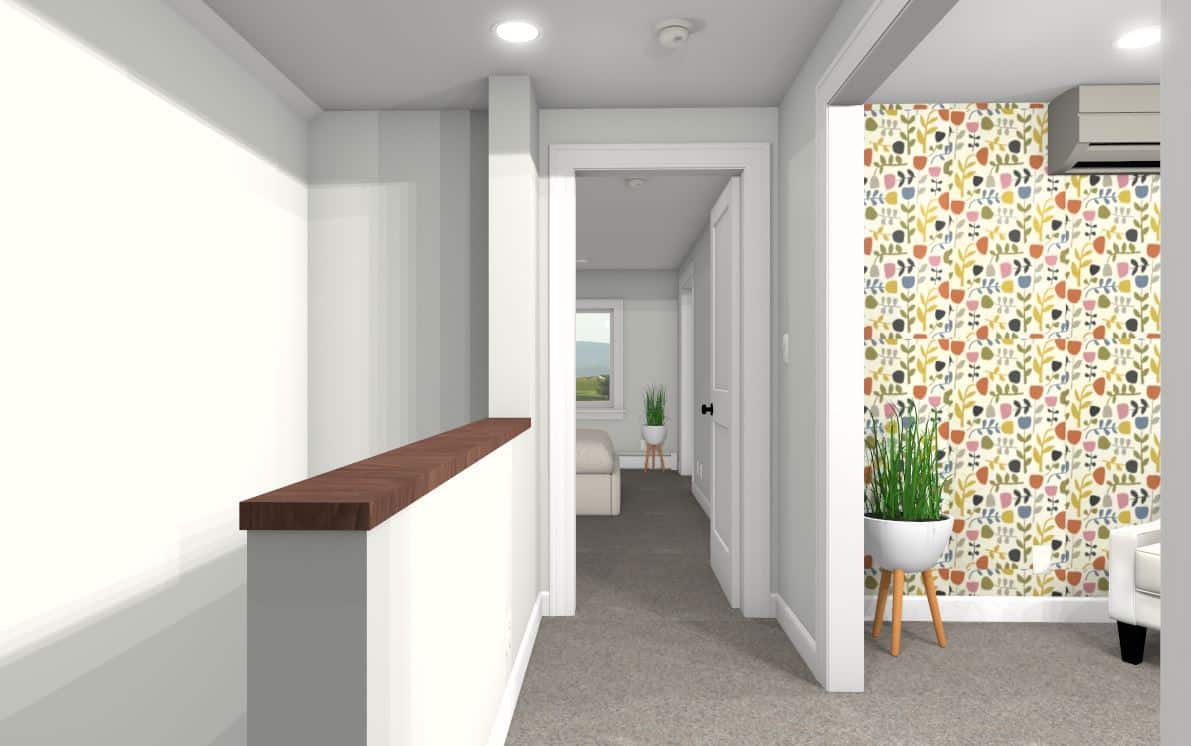
We’re now entering the finishing stage of the construction process, where the design vision comes alive with unexpected wallpaper, a mixture of bold and classic paints, and soft carpeting to make the bedroom feel even cozier.
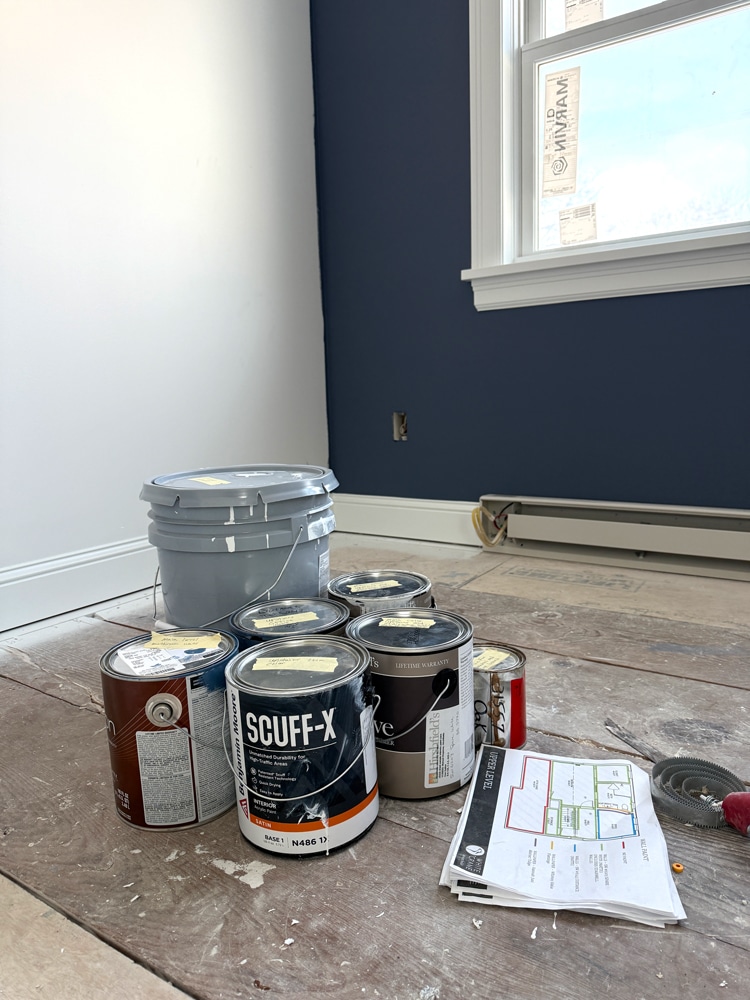
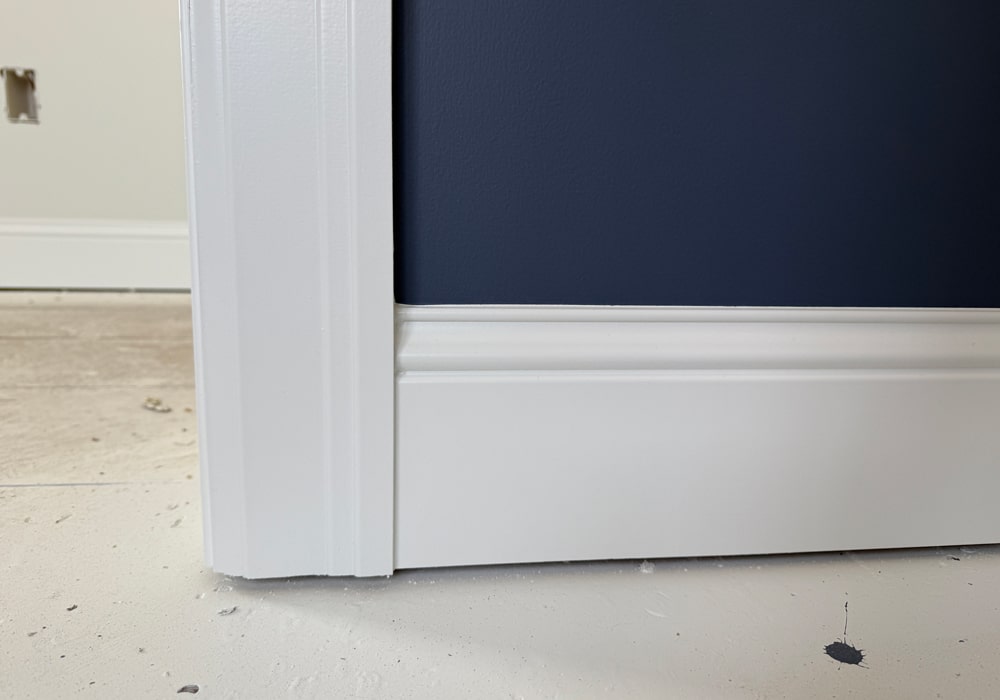
While paint selections might seem simple, color choices help define the project’s aesthetics. The homeowner selected Sherwin-Williams, Spare White, for the bathroom, bedroom, and hallway. It’s an approachable white that feels fresh without being overly stark. Specifying it throughout the remodel ensures cohesiveness without overwhelming subtler upgrades like the new millwork, bathroom hardware, and decorative lighting.
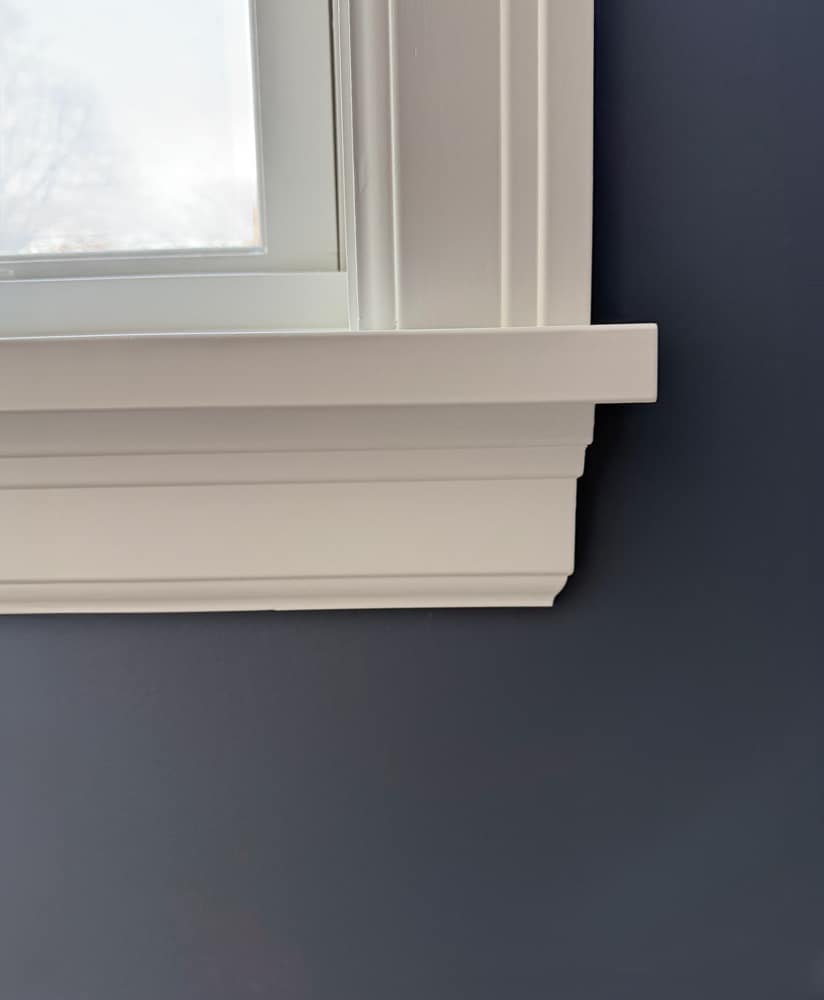
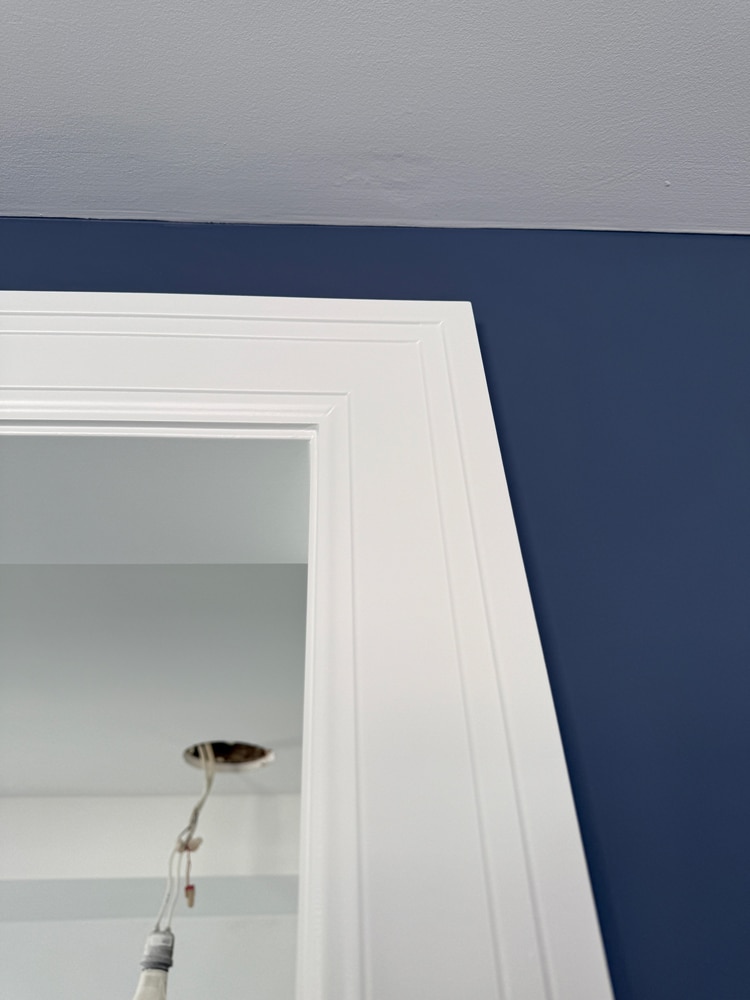
All millwork and interior doors are enameled with a satin finish in Sherwin-Williams, Extra White, a crisp, timeless selection that complements the Spare White used on nearby walls.
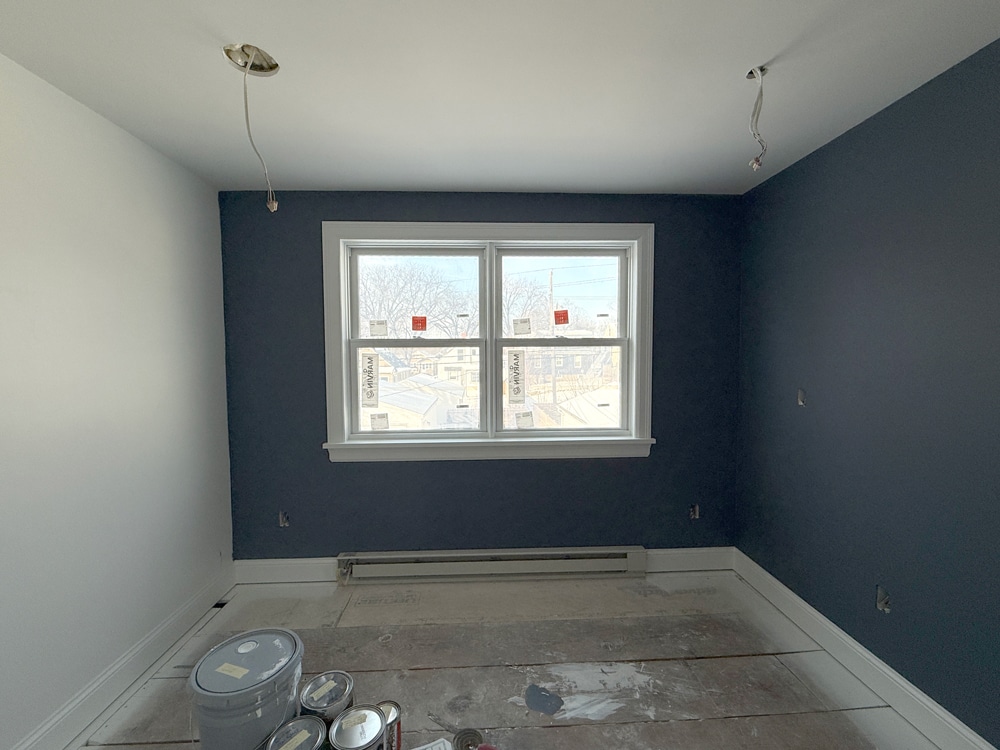
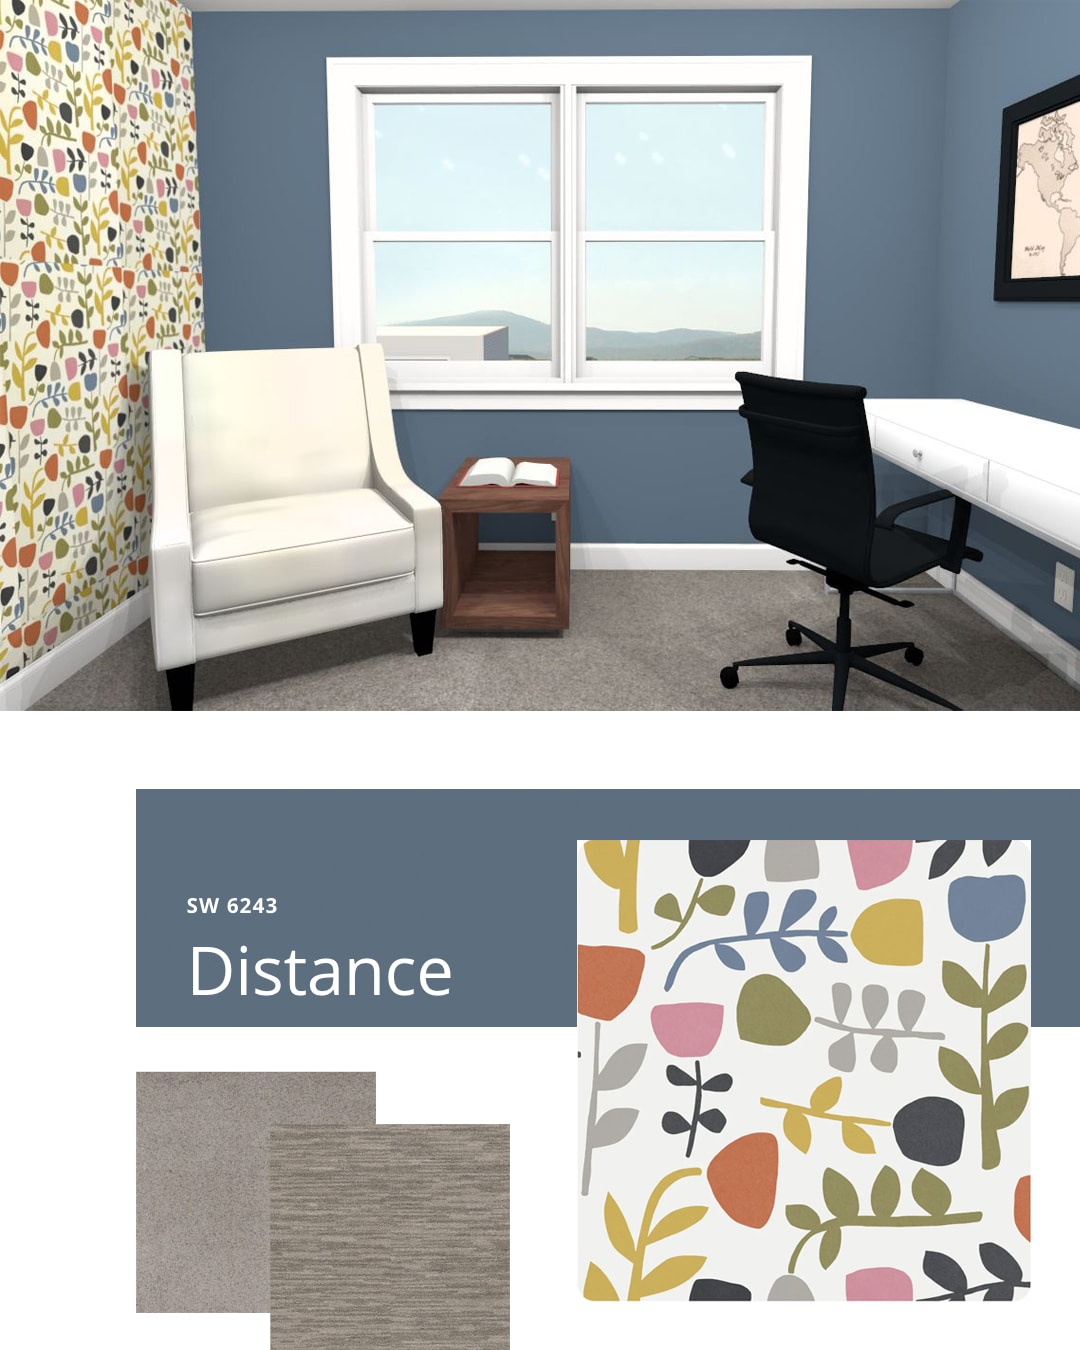
Just off the staircase in the “snug” area, our homeowner moved from the calming white to Sherwin-Williams, Distance, a bold blue paint which helps create an imaginative and joyful atmosphere. As we’ll see later in the blog, this particular selection is the perfect complement to an even bolder wallpaper.
Sure, we’ve all painted a few walls here and there. But when you’re painting for someone else, technique and prep matter in delivering professional results.
From taping off specific areas to proper scheduling, we knew the crew was set up for success by the time priming ever started. Driven by experience working on homes just like this one, our painters relied on a well-tested multi-phase approach to minimize mistakes and maximize quality.
“95% of a painter’s job is prep.” – White Crane Project Manager
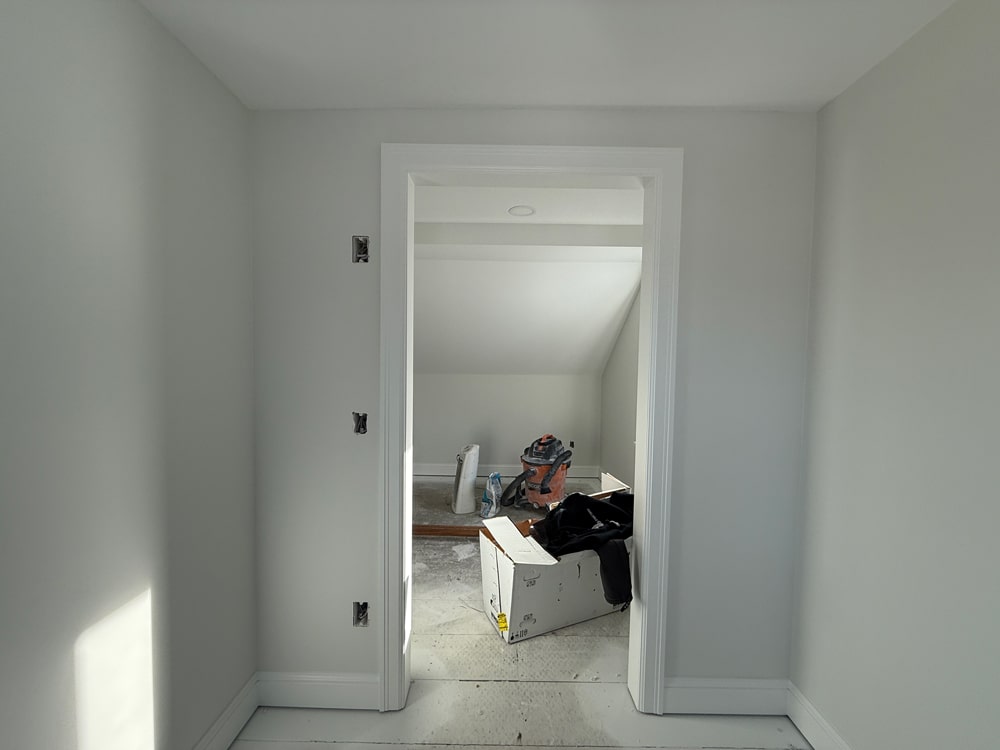
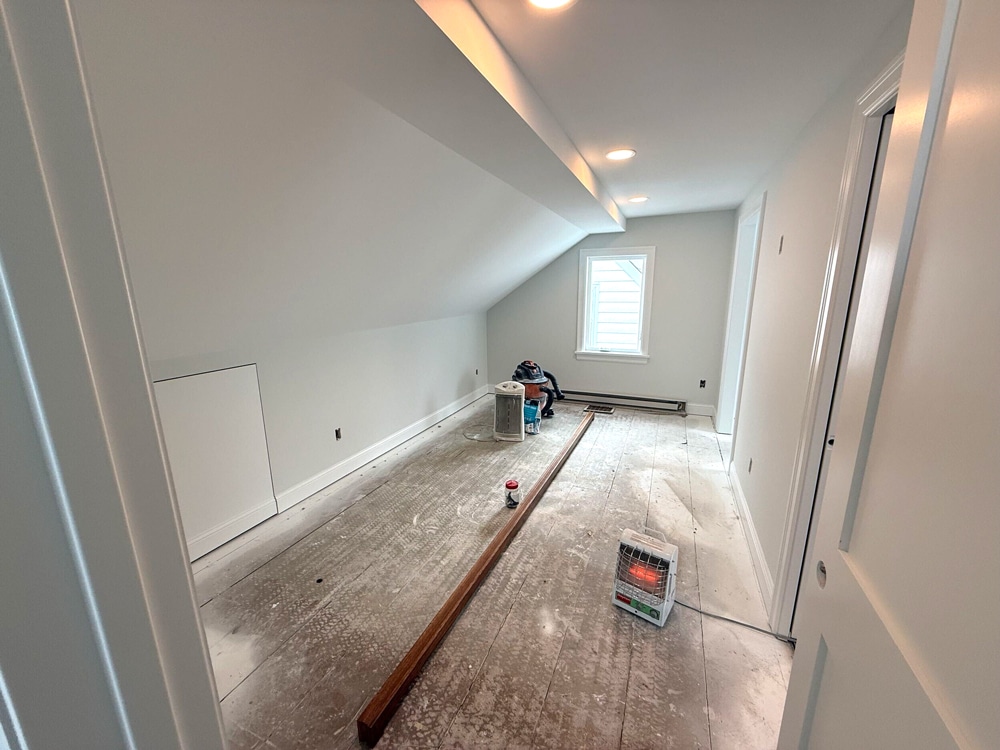
Phase One: Priming
Right after drywall, painters primed all surfaces with a flat, white CHB paint. This sealed drywall dust to create a proper base for finishing coats, as a smooth wall surface helps ensure better adhesion for subsequent coats.
Phase Two: Staining & Enameling
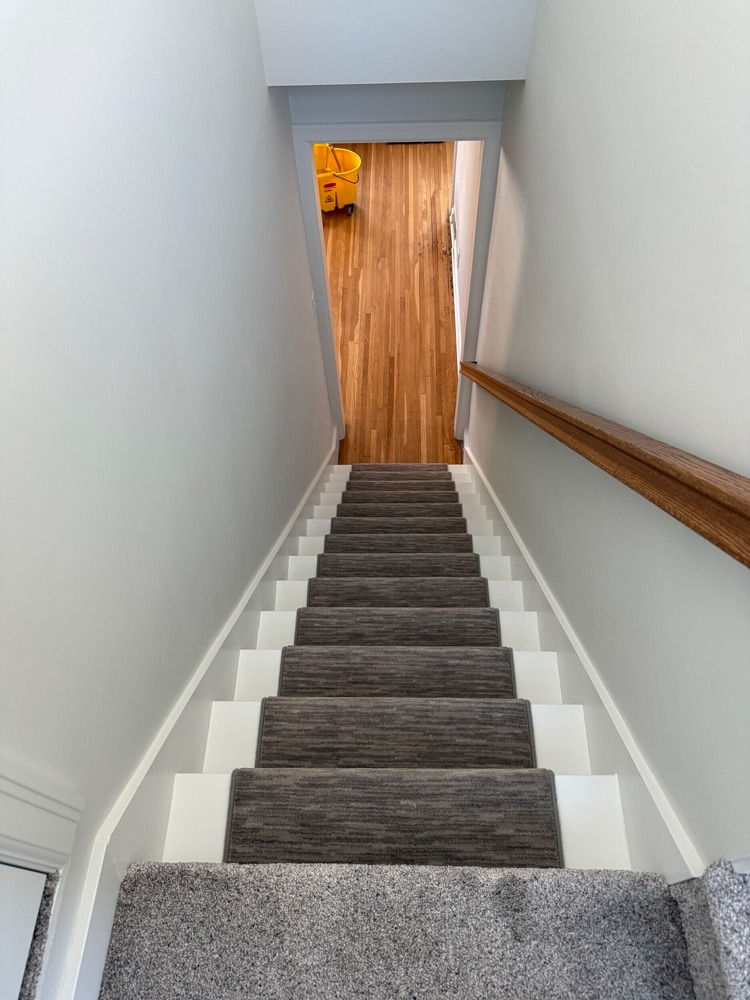
Staining was up first—the staircase handrail and newel cap got their warm wood finish. Next, the painters applied stain with rags, working it into the wood grain to achieve an even color. We then applied multiple coats of varnish as a sealant, creating the smooth, durable finish needed for a heavily used handrail.
Then we focused on enameling all the soon-to-be crisp, white millwork. We used wood filler to hide nails and sanded them smooth before enameling the base profiles and the window and door trim with Sherwin-Williams Extra.
Phase Three: The Finishing Coats
The walls came last. Painters used rollers to apply the subsequent layers of Sherwin-Williams Spare White and Sherwin-Williams Distance, creating the subtle texture most homeowners prefer over the ultra-smooth finish spraying can create. Rollers also provide better control for cutting in around trim and creating clean lines where wall colors meet white ceilings.
The transformation from primer to final color was dramatic: suddenly, the space had personality, atmosphere, and the feeling the homeowner described during design selections.
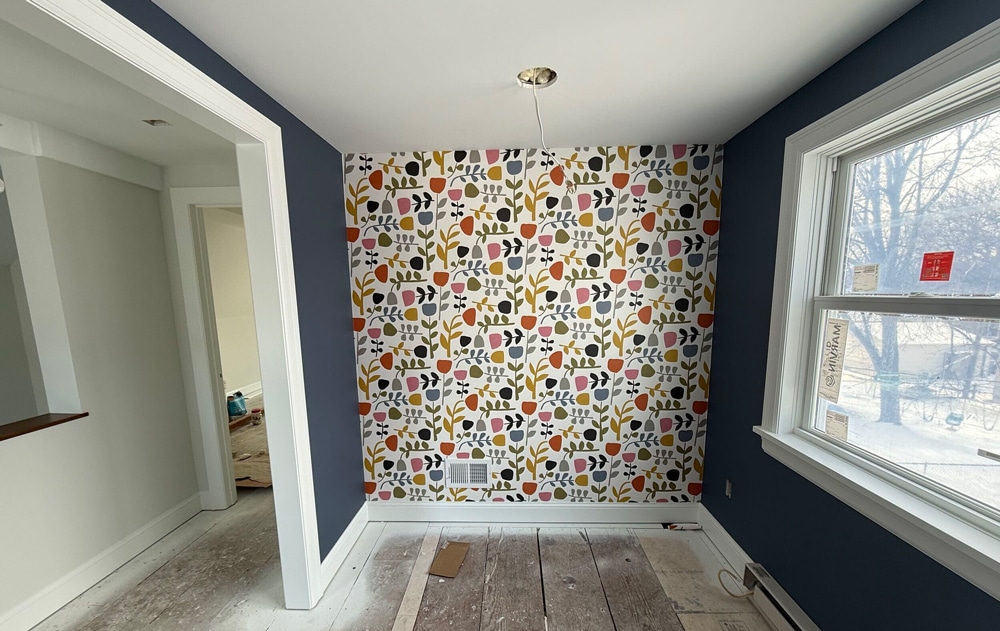
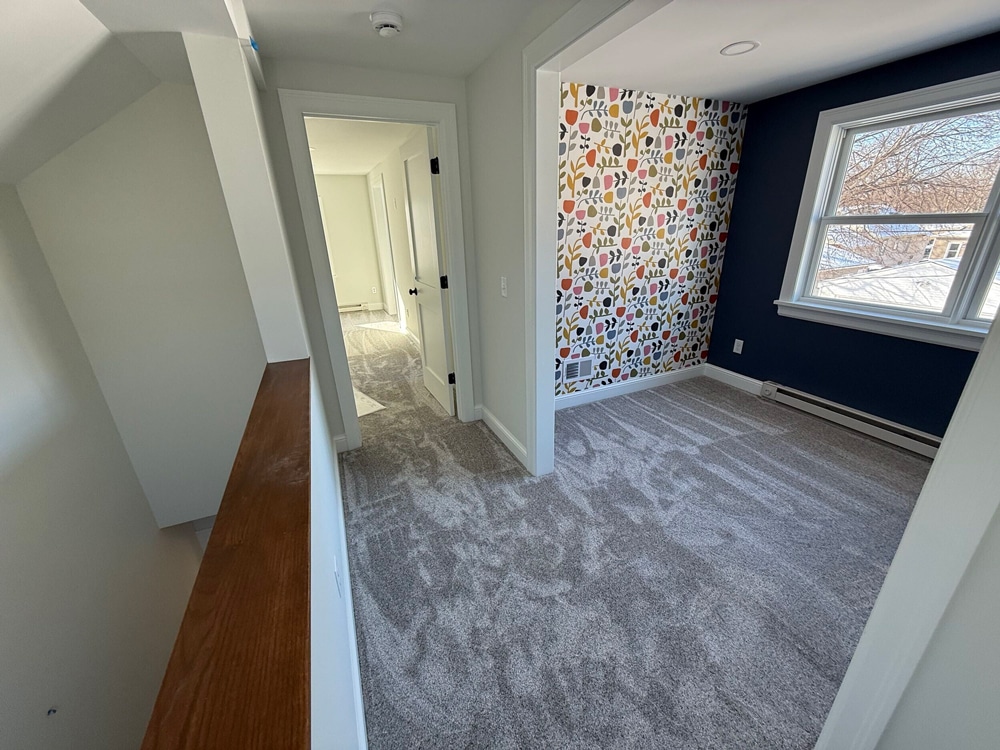
With the painting finalized, it was time to incorporate our client’s wallpaper sections. The homeowner fell in love with two very different wallpapers during the design phase. For the bathroom, she selected A-Street Prints Whimsy Idalia Flamingo wallpaper in navy—a balanced choice that combines sophistication and whimsy. For the “snug,” we incorporated an abstract tulip wallpaper with artistic, painterly blooms by Hannah Juni.
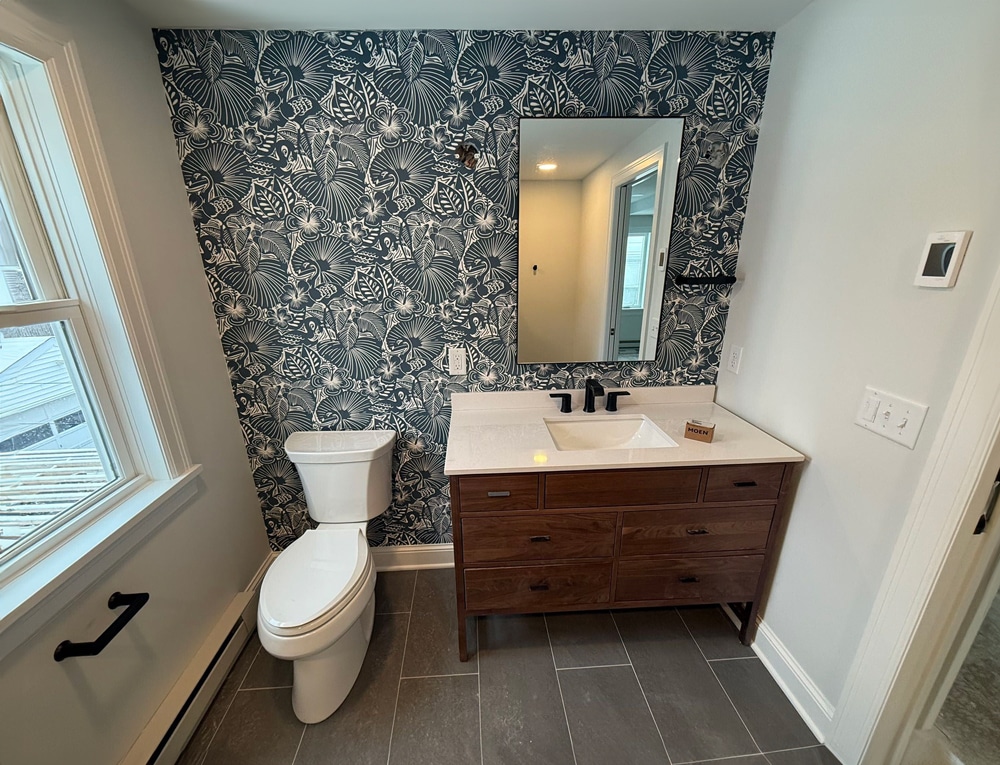
First, the installer checked that the paint was fully cured and that the walls were smooth, as any imperfection would telegraph through the wallpaper. They measured carefully, because unlike paint, wallpaper mistakes can’t be easily corrected.
One Strip at a Time
The installer cut wallpaper strips slightly longer than needed, applied paste, then carefully positioned each strip on the wall, starting from the top and working down. This method allowed the installer to slide the paper as needed for better pattern and seam alignment.
Creating Perfect Seams
Next, the installer slightly overlapped the wallpaper edges, then used a straightedge and a sharp blade to cut through both layers simultaneously, removing excess material from both strips. This created perfectly butted, well-disguised seams. To smooth out air bubbles, the installer worked from the center of the panel to the edge, smoothing each strip and wiping away excess paste. The entire installation—both accent walls—took about two hours, a testament to the installer’s skill.
Timing Matters
Wallpaper goes up after paint is complete but before some fixtures are installed, allowing the installer to work around obstacles without cutting around sconces or other hardware.
“I love the color of the tulips and that the flowers were more abstract.” – Homeowner, 1.5-Story Minneapolis Dormer Addition
The homeowner opted for Dreamweaver Serene carpeting in Rainwashed to run across the entire second level, from the stair landing to the bedroom. Along the attic stair, a Milliken Imagine Slimline carpet runner in Fog adds a finishing touch to the freshly enameled treads.
Installing the Carpeting:
When it comes to scheduling, carpet installation is done near the very end of the remodel to avoid drips, spills, or other accidents. Installers began by tacking strips around the room’s perimeter—thin wooden strips with angled tacks pointing toward the wall that will grip the carpeting backer and hold it taut. Next, the team added plush padding to provide a soft, comfortable walking surface and extend the carpet’s lifespan.
As the carpeting arrived in rolls, the installers unrolled the product, cutting the material slightly oversized, then used a power stretcher to pull the carpeting tight from one wall to the other. This stretching process prevents wrinkles and ensures the carpeting lies flat. Then the edges were tucked into the gap between the tack strips and baseboard using a tool called a knee kicker. With the seams carefully disguised, a hot-melt tape seaming iron fused the edges together to complete the installation process.
Installing the Runner:
For the stair runner, the installers worked from the bottom landing to the upper level, securing the carpet to each tread while ensuring the pattern ran straight. The runner got tucked neatly at each riser, creating clean lines between the exposed enameled wood and the fog-colored carpet.
We’re close to the finish line. What’s Next?
In our next blog, we’ll showcase the plumbing fixtures, decorative lighting, and tile that get this remodel across the finish line.
We’re here to help! Check out our planning resources below, or reach out to us here.
Here's the step-by-step process that ensures you’ll have a remodel you love.

The Twin Cities are filled with story-and-a-half homes that are perfect for a certain kind of addition, called a shed dormer. Learn more about this popular remodeling project.

Learn what it costs to remodel an attic in the Twin Cities, and what factors drive those costs.