1.5-Story Minneapolis Dormer Addition
A remodel is underway. Take a look inside.
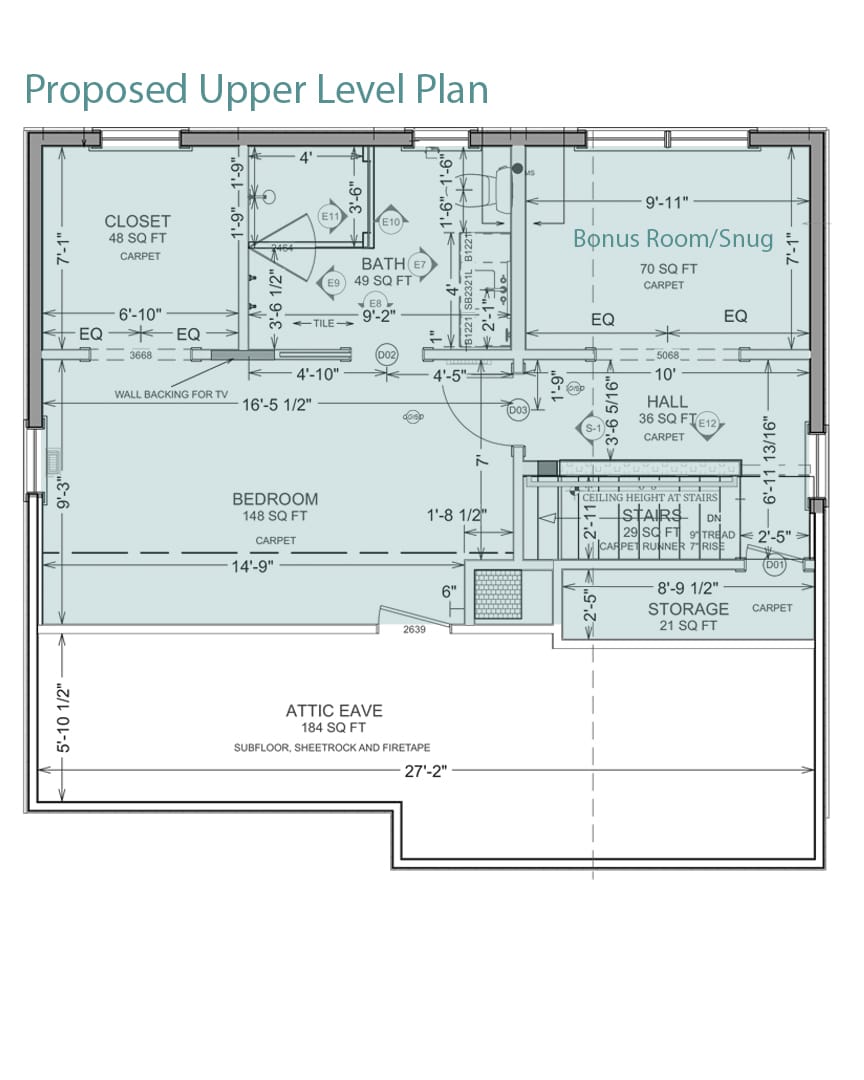
Follow along as we create a dormer addition for a homeowner in Southwest Minneapolis who is looking for an updated bedroom with an adjacent bathroom and primary closet.
Current Step
Tile & Fixtures
Tile & Fixtures
We’re wrapping up a Southwest Minneapolis dormer remodel with bathroom tile and fixtures.
Thanks to the improved ceiling heights afforded by the design and construction of a dormer off the back of this classic 1.5-story Minneapolis home, we’ve created a spacious bathroom for a homeowner who had long dreamed of a more comfortable bedroom suite. While we’re close to the finish line with tile and fixture installation, preparations for quality construction actually began with design.
How could design have anything to do with quality tile installation?
Preparing for tile in a wet environment like this dormer bathroom is critical, with pre-tiling measures spanning from design through final inspections and well into construction.
Architectural Drawings
Our architectural drawings and specifications communicate to our tile crew not only what the final work should look like but also our expectations for the level of finish and the specific products to be used. Think of these documents as a complex set of instructions that keeps all of us working towards a shared vision from start to finish.
Trade Partner Walk Through
Beyond the drawings, all our trades came to the site to walk through the home, ask questions, develop their own work plan, discuss possible issues, confirm availability, and properly estimate their work. With both design and construction professionals on the project, we can quickly address any final details with our partners, avoid issues that could affect the schedule or the quality of the tile installation, and immediately update the documentation as needed.
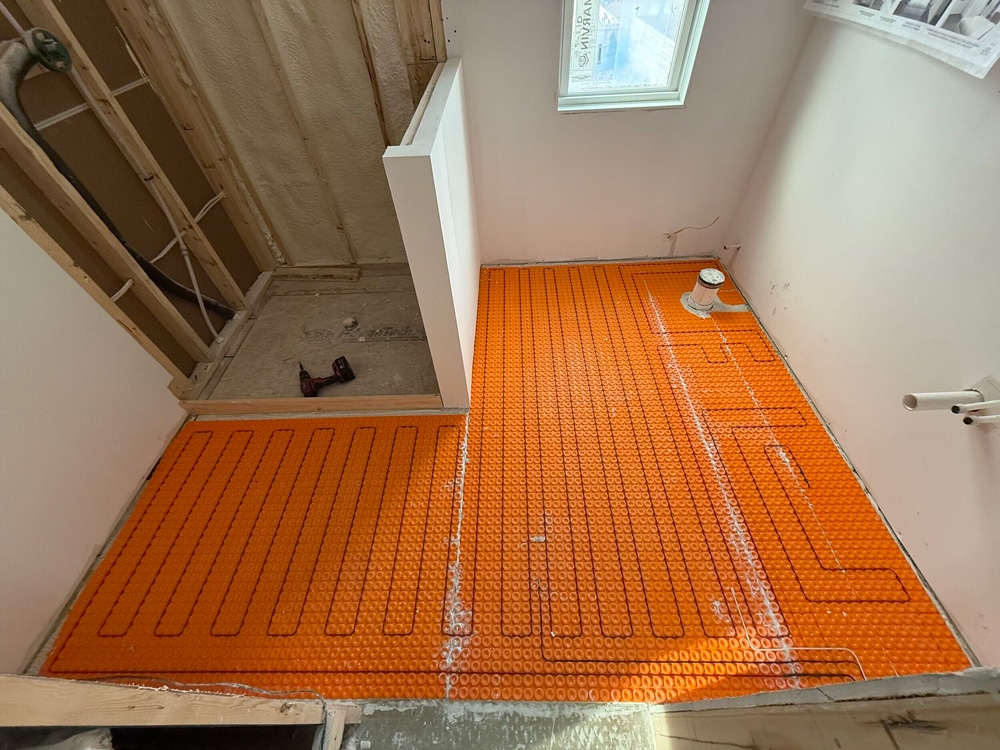
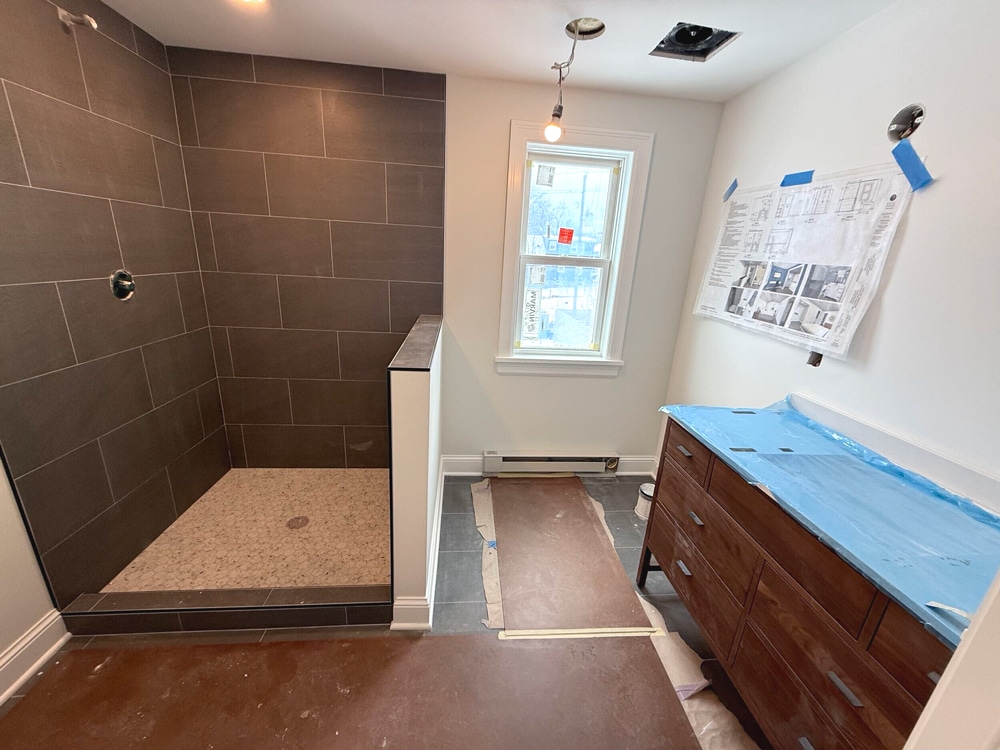
We’re kicking off tile work with two major milestones.
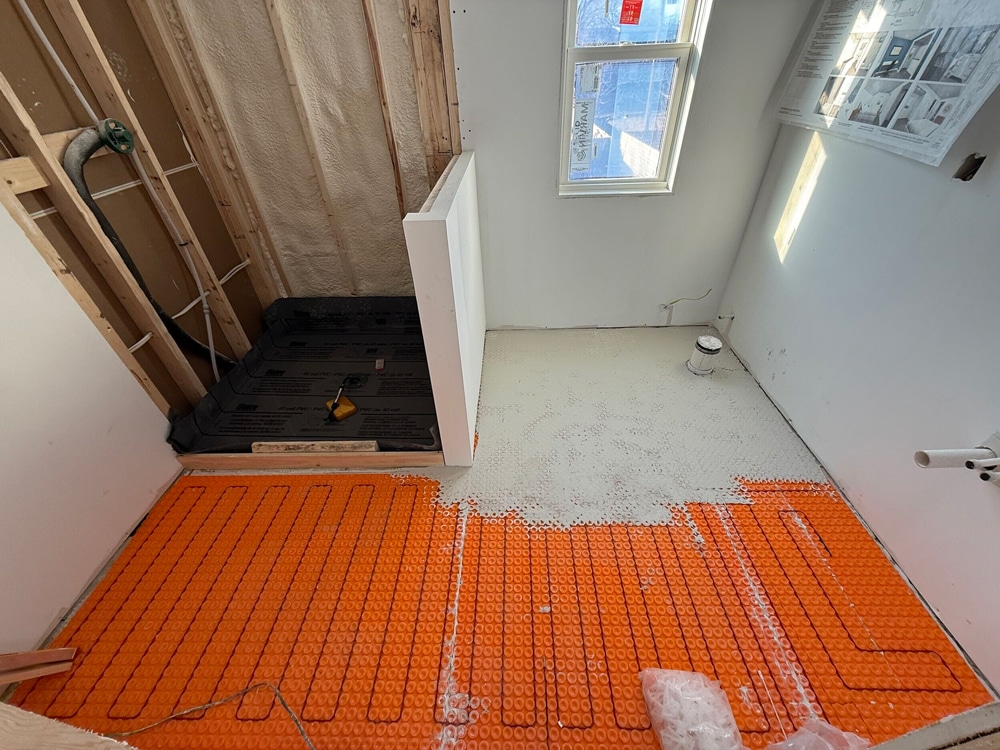
These first steps in tile work determine how well the final install will look and perform. That’s why our installer’s initial work involved completing two milestones: creating a level application surface and ensuring proper drainage in the shower assembly.
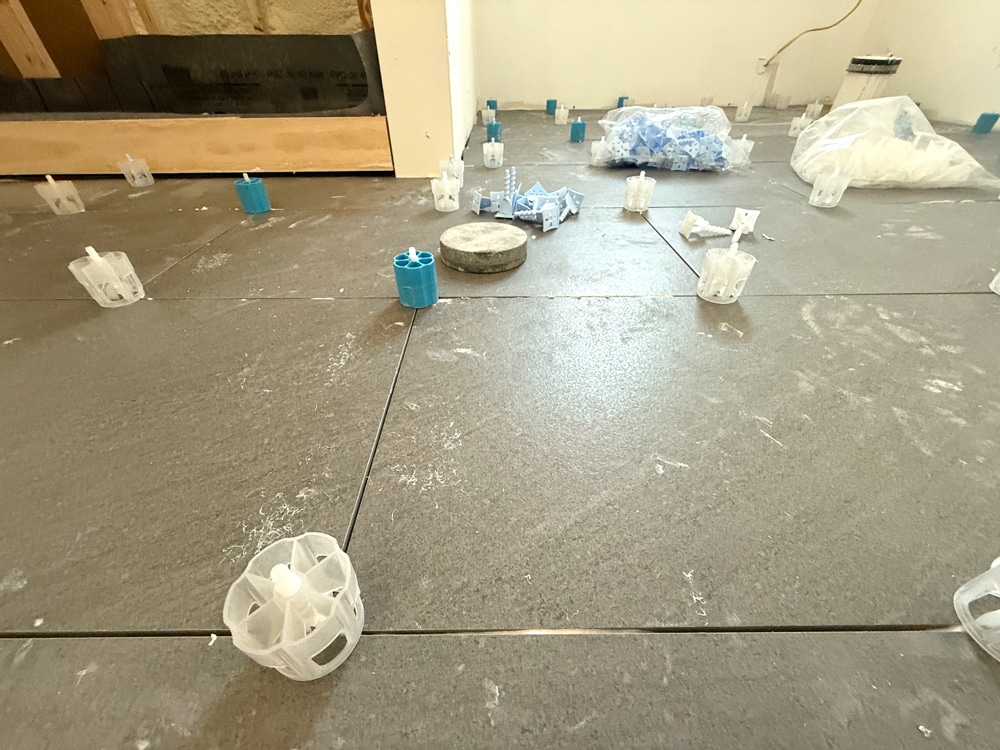
- Since the homeowner opted for in-floor heating, we needed to use a modified thinset mortar over the heating mat to ensure tiles would be applied to a level, even surface.
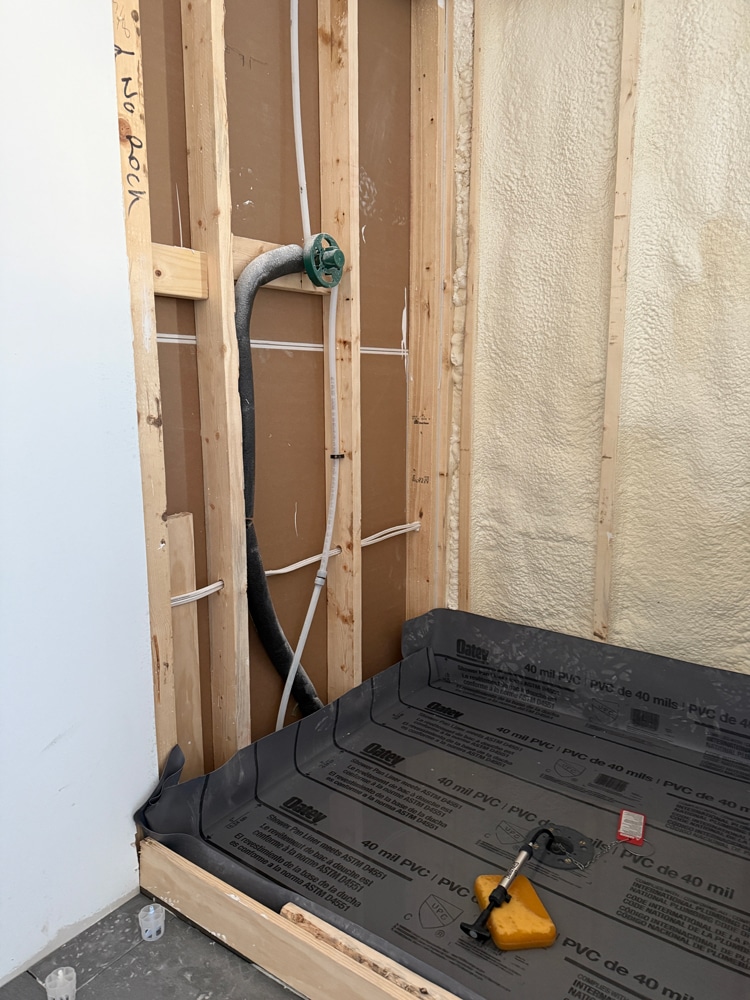
- In the shower, the tiler built up a curb and a mortar bed, called a pre-slope, then applied a waterproof membrane system to direct water toward the drain. To verify the quality of the work, the shower pan was flooded with several inches of water for 18-24 hours, after which a city inspector confirmed that the assembly not only retained the water but also drained properly. This test provides additional assurance that the drainage plan and assembly work, giving our client even more confidence in the remodel.
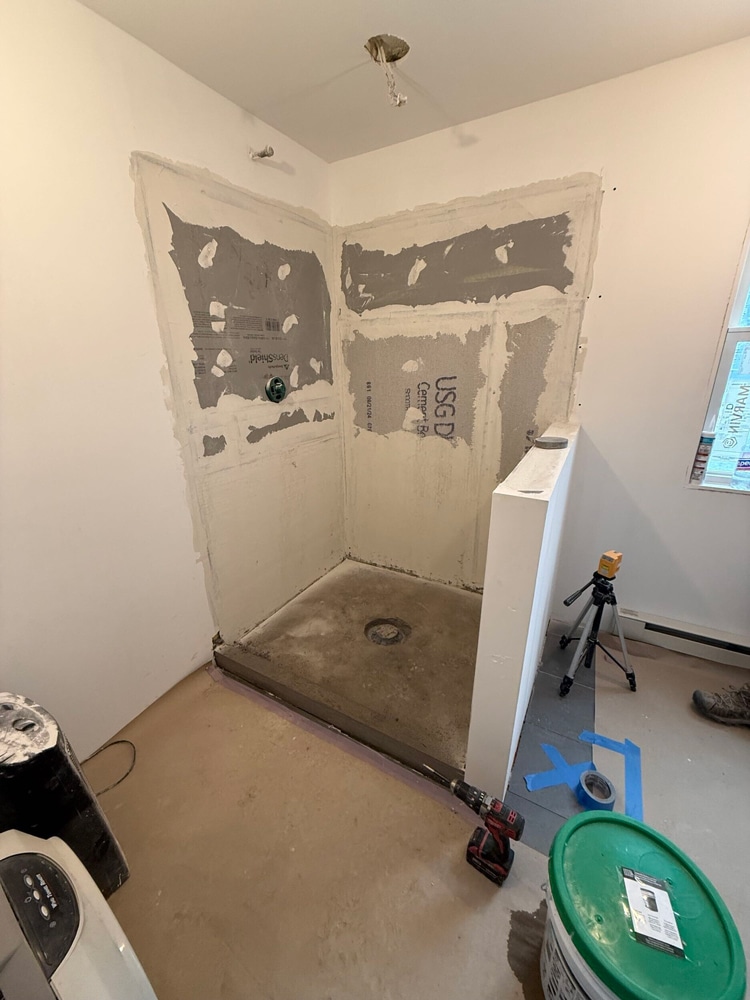
“Anytime we do a custom tile shower floor, we need to get a shower pan inspection done, which we always plan ahead for, as there can always be a chance for delay.” – White Crane Project Manager
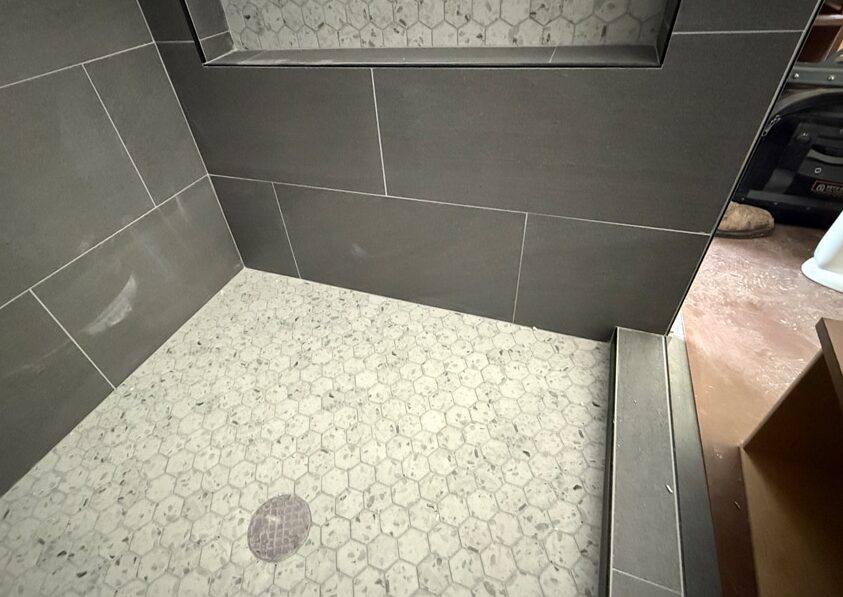
Installers balance two tile selections across the floor and shower.
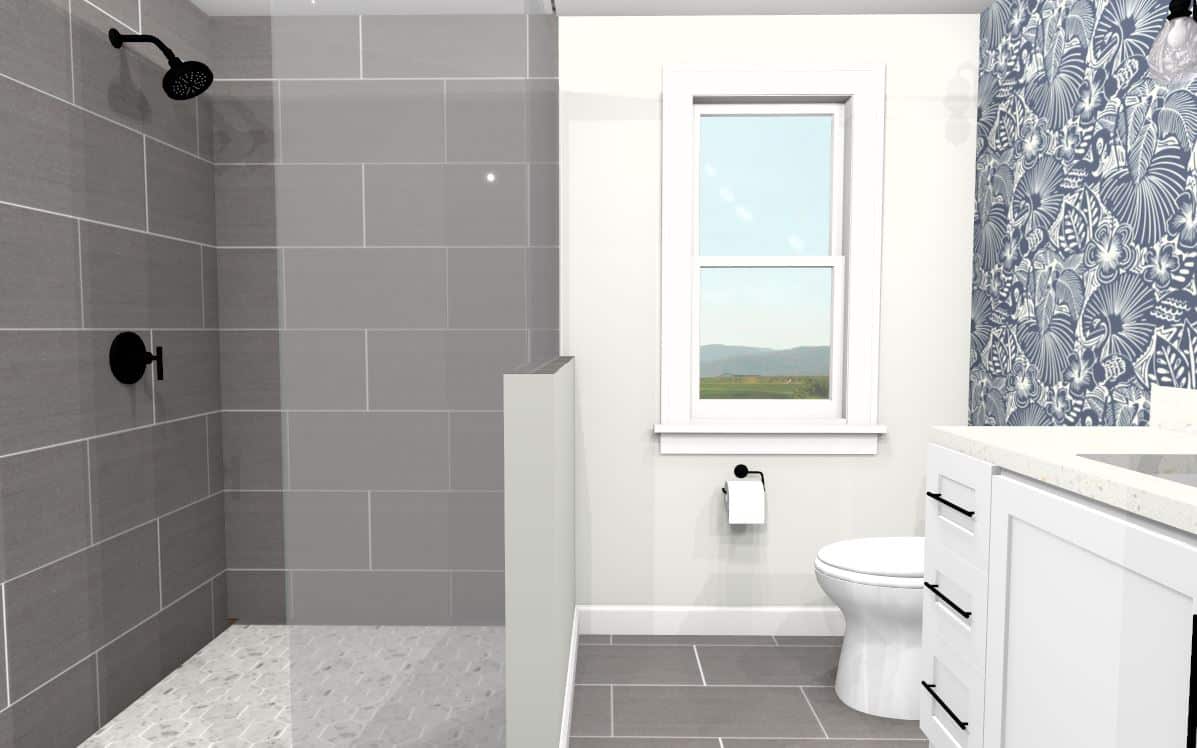
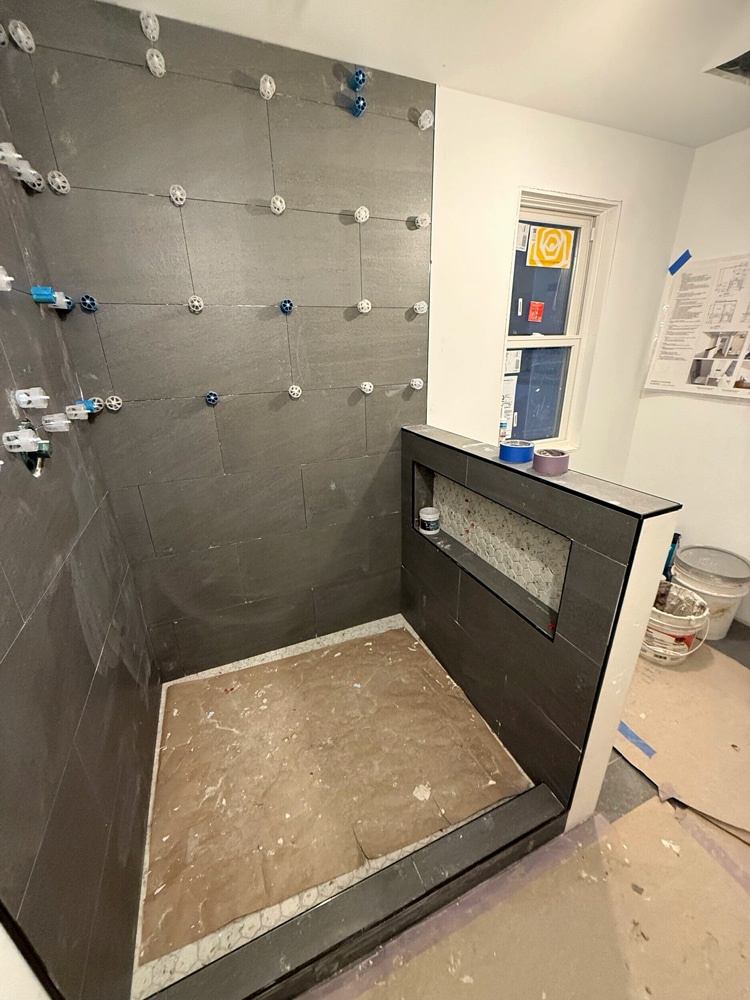
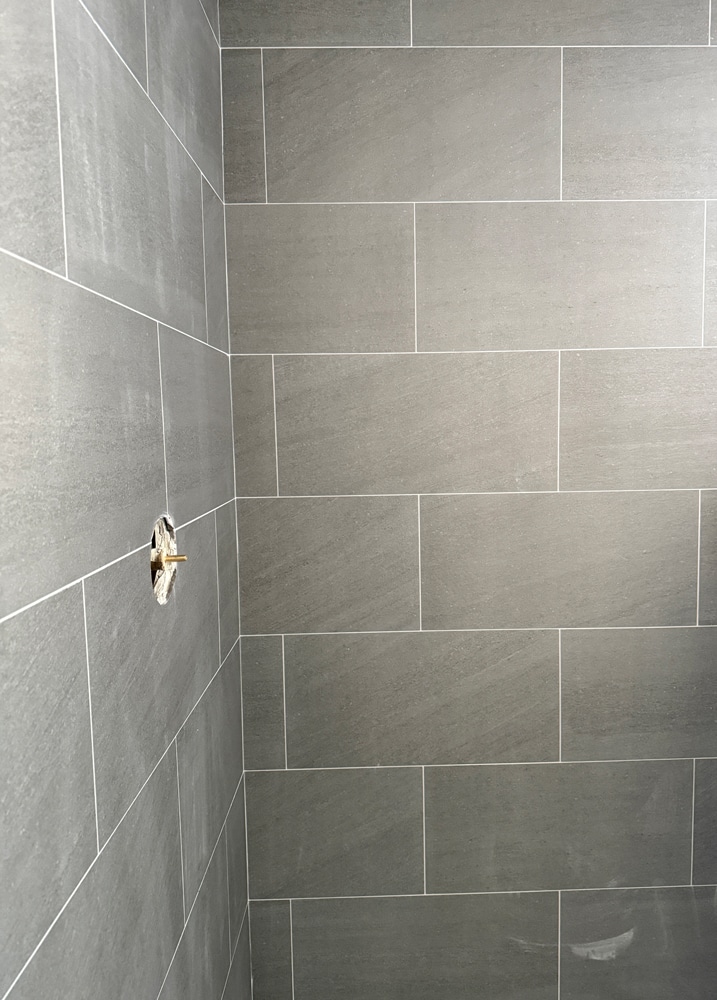
Since we passed the shower pan drain inspection, the actual tile installation could begin. The tile setter started with the bathroom floor, spreading thin-set mortar along the leveled floor surface, then pressed each 12×24-inch slate-toned Happy Floor tile into place. To ensure consistent grout lines throughout the floor, he also placed spacers between tiles. Utilizing the exact process as was done on the bathroom floor, the tiler installed 2″ hex mosaic tiles as the final shower floor, the exact selection that was chosen for the nearby niche as well. Finally, he moved to the shower walls, where designers again specified the larger 12×24-inch slate gray tiles, selectively modified where the Moen Genta shower kit will be installed. After the tiles had set for 24 hours, the tiler used grout to fill the spaces between tiles.
Tile Selections
- Bathroom Floors and Shower Wall Tile: Happy Floors, Kursaal 12×24 in Slate/Natural
- Shower Floor & Shower Niche: Shaw Luxe Moderne 2″ Hex Mosaic in Streamline White
Shower System
- Shower Trim Kit: Moen Genta LX 1.75 GPM Pressure Balanced Shower Trim Package with Multi-Function Shower Head in Matte Black
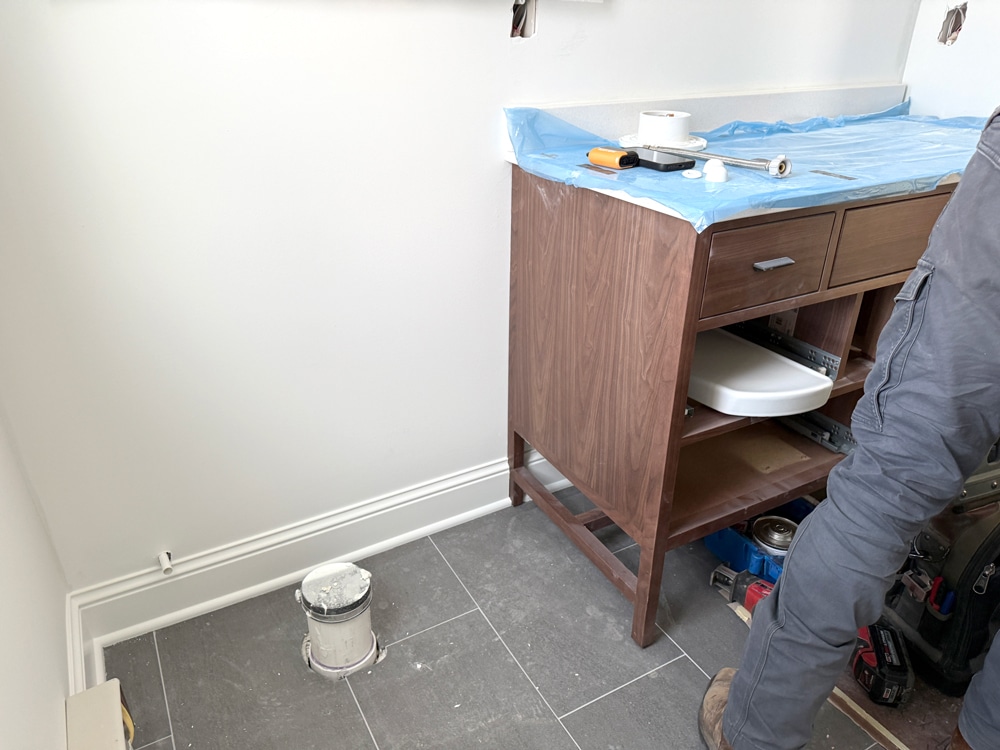
With tiling done, it’s time to integrate the vanity, toilet, and more.
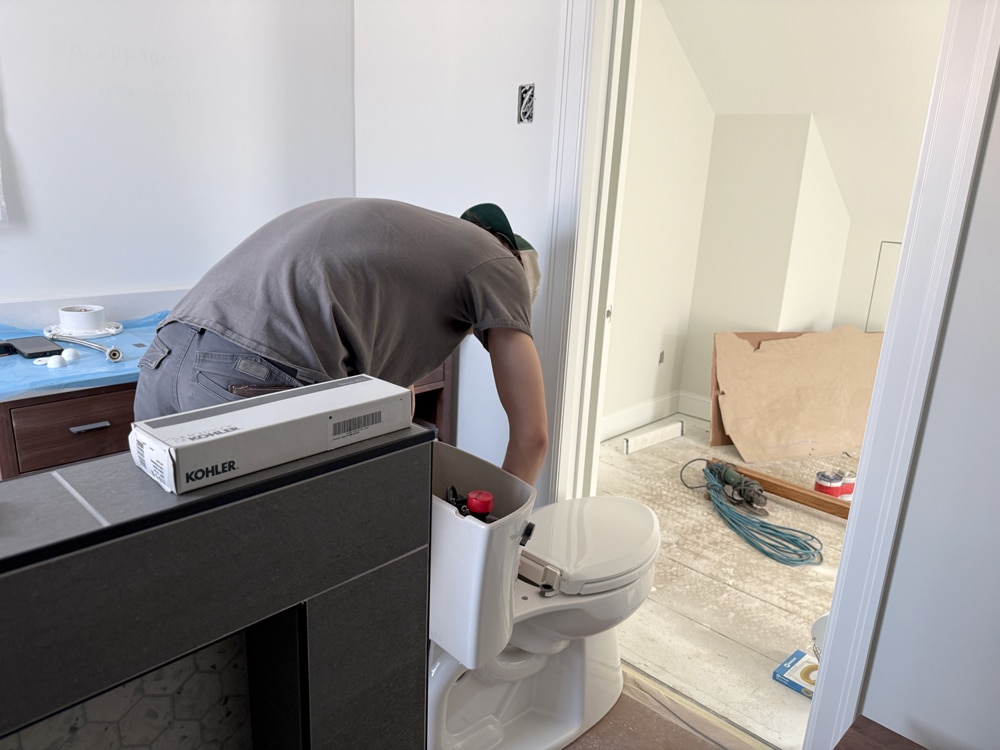
A finished floor meant that anything that needed to be installed on top of the tile could be done, namely, the toilet and vanity. With a prefabricated vanity selected, we were primarily concerned about navigating the tight staircase without damaging the freshly painted walls or the vanity. Here, we needed to secure the cabinetry to the studs and then work with the plumber to connect the faucet and drain to the plumbing rough-ins established much earlier in the construction process. Next, he installed the toilet and the pressure-balanced shower trim with a multi-function showerhead. To finish the space, we’ve installed a matte-black towel bar, toilet paper holder, and robe hooks to carry the clean-lined aesthetic throughout the rest of the bathroom. The black finish feels modern and sophisticated against the walnut vanity and gray tile.
Bathroom Selections
- Sink Faucet: Moen Genta LX 1.2 GPM Widespread Bathroom Faucet in Matte Black
- Shower Trim Kit: Moen Genta LX 1.75 GPM Pressure Balanced Shower Trim Package with Multi-Function Shower Head in Matte Black
- Toilet: Kohler Highline 1.28 GPF Elongated Two-Piece Toilet
- Towel Bar: Moen Genta LX Double Post Wall Mounted Towel Bar in Matte Black
- TP Holder: Moen Genta LX Wall Mounted Pivoting Toilet Paper Holder in Matte Black
- Wall Hooks: Moen Genta LX Single Robe Hook in Matte Black
- Mirror: Weeksville Metal Rectangle Wall Mirror
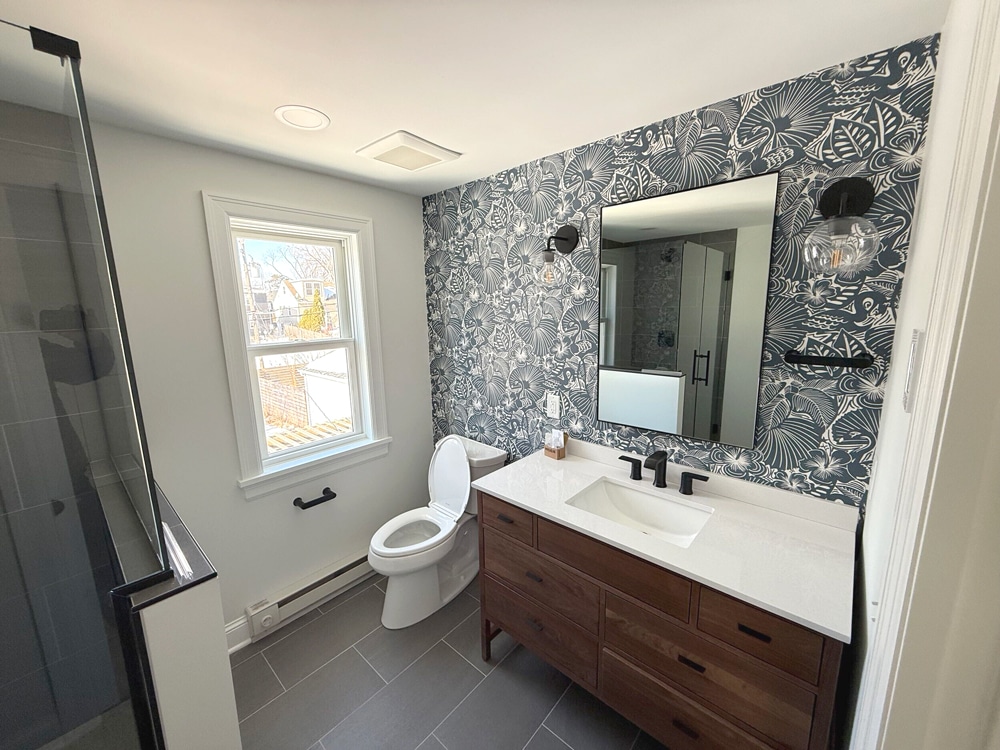
Sconces offer the finishing touch on this dormer bathroom.
The electrician installed recessed lights throughout the addition for general illumination, then returned to hang the Childerley Armed Sconces in midnight black alongside the bathroom mirror, which meant making the final connection to the junction box, mounting the sconce base, attaching the glass shade, adding bulbs, and testing that everything worked properly.
The sconces are the perfect match for a sophisticated, clean-line aesthetic, and substantial enough to balance the 48-inch vanity without overwhelming it. The midnight black coordinates with the matte black plumbing fixtures found throughout the bathroom, creating that cohesive, intentional feeling the homeowner was after.
Ready for the final reveal?
In our next blog, we’ll showcase the completed remodel with all the finishing touches that made this Minneapolis dormer the perfect retreat for the homeowner.
Want to learn more about
this type of project?
We’re here to help! Check out our planning resources below, or reach out to us here.