
What are shed dormers and why are they so popular around here?
The Twin Cities are filled with story-and-a-half homes that are perfect for a certain kind of addition, called a shed dormer. Learn more about this popular remodeling project.
Follow along as we begin a main level addition and basement remodel for a South Minneapolis bungalow.
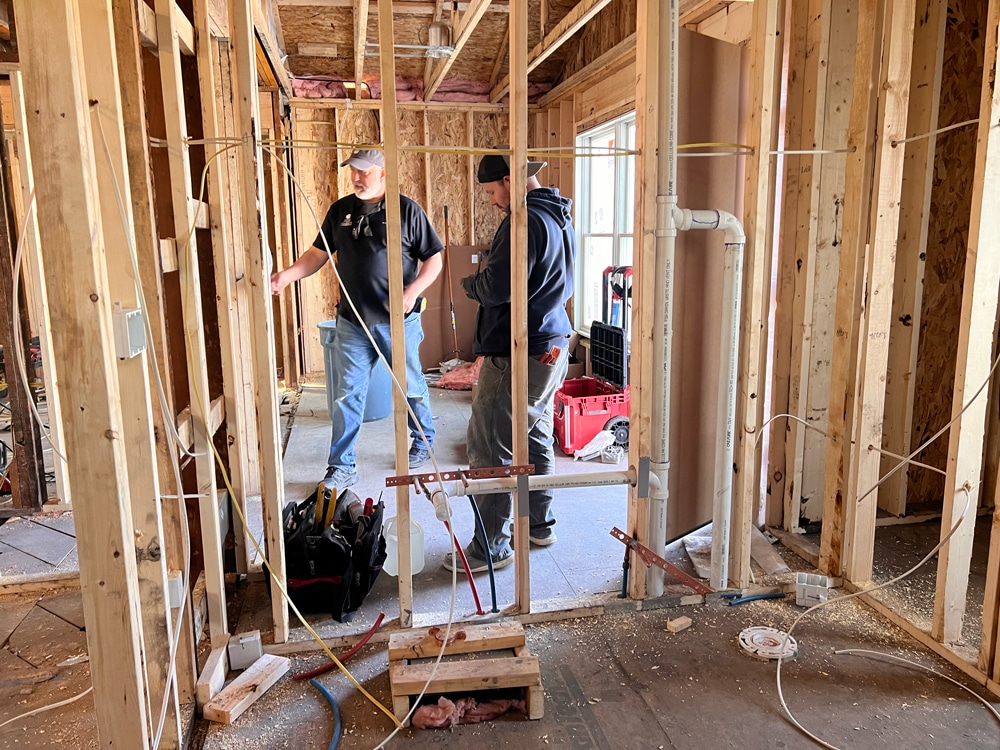
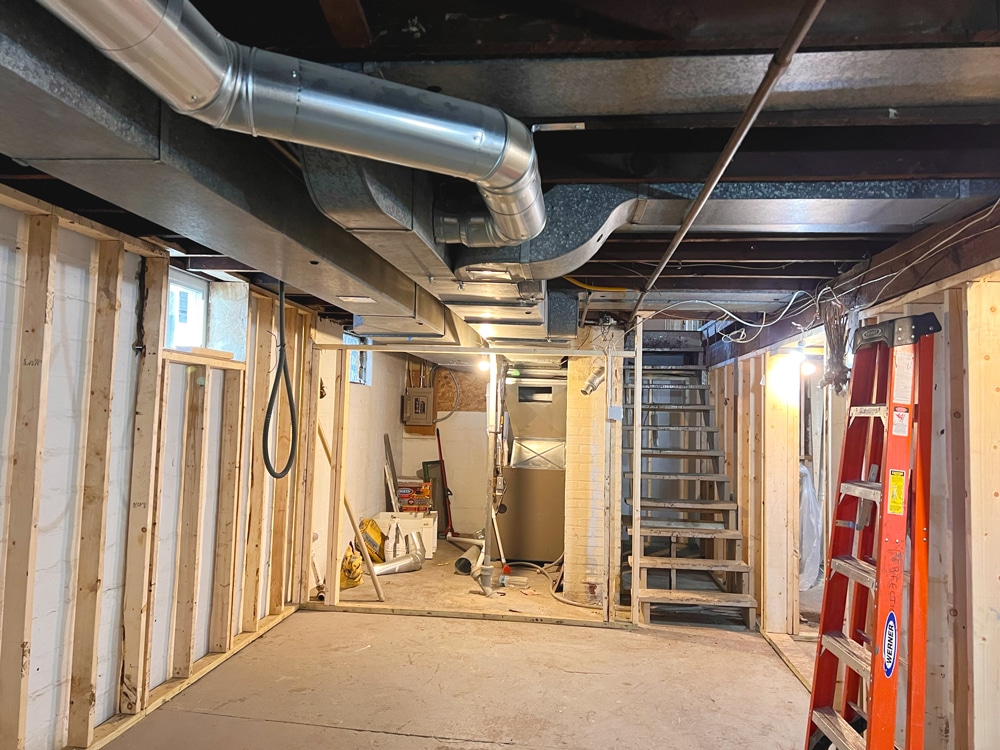
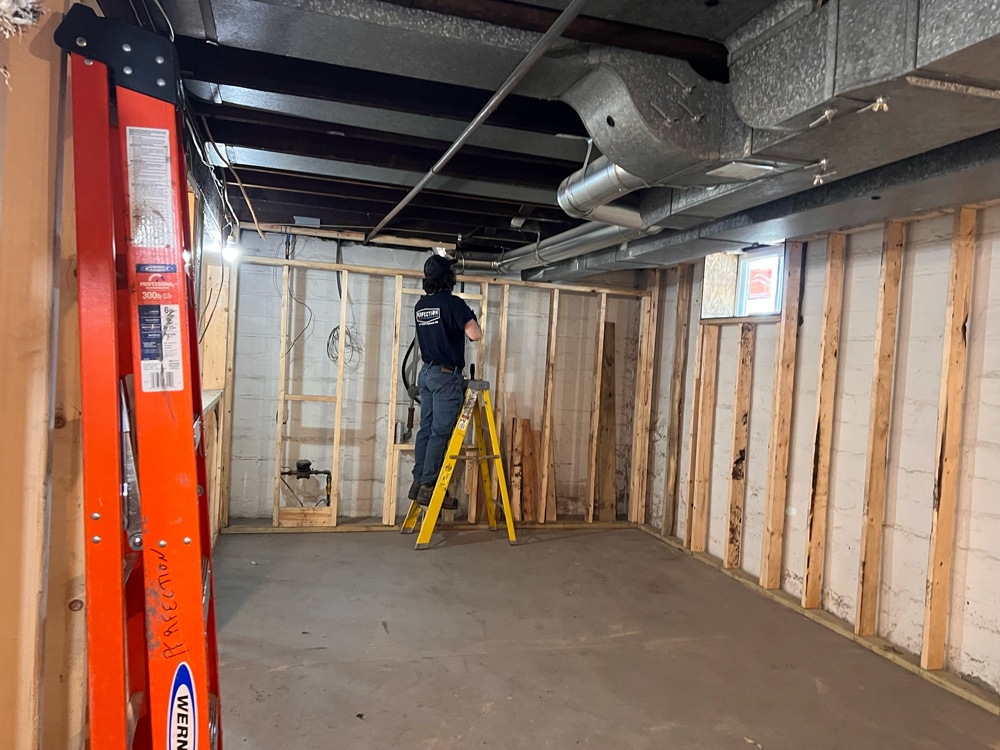
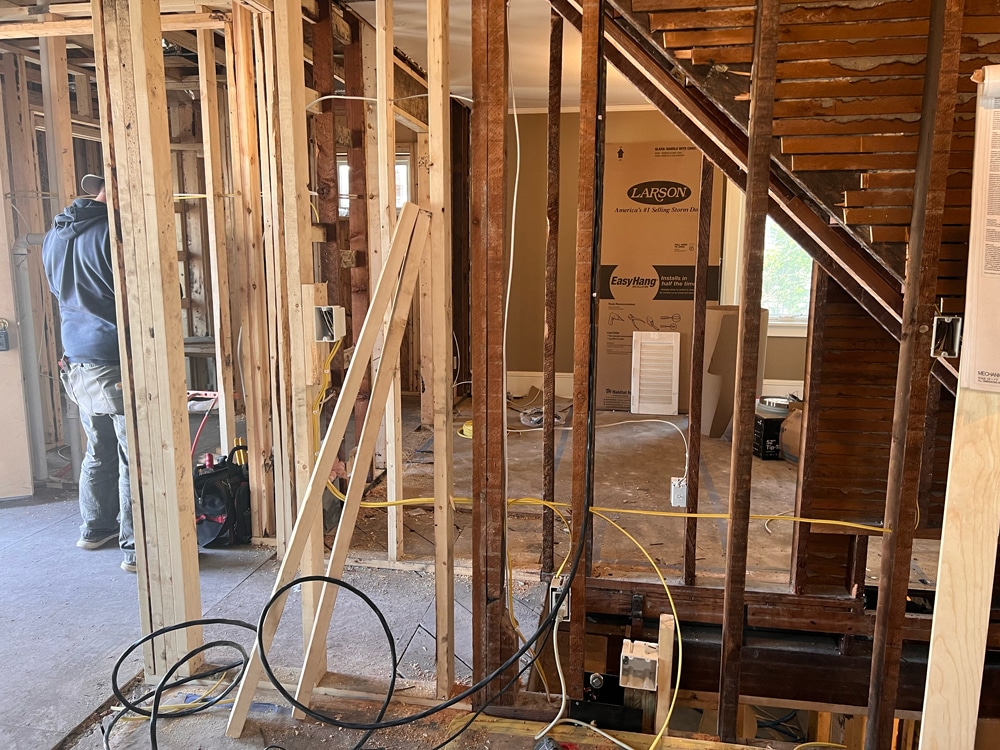
We’re at the rough-in stage for a kitchen addition and lower level remodel at this South Minneapolis Bungalow. During the rough-in phase, our trade partners bring in the various mechanical ducts, electrical lines, and plumbing systems that we will connect to final fixtures later on. When considering any remodeling work, especially in an older home like this one, our team and homeowners must decipher where existing mechanical, electrical, and plumbing needs to be moved, updated, or replaced, decisions that impact the project’s budget.
Let’s take a look at the rough-ins needed for this 1919 home, from the kitchen and bathroom addition to the lower level remodel.
Our plumbers are critical to the success of any project, as they create systems that mitigate or control how water engages a home, either organically from rain fall or from the use of interior appliances and fixtures. When considering plumbing needs in this Howe neighborhood home, our plumbing crew addressed three main functions: potable plumbing, sanitary plumbing, and stormwater plumbing. Generally, think about potable plumbing systems as the strategies for how clean water enters the home and sanitary plumbing as the drainage for wastewater, like that generated from a toilet or shower. Stormwater plumbing refers to the planning for how stormwater will be transferred off a property to local waterways.
While stormwater management is an integral part your home’s systems, let’s focus on the interior rough-ins that will bring clean water into and drainage out of the home.
The crew examined building and zoning codes, product specifications for fixtures and appliances, and the architectural documents to determine what rough-ins were needed, the best installation methods, and either the placement or removal of various pipes.
Plumbing: Main level
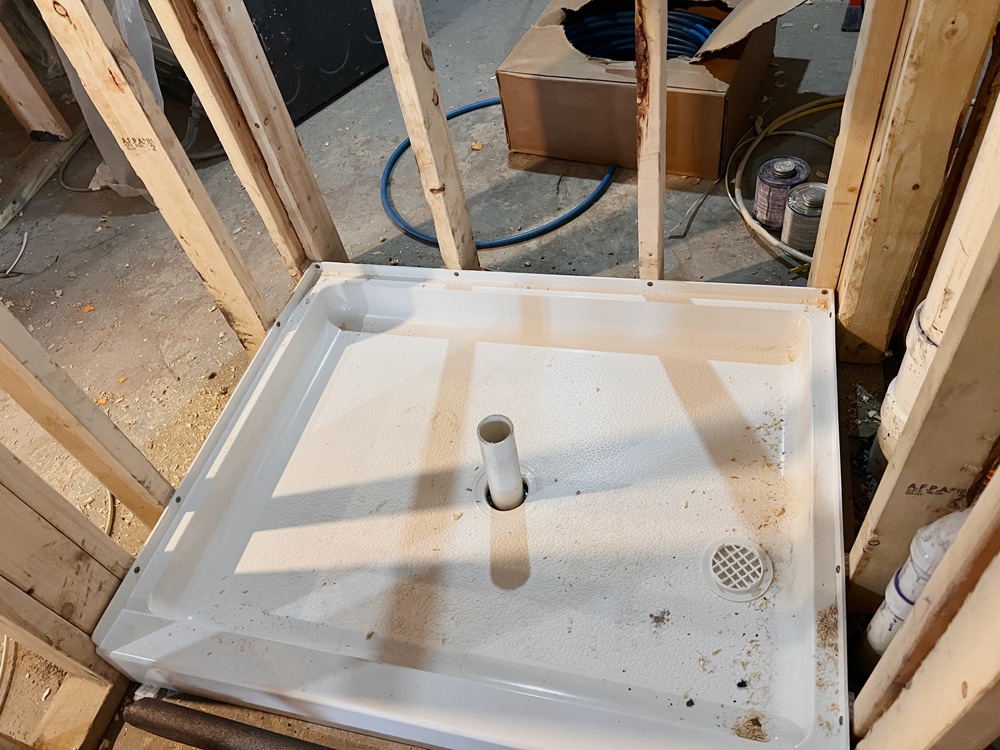
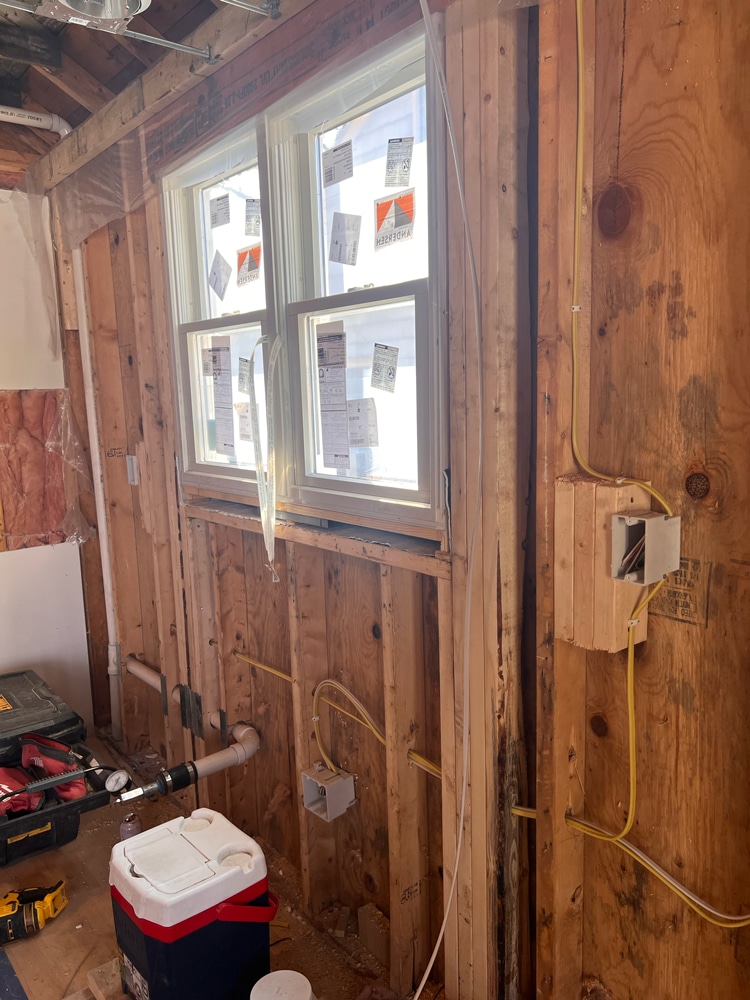
In the kitchen, our plumbers installed a gas line for the dual fuel range. We prepared for an upgraded sink and dishwasher to be installed later with cold and hot water connections and drainage. In the bathroom, we also needed cold and hot water supply lines to service a vanity sink with a drain outlet as well as connections for the adjacent shower kit and toilet.
Plumbing: Lower Level
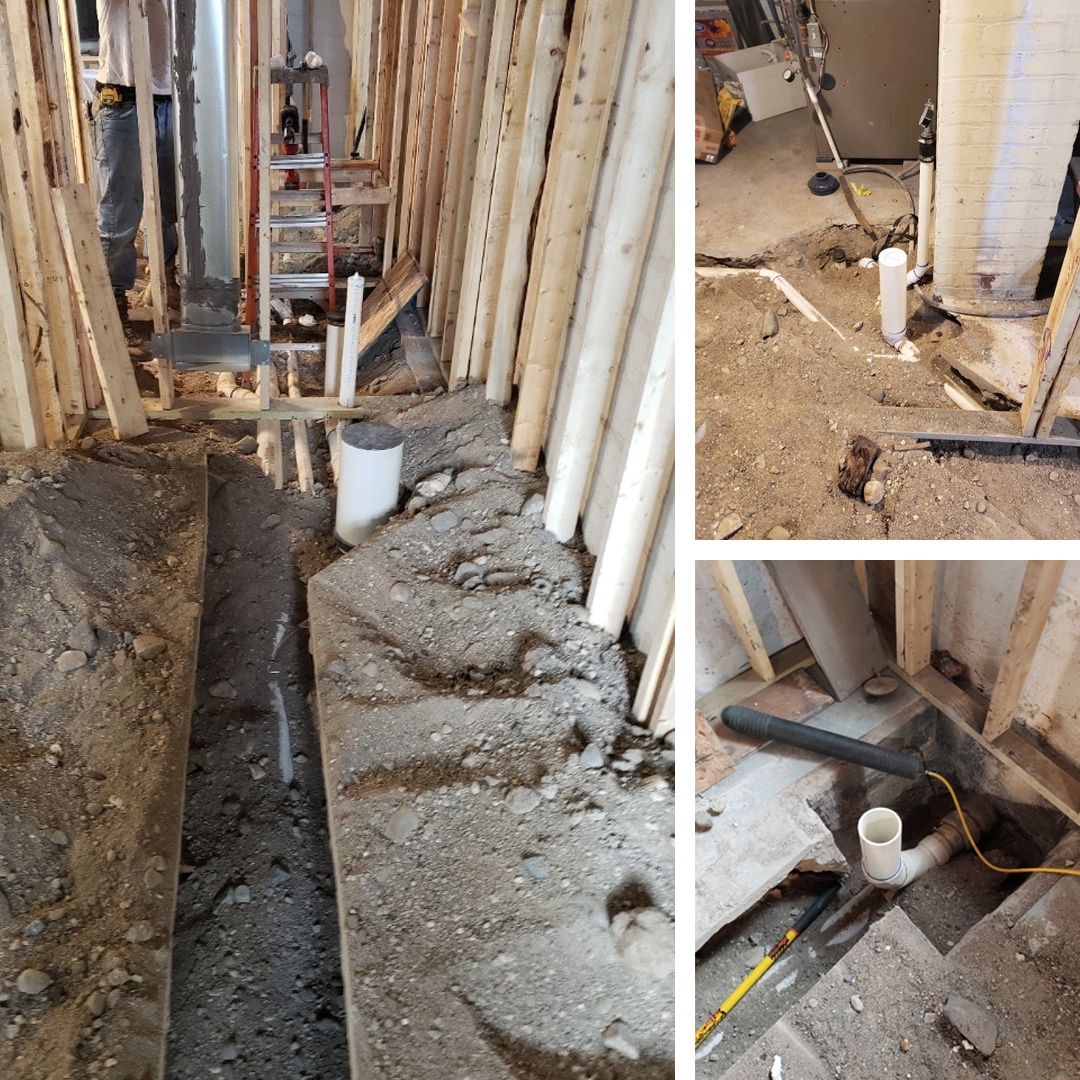
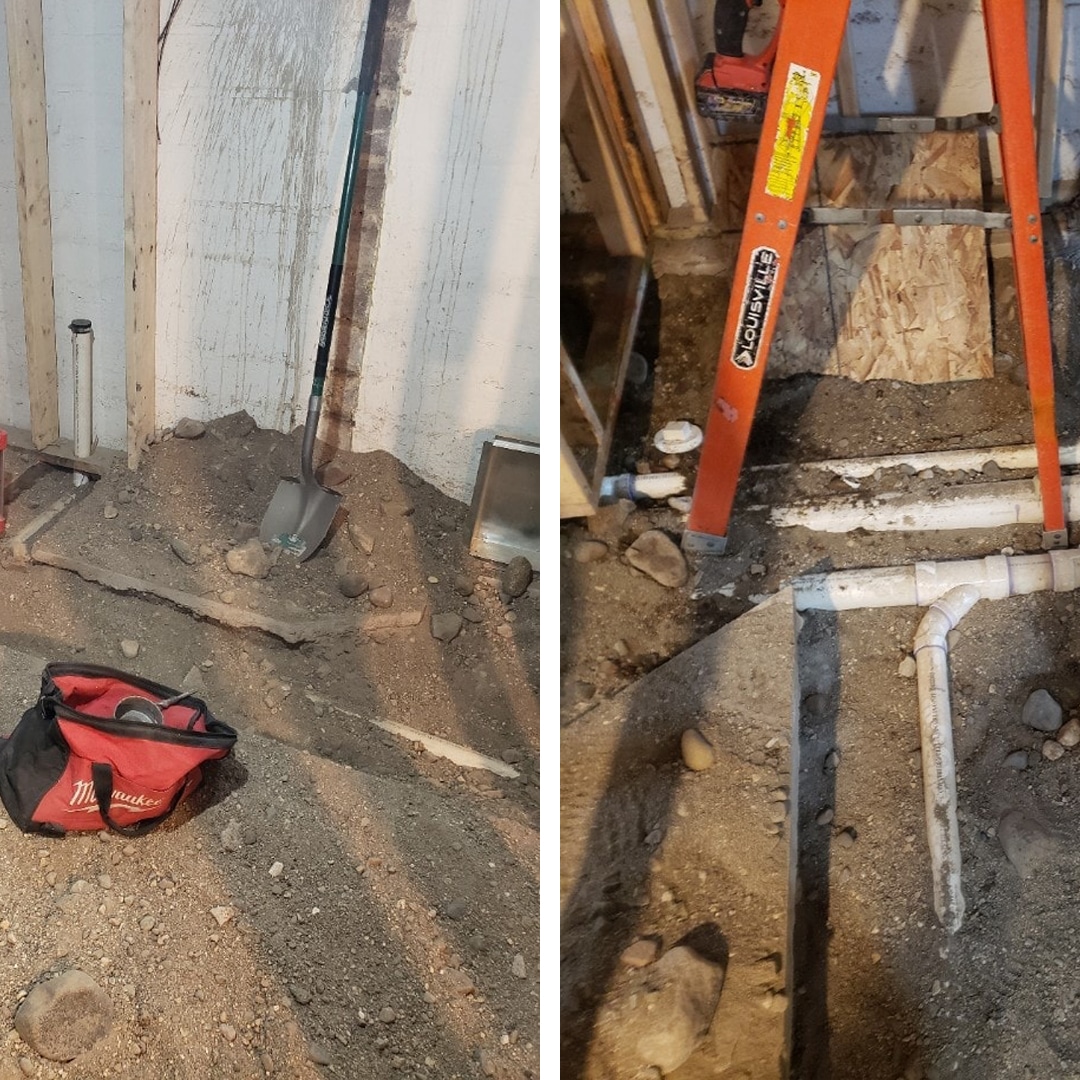
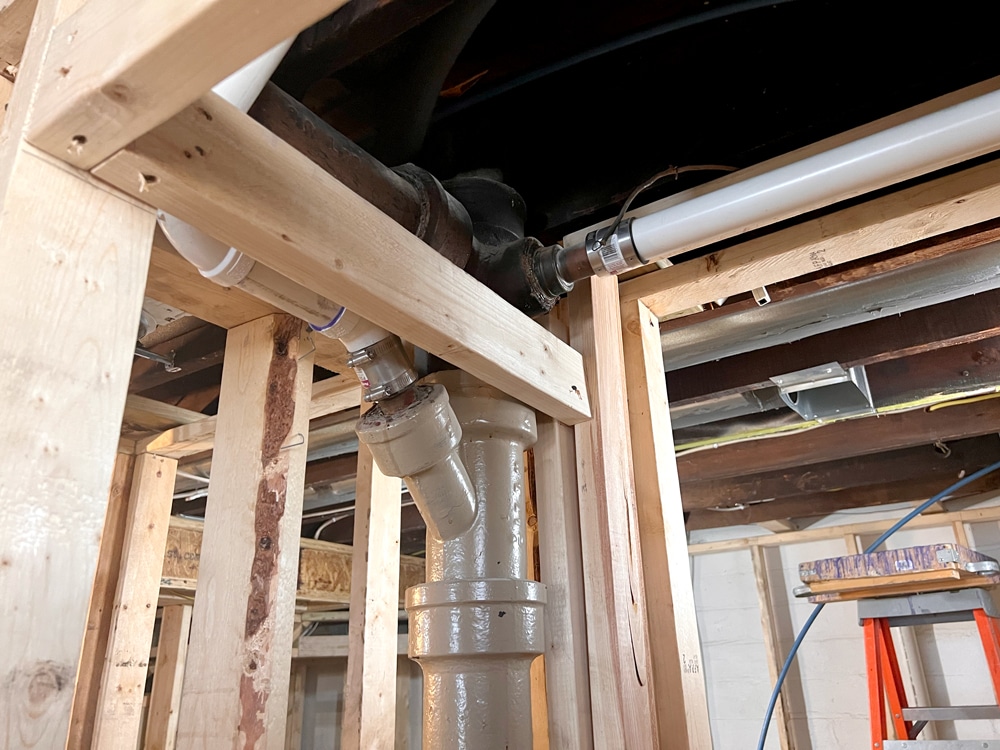
We’ve roughed-in the new bathroom and laundry room, including connections for the future toilet, bathroom and laundry sinks, shower, and washing machine. In this home, and many older homes like it, we found several old cast iron pipes that needed to be removed. Cast iron pipes are no longer an ideal solution because of how prone they are to failure, leaking, slow drainage, or contamination. An investment in a full basement build-out made upgrading many of the pipes the best option to protect our client’s home. We cut into the basement’s concrete floors with a wet saw, dug trenches to reach the buried cast iron pipes, and replaced them with PVC. Our plumbing crew also installed a new backwater shutoff valve as an additional measure to protect our client’s investment in their remodel, which will help prevent drainage from backing up into the home.

White Crane Project Manager
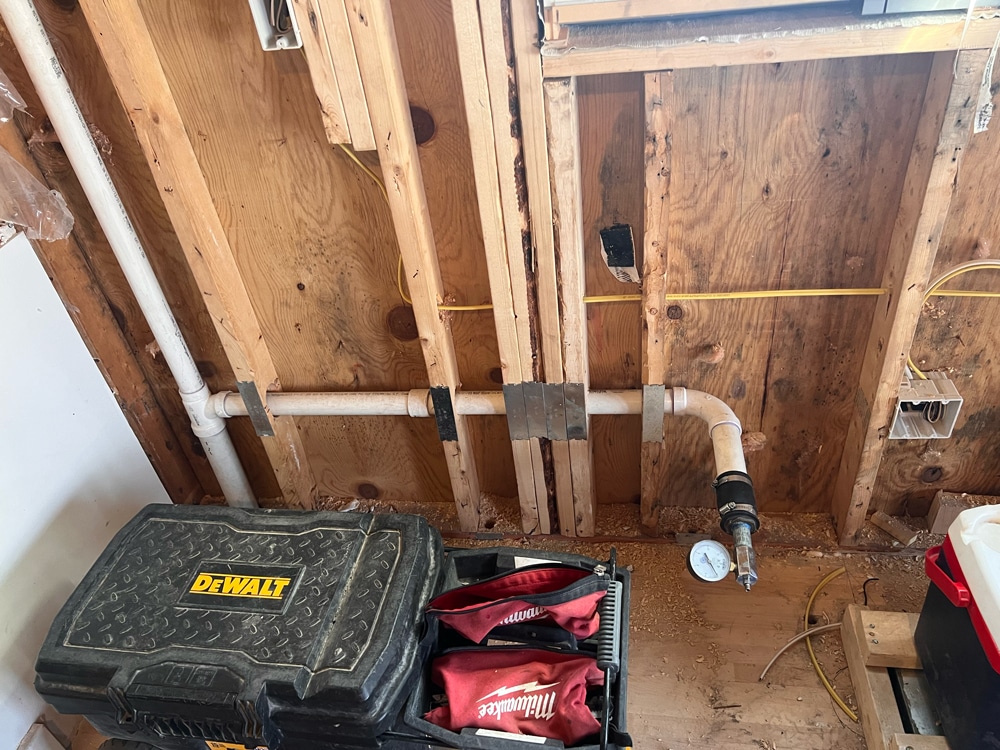
“To get to the old cast iron piping, our guys had to come in and cut the concrete, so that our plumber could come in and snap in new PVC.” – White Crane Project Manager
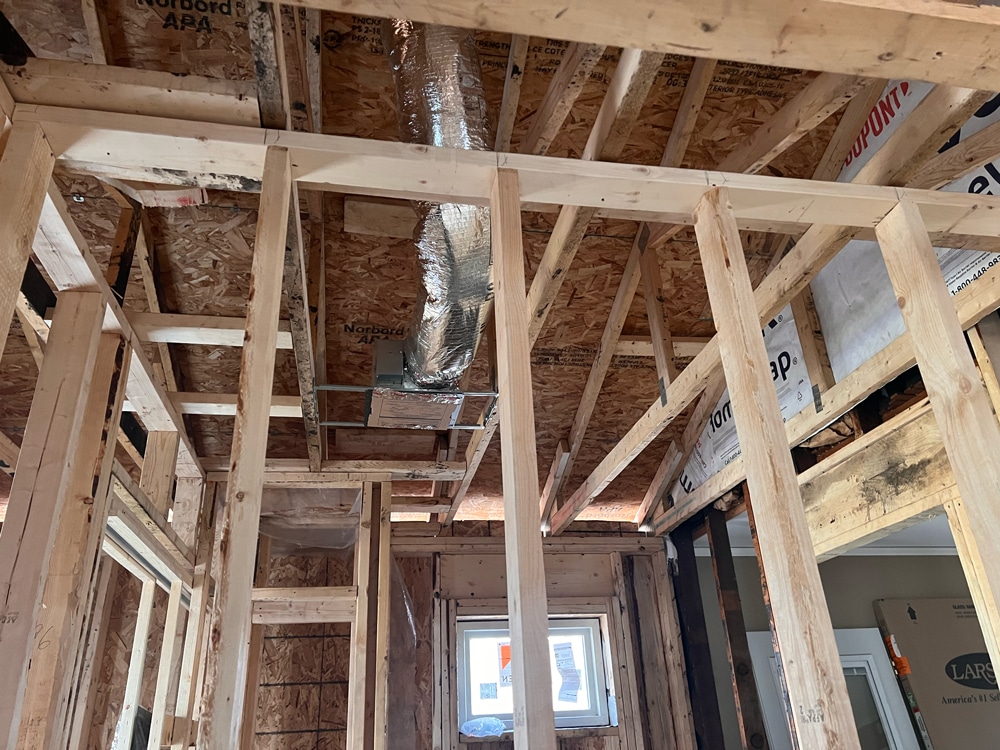
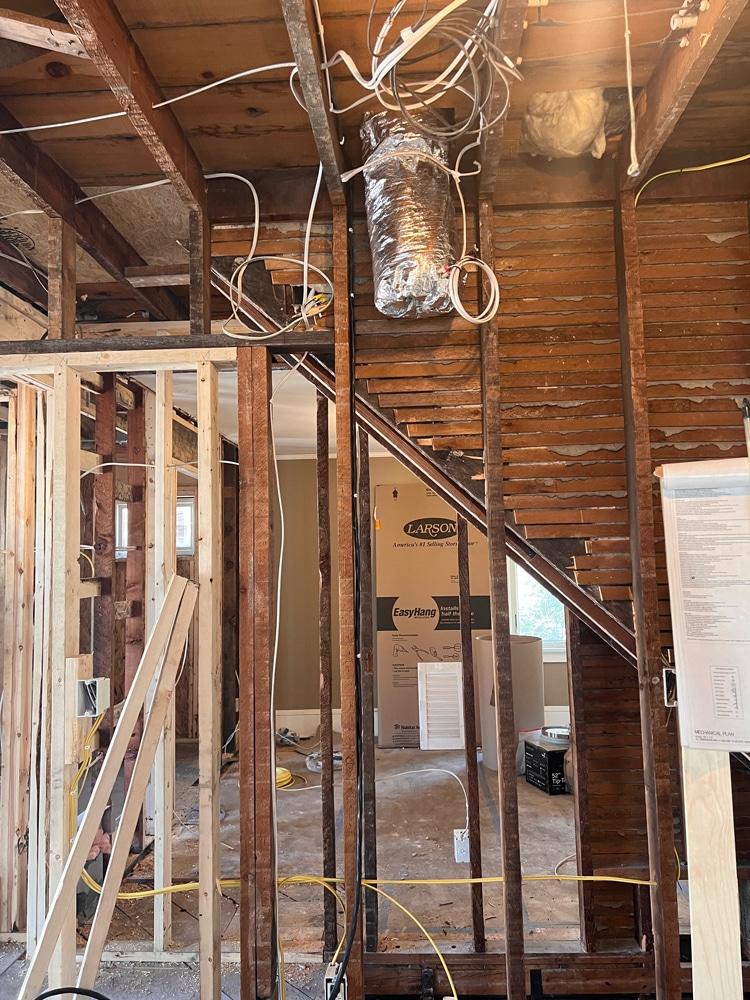
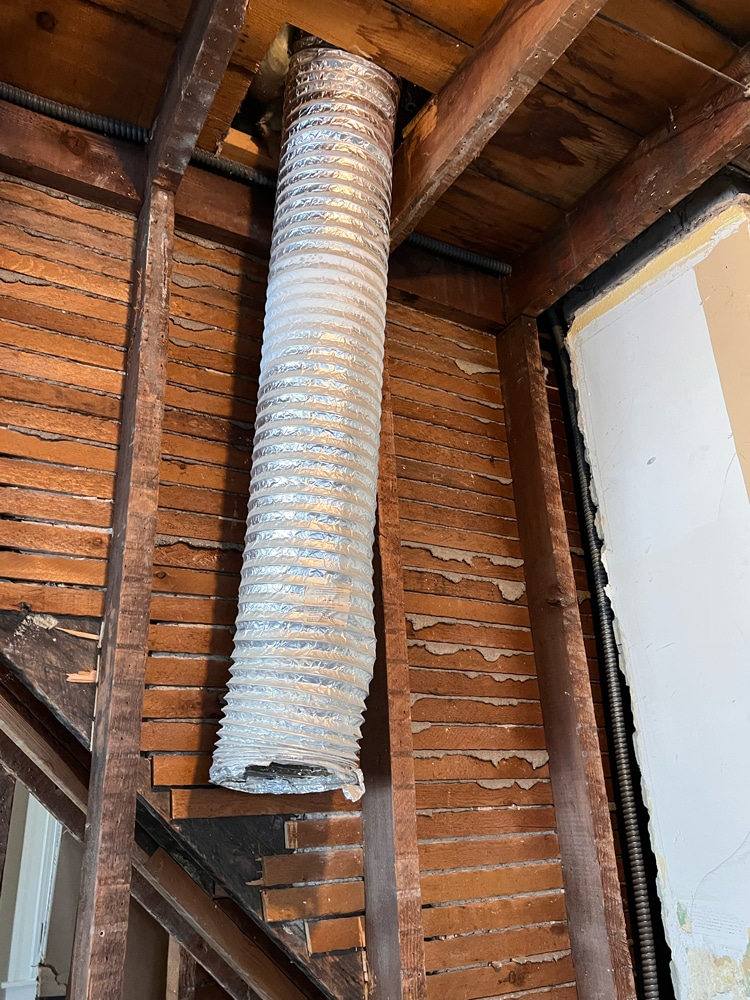
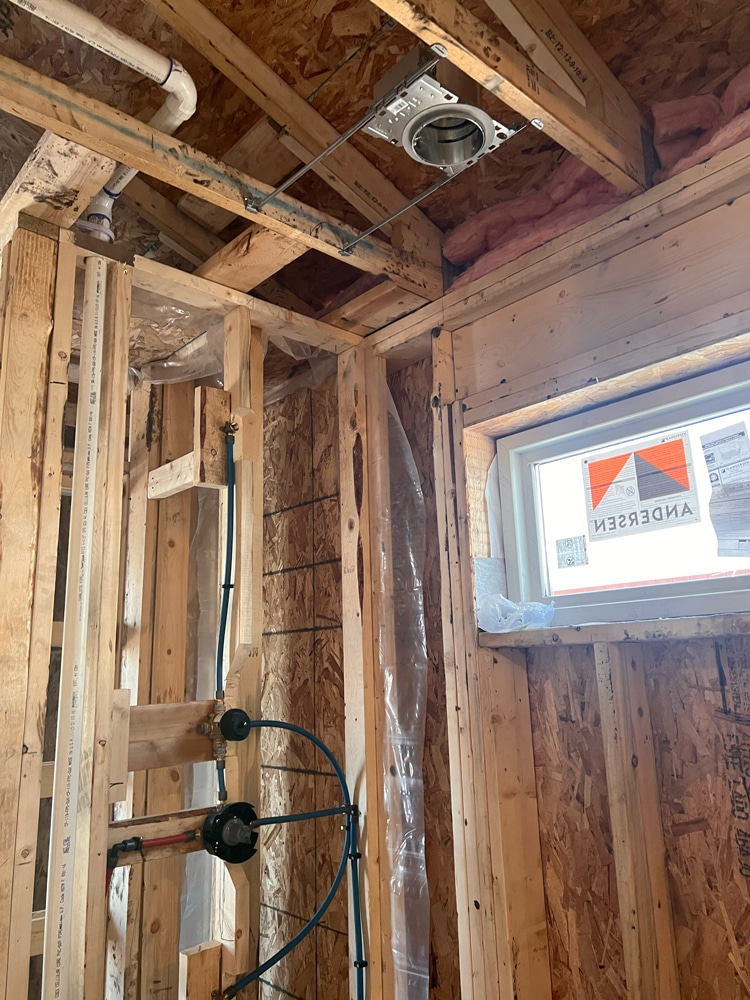
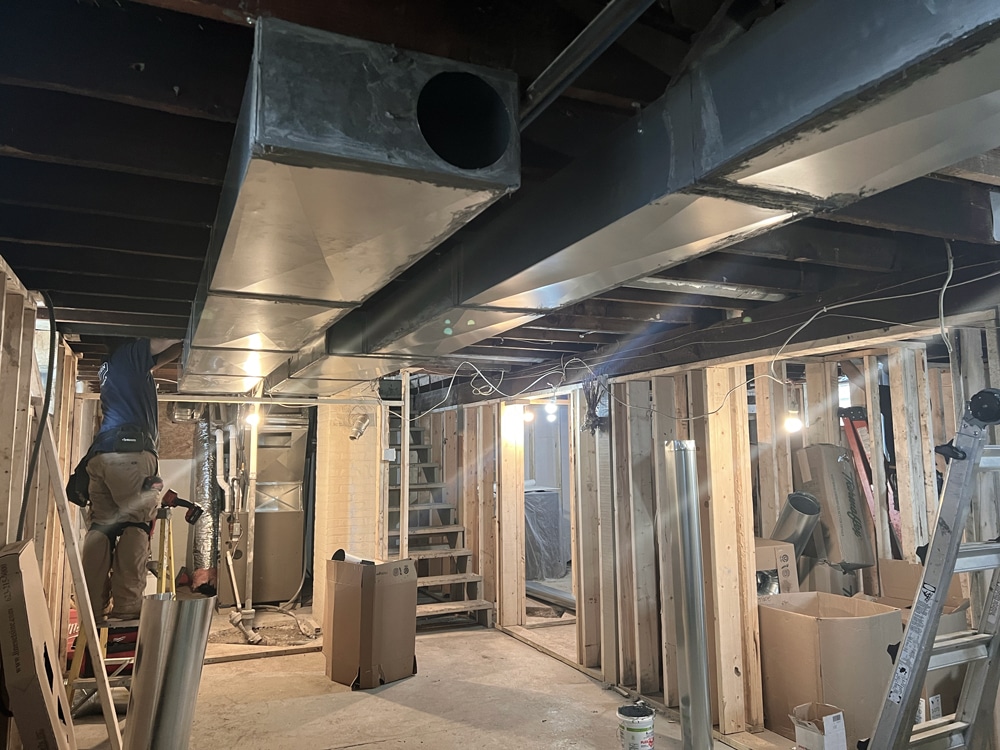
The mechanical team focused on assembling all the systems needed for heating, air conditioning, and venting within the home. For these systems to suit the remodel, our team walks the property and studies the drawings, then lays out the ductwork to optimize airflow and control the home’s interior temperature. We adjusted existing ducts and added both ductwork and venting throughout the remodel where needed.
“When needed to bring up new heat from under the floor to provide heat under the kitchen sink cabinetry, a pretty typical solution. It’s always nice to have warm toes in the wintertime!” – White Crane Project Manager
Mechanical: Main Level
We installed the vent at the dual-fuel range in the kitchen as well as additional heating under the lower cabinets at the kitchen sink. The newly conditioned air at the kitchen addition will vent out of the toe-kick, keeping toes warm or cool, depending on the season. Updated bathroom codes call for bathroom venting as well. And just like in the kitchen, we’ll use the custom vanity toe-kick to disguise the additional heating there.
Mechanical: Lower Level
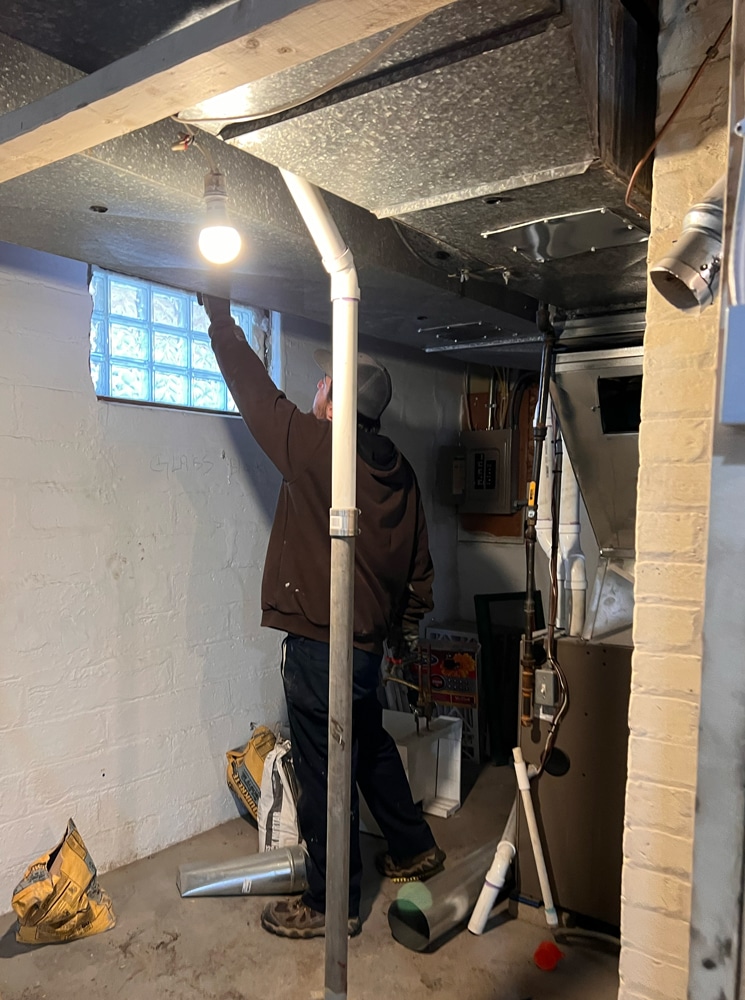
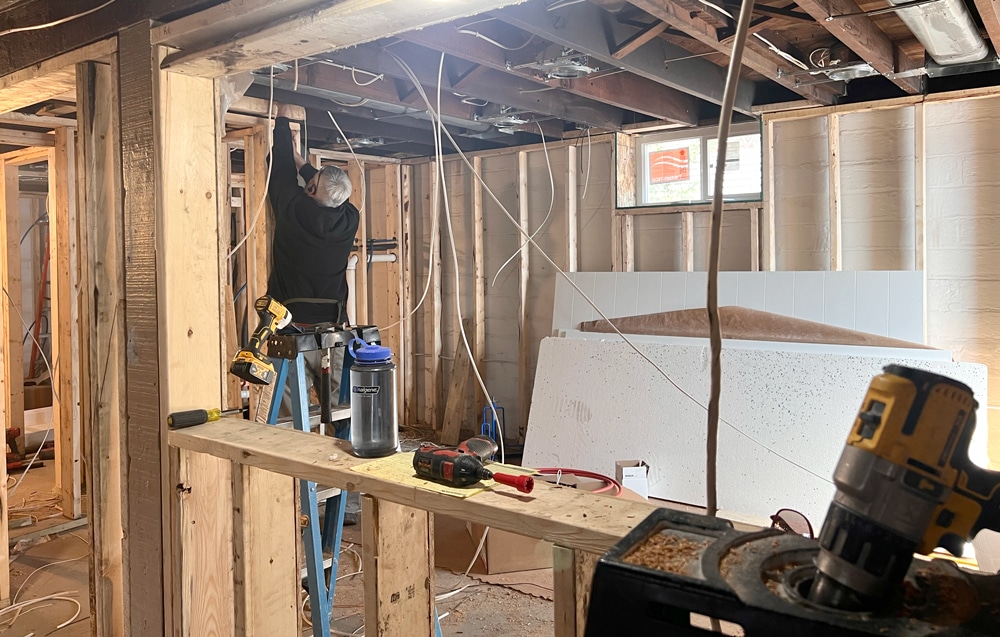
A major concern in the lower level was reworking the dropped ducts for the HVAC, given the already lower ceiling heights there. The basement soffits rose by 2 inches, giving our clients a little extra ceiling height. Though adjusting or replacing existing mechanical equipment can be costly and add time to the overall project scope, mechanical improvements increase an older home’s efficiency. The newly framed mechanical room houses an updated electrical panel, water heater, furnace and drain. Across the hall, the bathroom now meets code with the installation of a new exhaust fan.
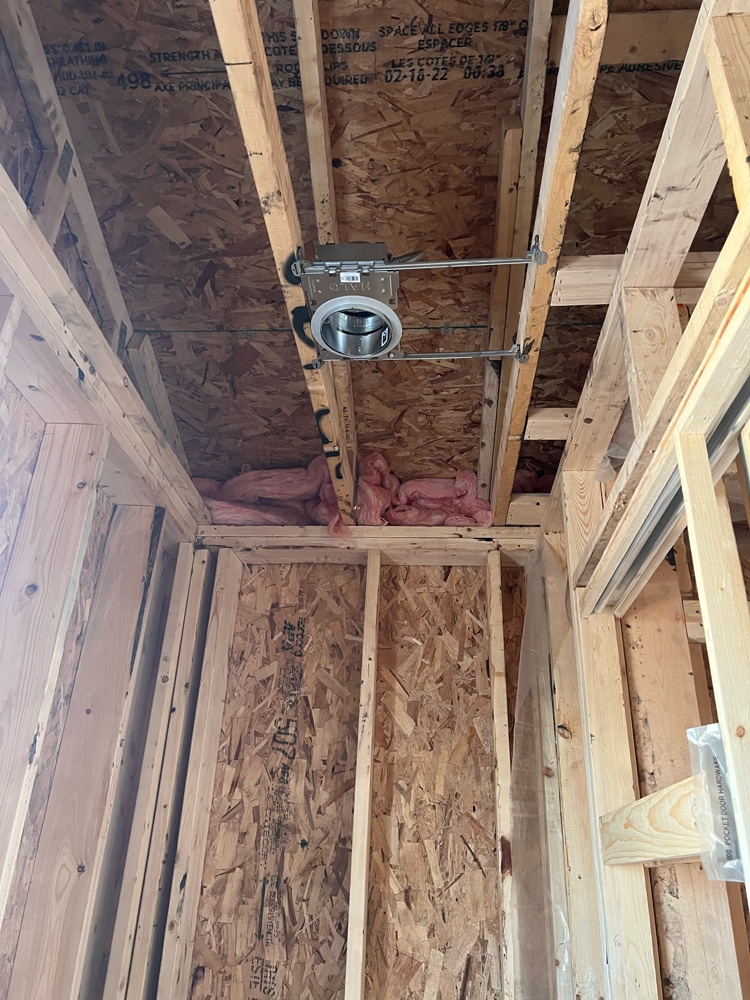
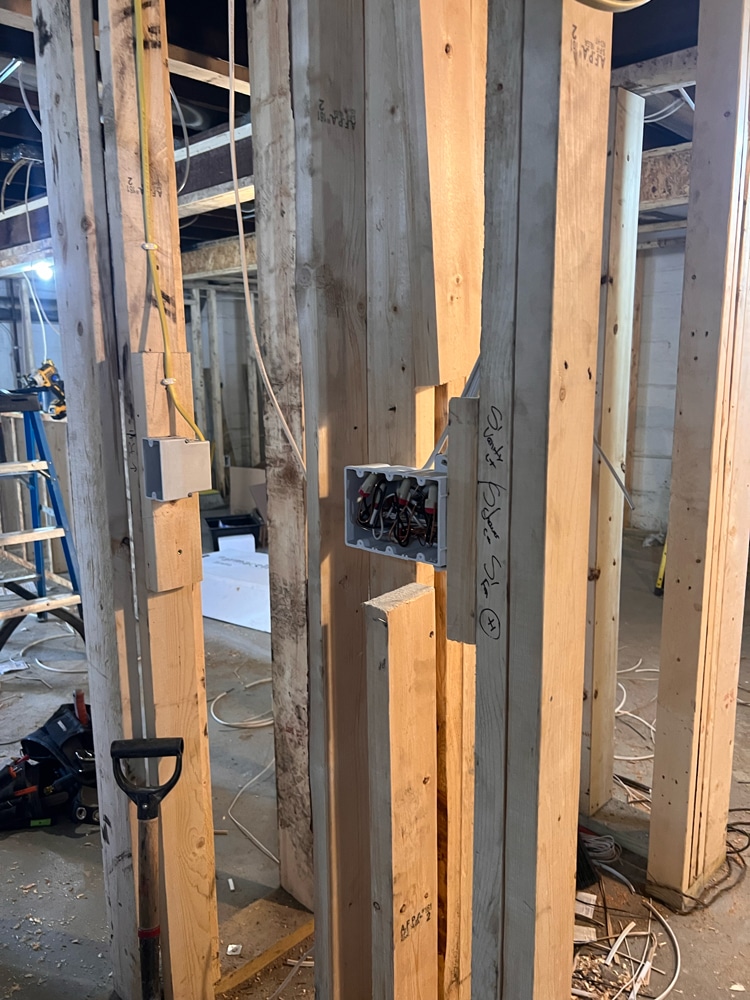
Our electricians were also busy. They focused on laying electrical lines throughout the addition and adjusting existing lines where needed for the remodel on the main floor and lower level. They also set up the electrical panel and pulled wiring for new switches and outlets across the home.
“We predominately have canned lighting, which is super convenient in restricted spaces where there wouldn’t be enough room for pendant lighting.” – White Crane Project Manager
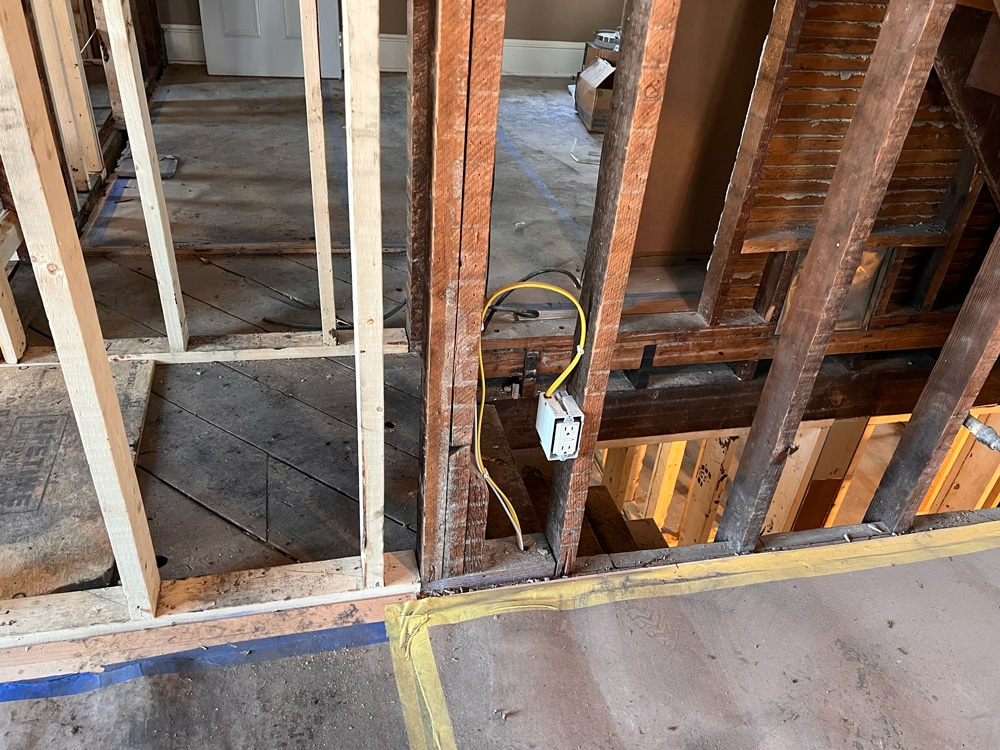
Electrical: Main Level
Our designers called for additional task lighting at most cabinets. To make this happen, our electricians wired for lighting at the underside of open shelving and for low voltage lighting at the range wall cabinets. Apart from outlets and switching required per code, this was the ideal time to install recessed cans for overhead lighting. We opted to keep the existing junction box in place behind the range wall to avoid rewiring most of the house, adding new boxes where needed. Decisions like this one help contain construction costs.
Electrical: Lower Level
Just like the floor above, we looked to code to make sure we’re getting the proper amount of the outlets. Other than switch boxes, we also installed a dryerbox, recessed cans throughout the lower level, and decorative lighting at the bathroom vanity.

By now, you’ve likely started realizing a critical part of considering the systems needed for an older home remodel comes down to comparing the cost of retaining existing systems versus upgrading them. This is an important part of our initial review of the home, the design phase, and even how our trades make decisions during construction.
Replacing most of the outdated cast iron pipes in the lower level was the best choice for preventing water damage in what will become a quality finished basement, adding costs now but preventing future costly repairs. Though upgrading various mechanical systems also affected the budget, this will make the whole home more efficient overall. Conversely, choosing to keep the existing junction box in the kitchen limited rewiring in other areas of the home, protecting both scope and budget creep.
Decisions like these can significantly change remodeling costs, impacting the final project scope and the level of finishing possible. That’s why we help every homeowner consider how best to allocate their budget and the impact of those choices.
We’re here to help! Check out our planning resources below, or reach out to us here.
The Twin Cities are filled with story-and-a-half homes that are perfect for a certain kind of addition, called a shed dormer. Learn more about this popular remodeling project.

Are you thinking about a basement remodel and wondering how much you’ll need to invest? See the cost breakdown for remodeling a basement in the Twin Cities.

Here's the step-by-step process that ensures you’ll have a remodel you love.