Creative Ways to Make Space: Accessory Dwelling Units
Interested in an apartment above your garage, a backyard studio, or a workshop detached from your house? ADUs are fully functional living spaces that can have many uses.
Follow along as we build an Accessory Dwelling Unit (ADU) above a new garage in South Minneapolis.
To gain access to existing plumbing lines, we cut the Lower Level floor in the home to connect the ADU plumbing to the main in the house. Our carpenter removed the vinyl floor and underlayment. and opened up the exterior wall where the plumber roughed in and also the interior wall between the family room and the bathroom.
When we opened up the wall common to the bathroom we found the main plumbing was facing the opposite direction, which meant we would need to do one of 3 things:
Finally, the option that we thought was the best course of action, and the option client chose:
Our goal was to solve the plumbing installation while keeping this process as minimally disruptive to the family as possible.

This trench in the Lower Level of our client's home will eventually help to bring new plumbing to the ADU.

The ADU plumbing must tie into the house main, so we're creating a trench in the Lower Level bath, which in this case, was the best option for our clients.
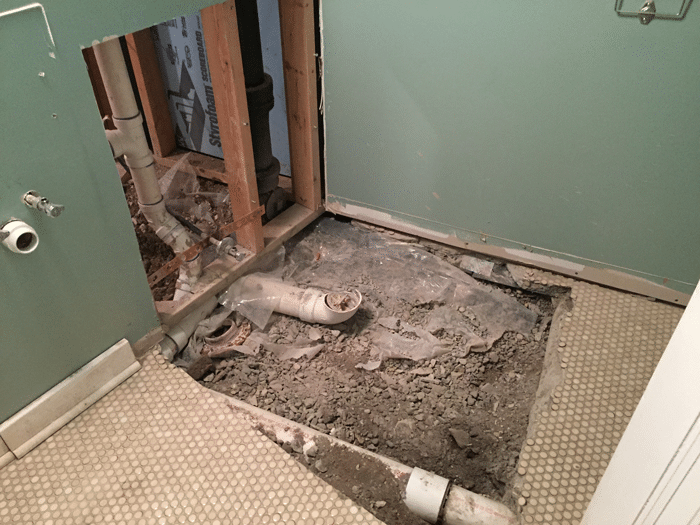
We removed the toilet and sink in the lower level bath and removed a couple of square feet of tile and concrete to tie into the main drain. New tile will be installed, and a sink and toilet will be put back into place.
We’re here to help! Check out our planning resources below, or reach out to us here.
Interested in an apartment above your garage, a backyard studio, or a workshop detached from your house? ADUs are fully functional living spaces that can have many uses.

Learn what it costs to build a garage apartment ADU (Accessory Dwelling Unit) in Minneapolis or St. Paul, and what drives those costs.

Here's the step-by-step process that ensures you’ll have a remodel you love.