
Think you can’t afford that remodel? (There are more options than you think.)
So you’d love to upgrade your kitchen or add a shed dormer with a primary suite, but you’re not sure how to pay for it? Learn about three ways to finance your remodel.
See inside as we transform the kitchen and upper level bath of this 1920s Tangletown home.
In the Kitchen | Layout changes in the freshly reimagined kitchen and bathroom called for new window sizes and placements, requiring existing windows to be removed and replaced. With the removal of the banquette in favor of additional countertops, our crew needed to demo the existing oversized windows that would interfere with the incoming 36″ tall cabinets. The 35″ x40″ Thermo-Tech replacement window sits just above the countertops at the centerline of the new sink. Flanking the adjacent range and vent hood, we’ve installed two additional 31″x40″ windows.
In the Bathroom | Additional privacy is designed into the spa-inspired shower and tub enclosure. We removed a large window in that area and another above the vanity in favor of a large mirror to better serve our clients’ needs. We also replaced a second window in the shower with a 24″x42″ frosted glass Thermo-Tech unit to guarantee a light-filled space with privacy considerations in mind.
Installation Time: 1 day
New Windows & Exterior Doors: 1 door | 4 windows
Removed Windows: 3 units
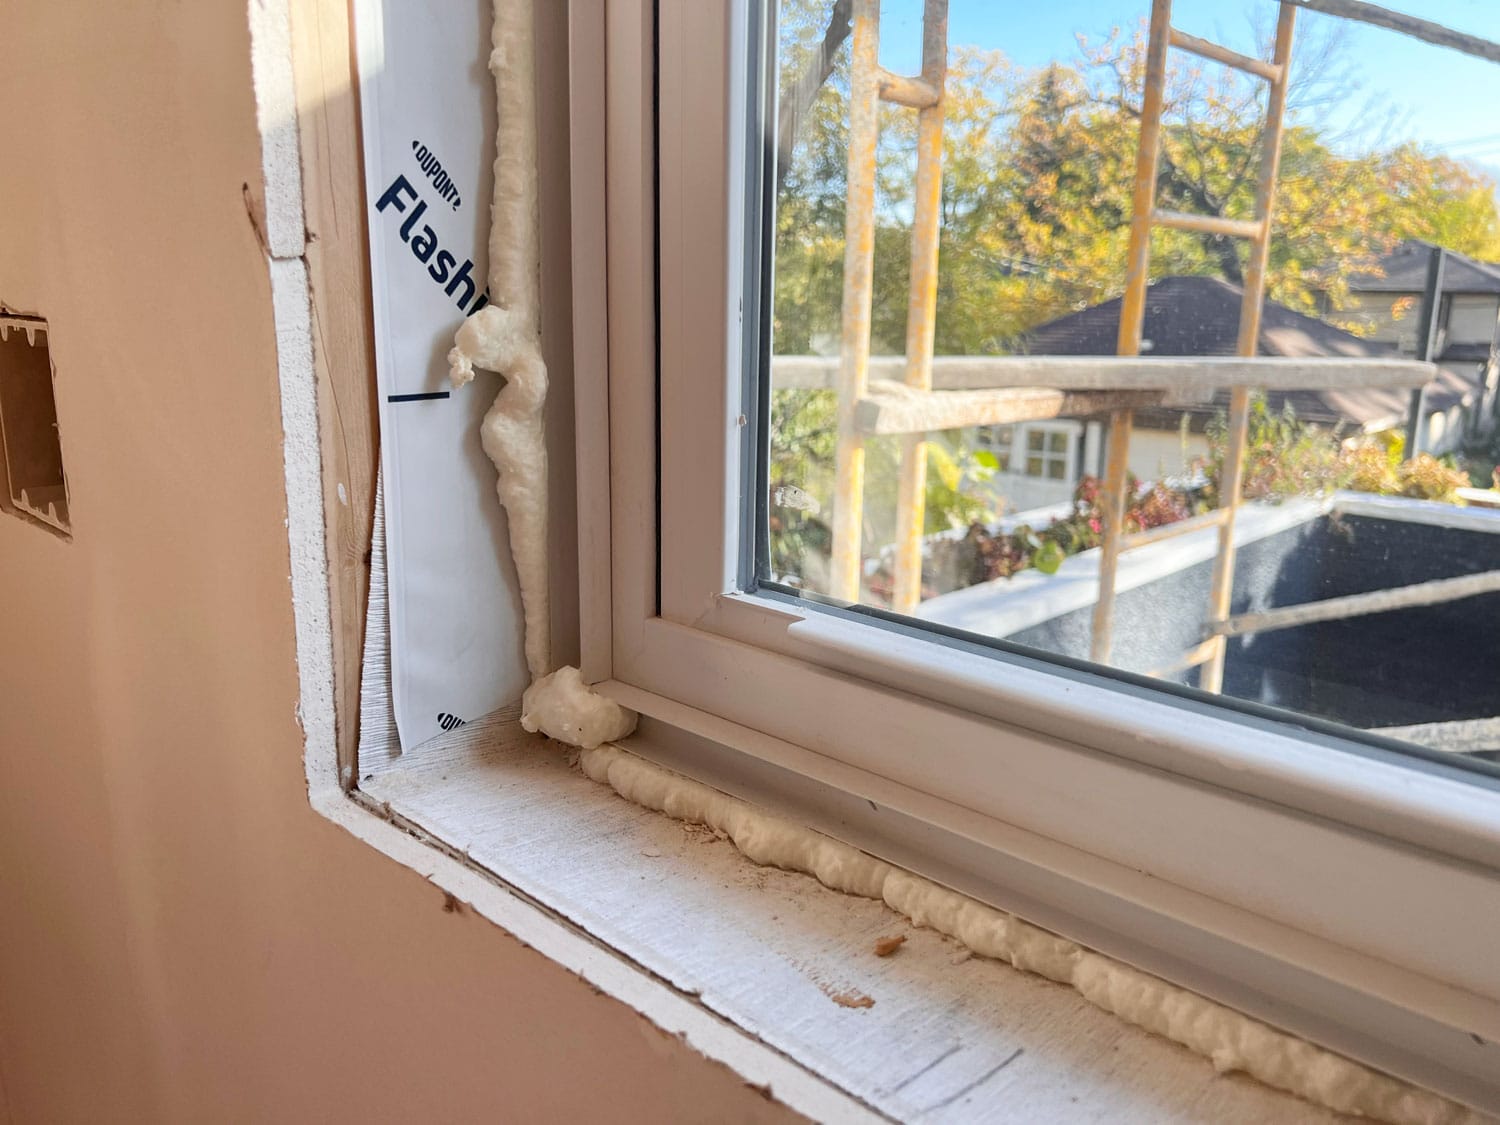
With demo and framing completed, our installation crew placed the new windows and doors into position along with flashing tape, caulking, and insulation.
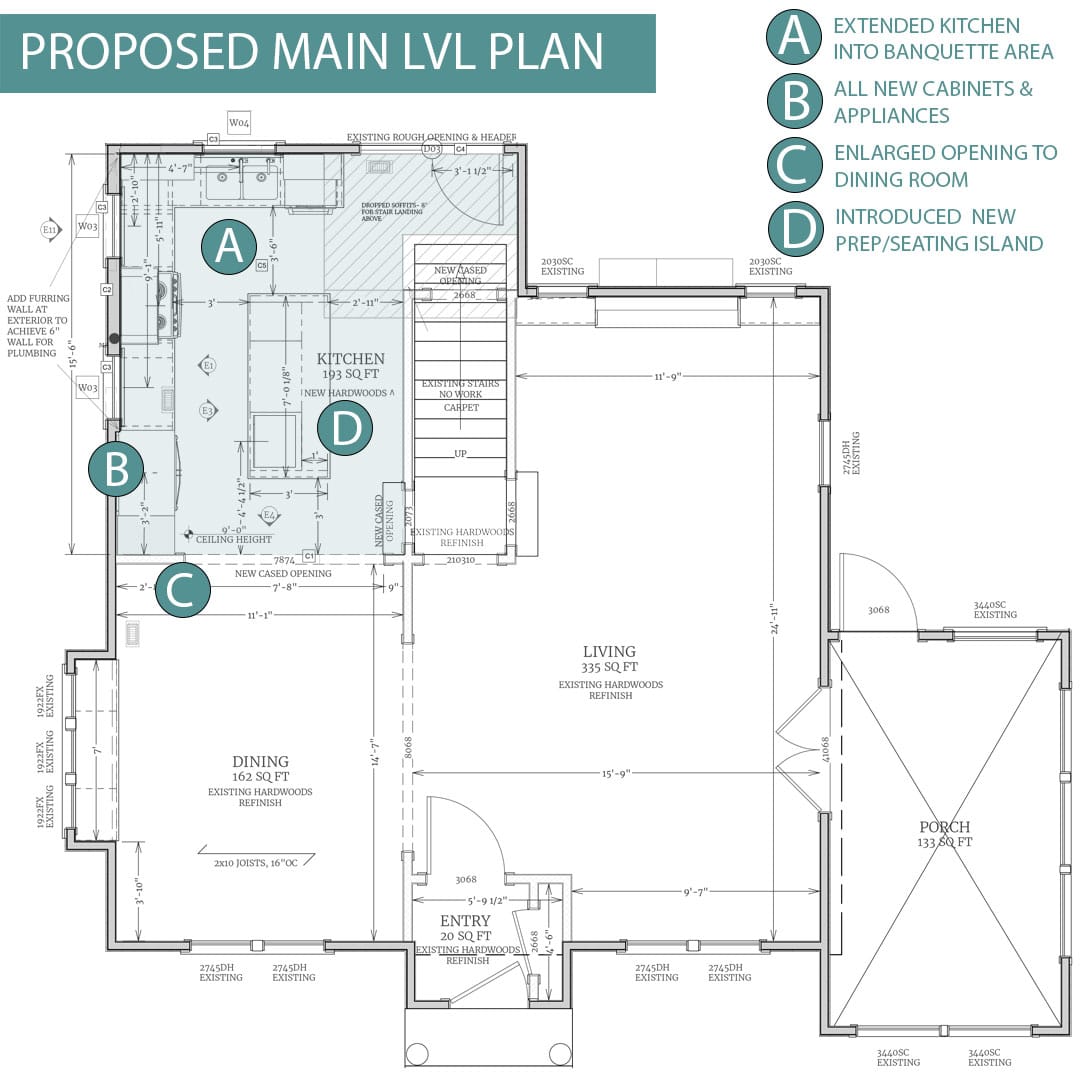
Across the kitchen, we proposed all new windows and a new exterior door for a more functional and well-lit room.
Stucco work takes time, because the process requires the right weather conditions and drying times between several necessary stucco applications. Since we moved several windows to better serve the updated layout and fixed rot along an exterior wall, we needed to patch areas along the basement level to the second floor. Here are some of the critical steps our stucco team employed to patch this Tangletown home and guarantee the same finish as the rest of the home.

Looking at the rear elevation of the home, notice the zones where stucco was removed to make space for new windows and doors.
Step 1: Waterproofing + Lath
The crew first made sure the appropriate moisture barriers were in place, typically some type of building paper or housewrap, before we added a sheet of metal lath that the stucco adheres to.
Step 2: Inspection Time
Inspections come next and add the extra layer of security to the building process to help guarantee the integrity of the project! The inspector checked that the building paper and lath are properly installed and that the nails/staples are placed correctly.
Step 3: First Coat, Scratch Coat
The first coat consisting of a sand and cement mixture was applied, creating an appropriate surface for the upcoming brown coat to adhere. Installers typically use a darby and trowel to apply the slurry in horizontal lines across the open lath.
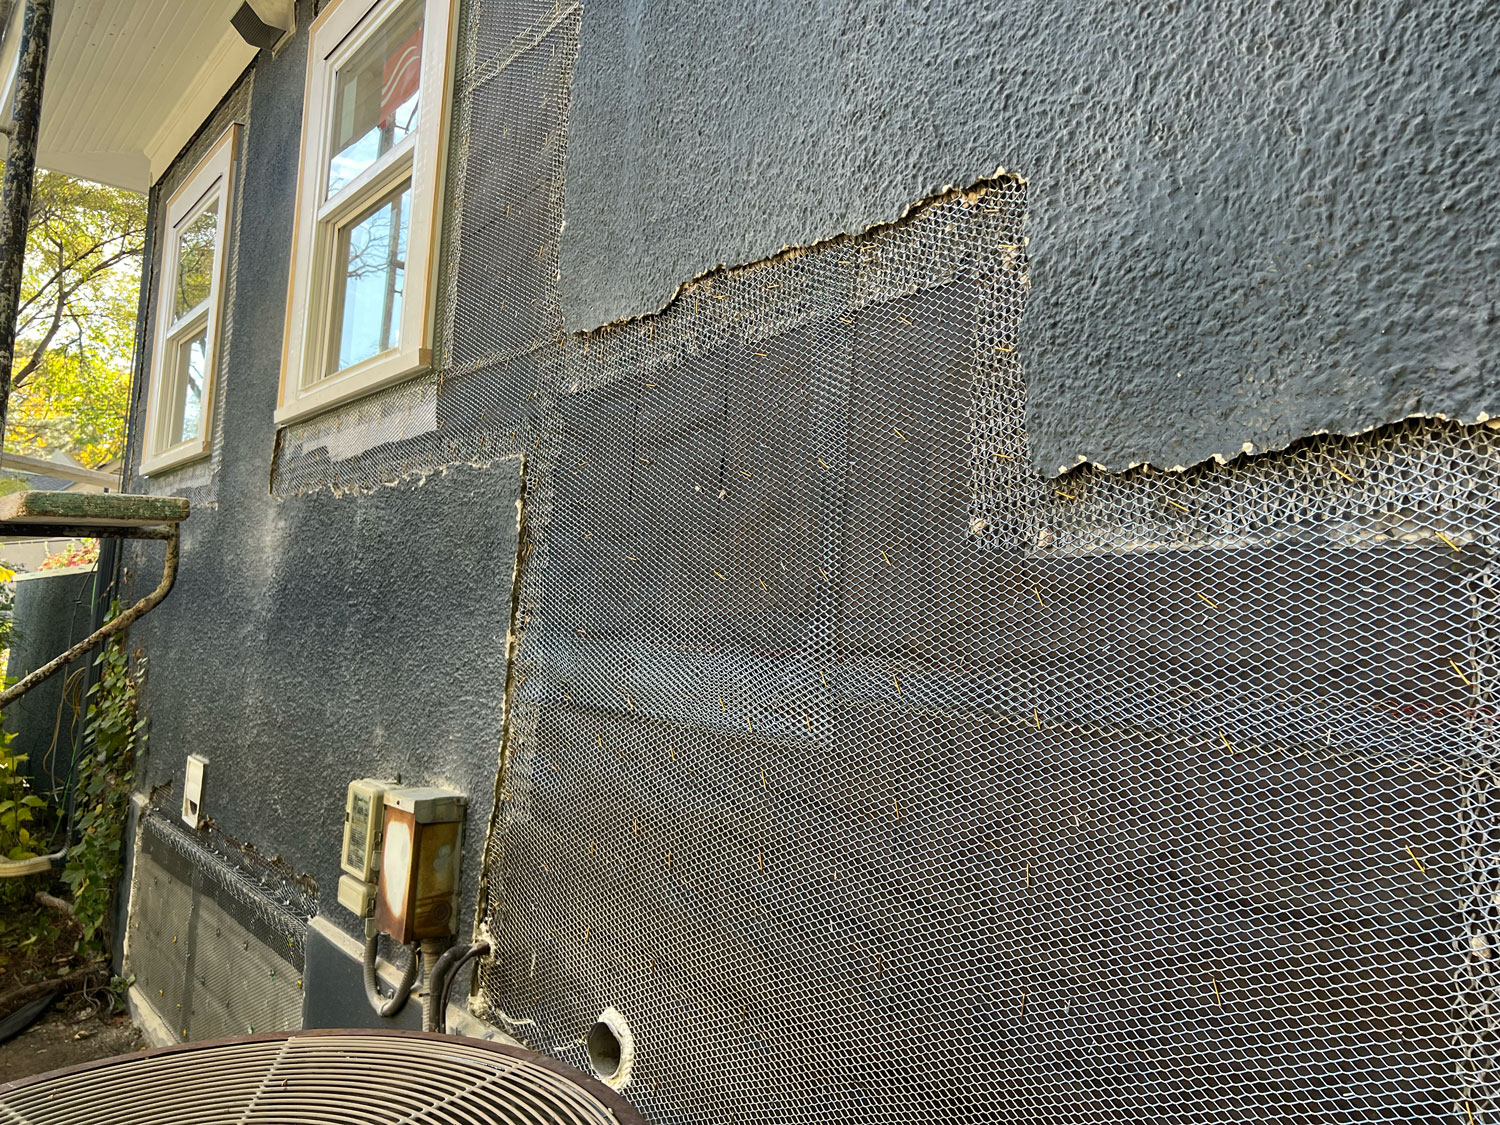
The demo crew removed additional stucco along the side of the home to account for not only new windows but framing repairs caused by a leaking shower on the second level. With the lath installed, the next step is to apply the scratch coat.
Step 4: Let it Sit
Depending on project constraints and climate, stucco mixtures and drying times vary. 1 week of drying elapsed before the second coat was applied.
Step 5: Second Coat, Brown Coat
We applied a second, much smoother coat to create an ideal surface for the final layer of stucco to rest, compressing the mixture and smoothing the surface as we moved along the initial coat.
Step 6: Let it Sit…Again
We allowed one more week of drying
After the lath is installed, we applied several coats of stucco to patch areas where existing windows and doors were removed.
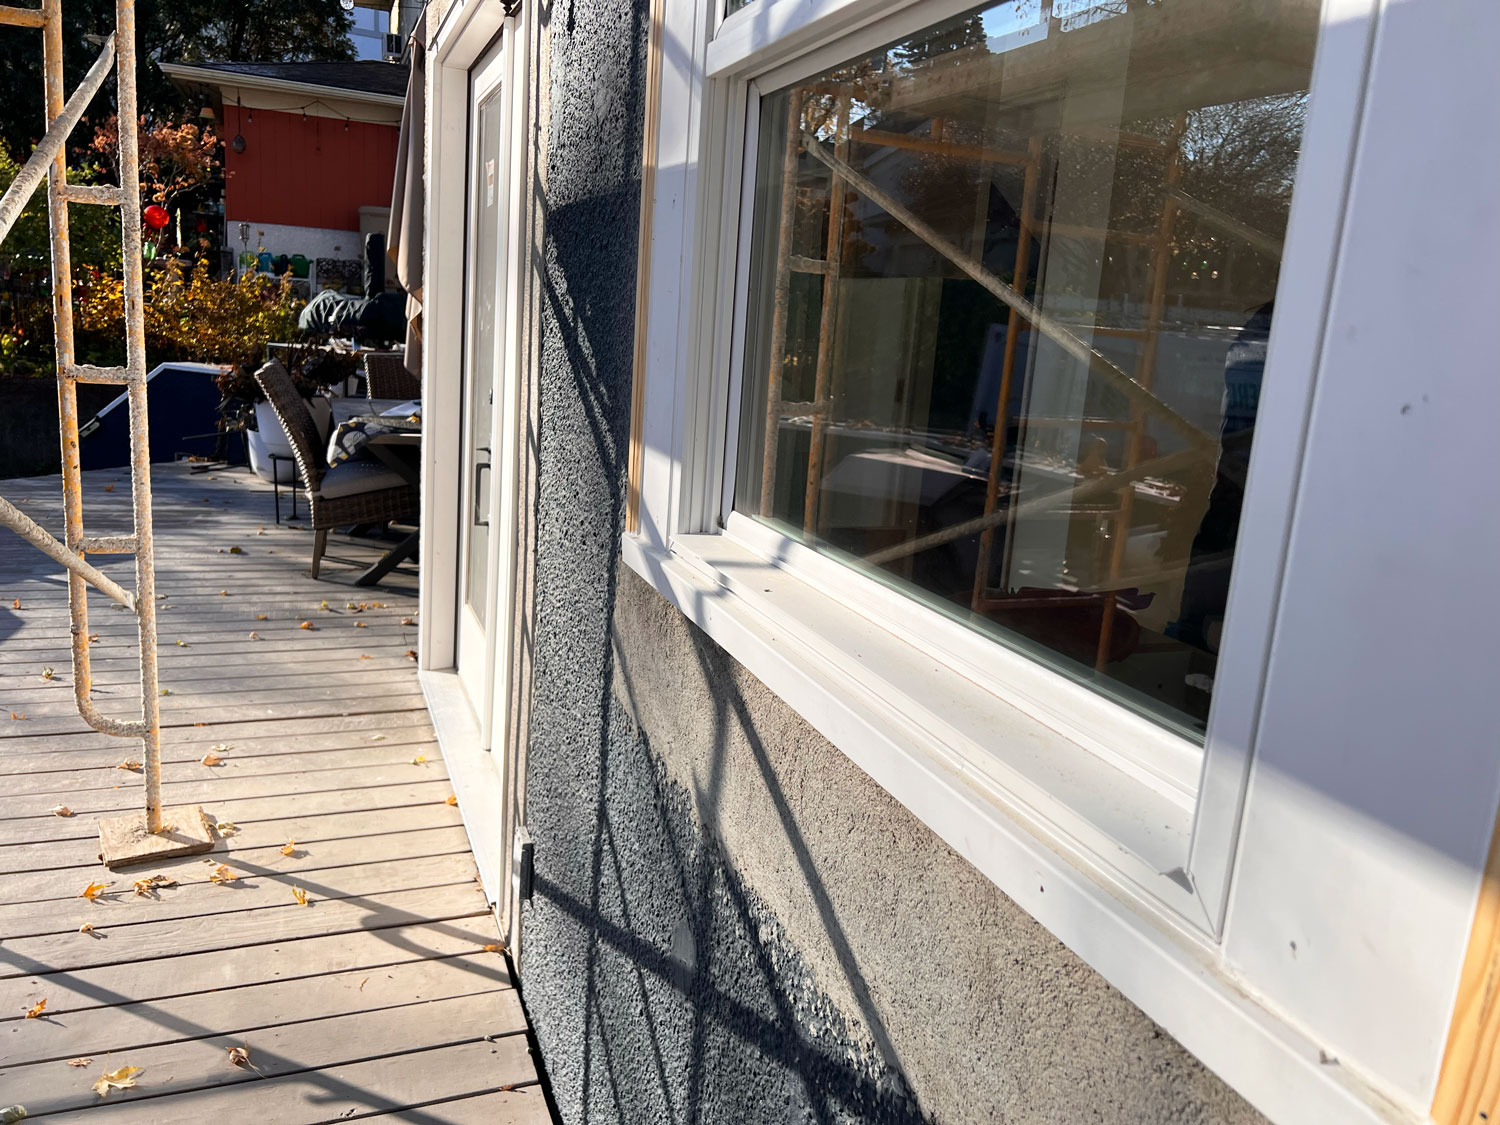
Step 7: Final Coat + Drying Time
With a final coat, we aimed to mimic the texture of the existing stucco, blending newly applied stucco to the surrounding material. Once applied, this final coat has the same drying time as the previous two coats.
Step 8: Paint Later
Recently painted a stunning shade of navy blue before the remodel, our crew opted to use the same shade to paint over the new stucco when weather conditions permit. If we were stuccoing the entire home, we would apply a color-infused stucco layer to finish the job.
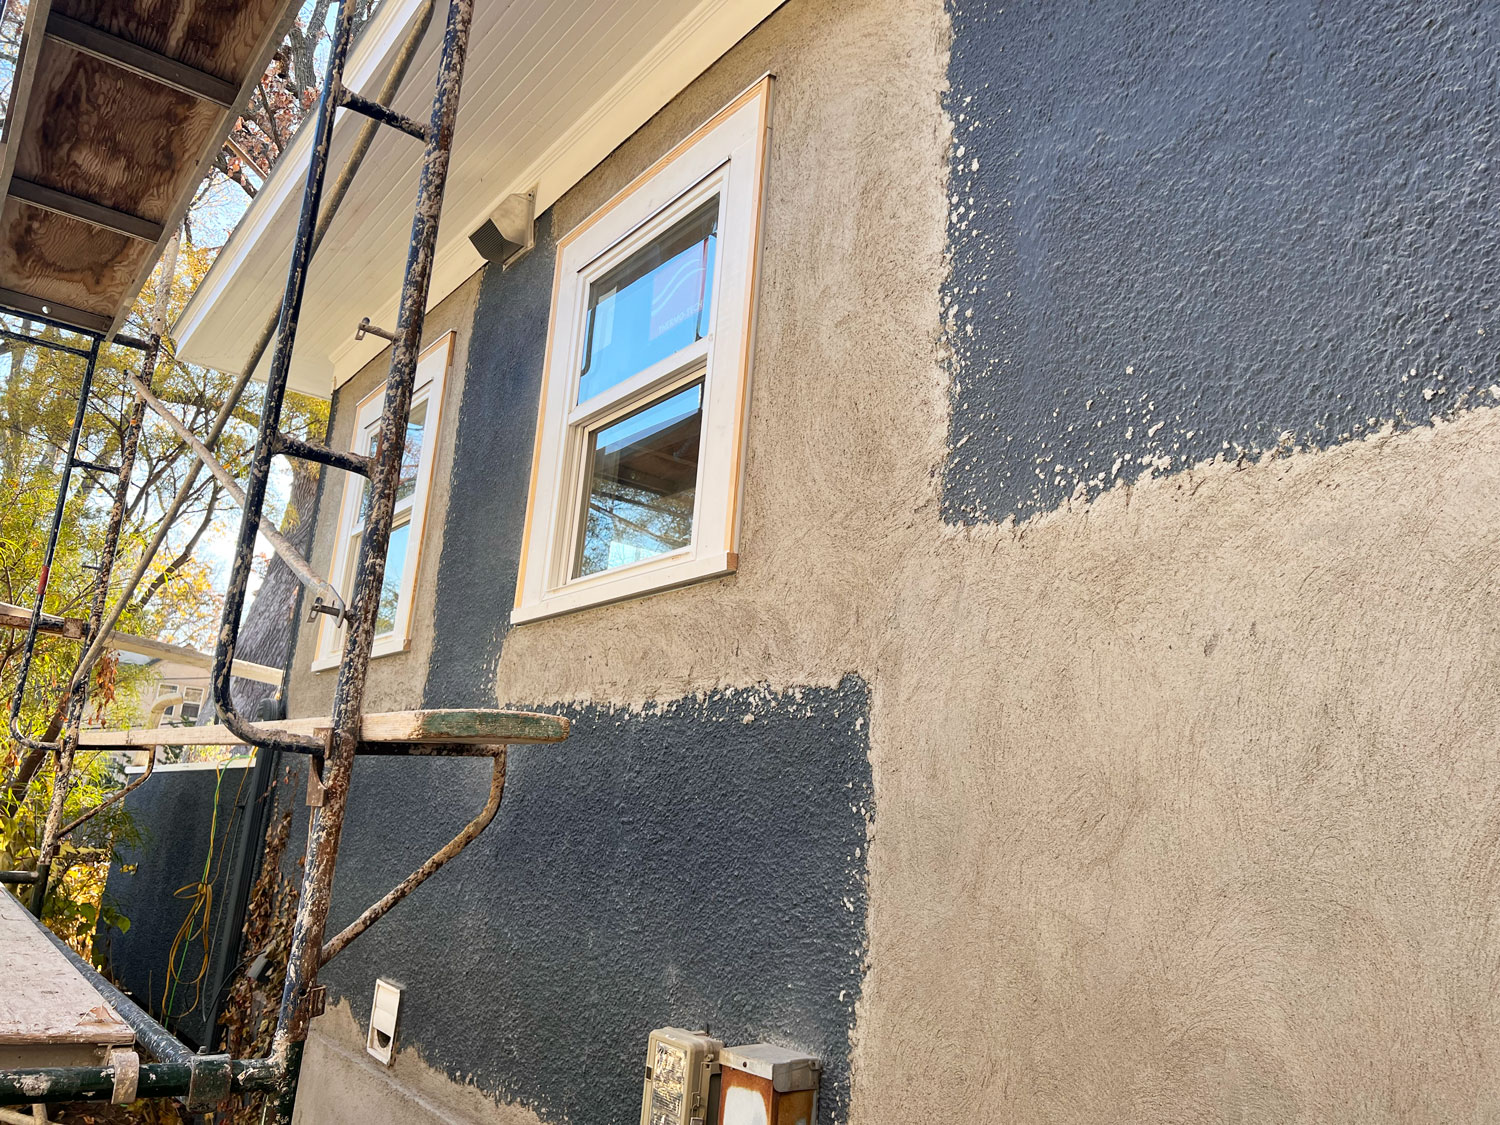
To properly apply stucco, drying times and weather conditions must be taken into account. On this project, 1 week passed between stucco applications.
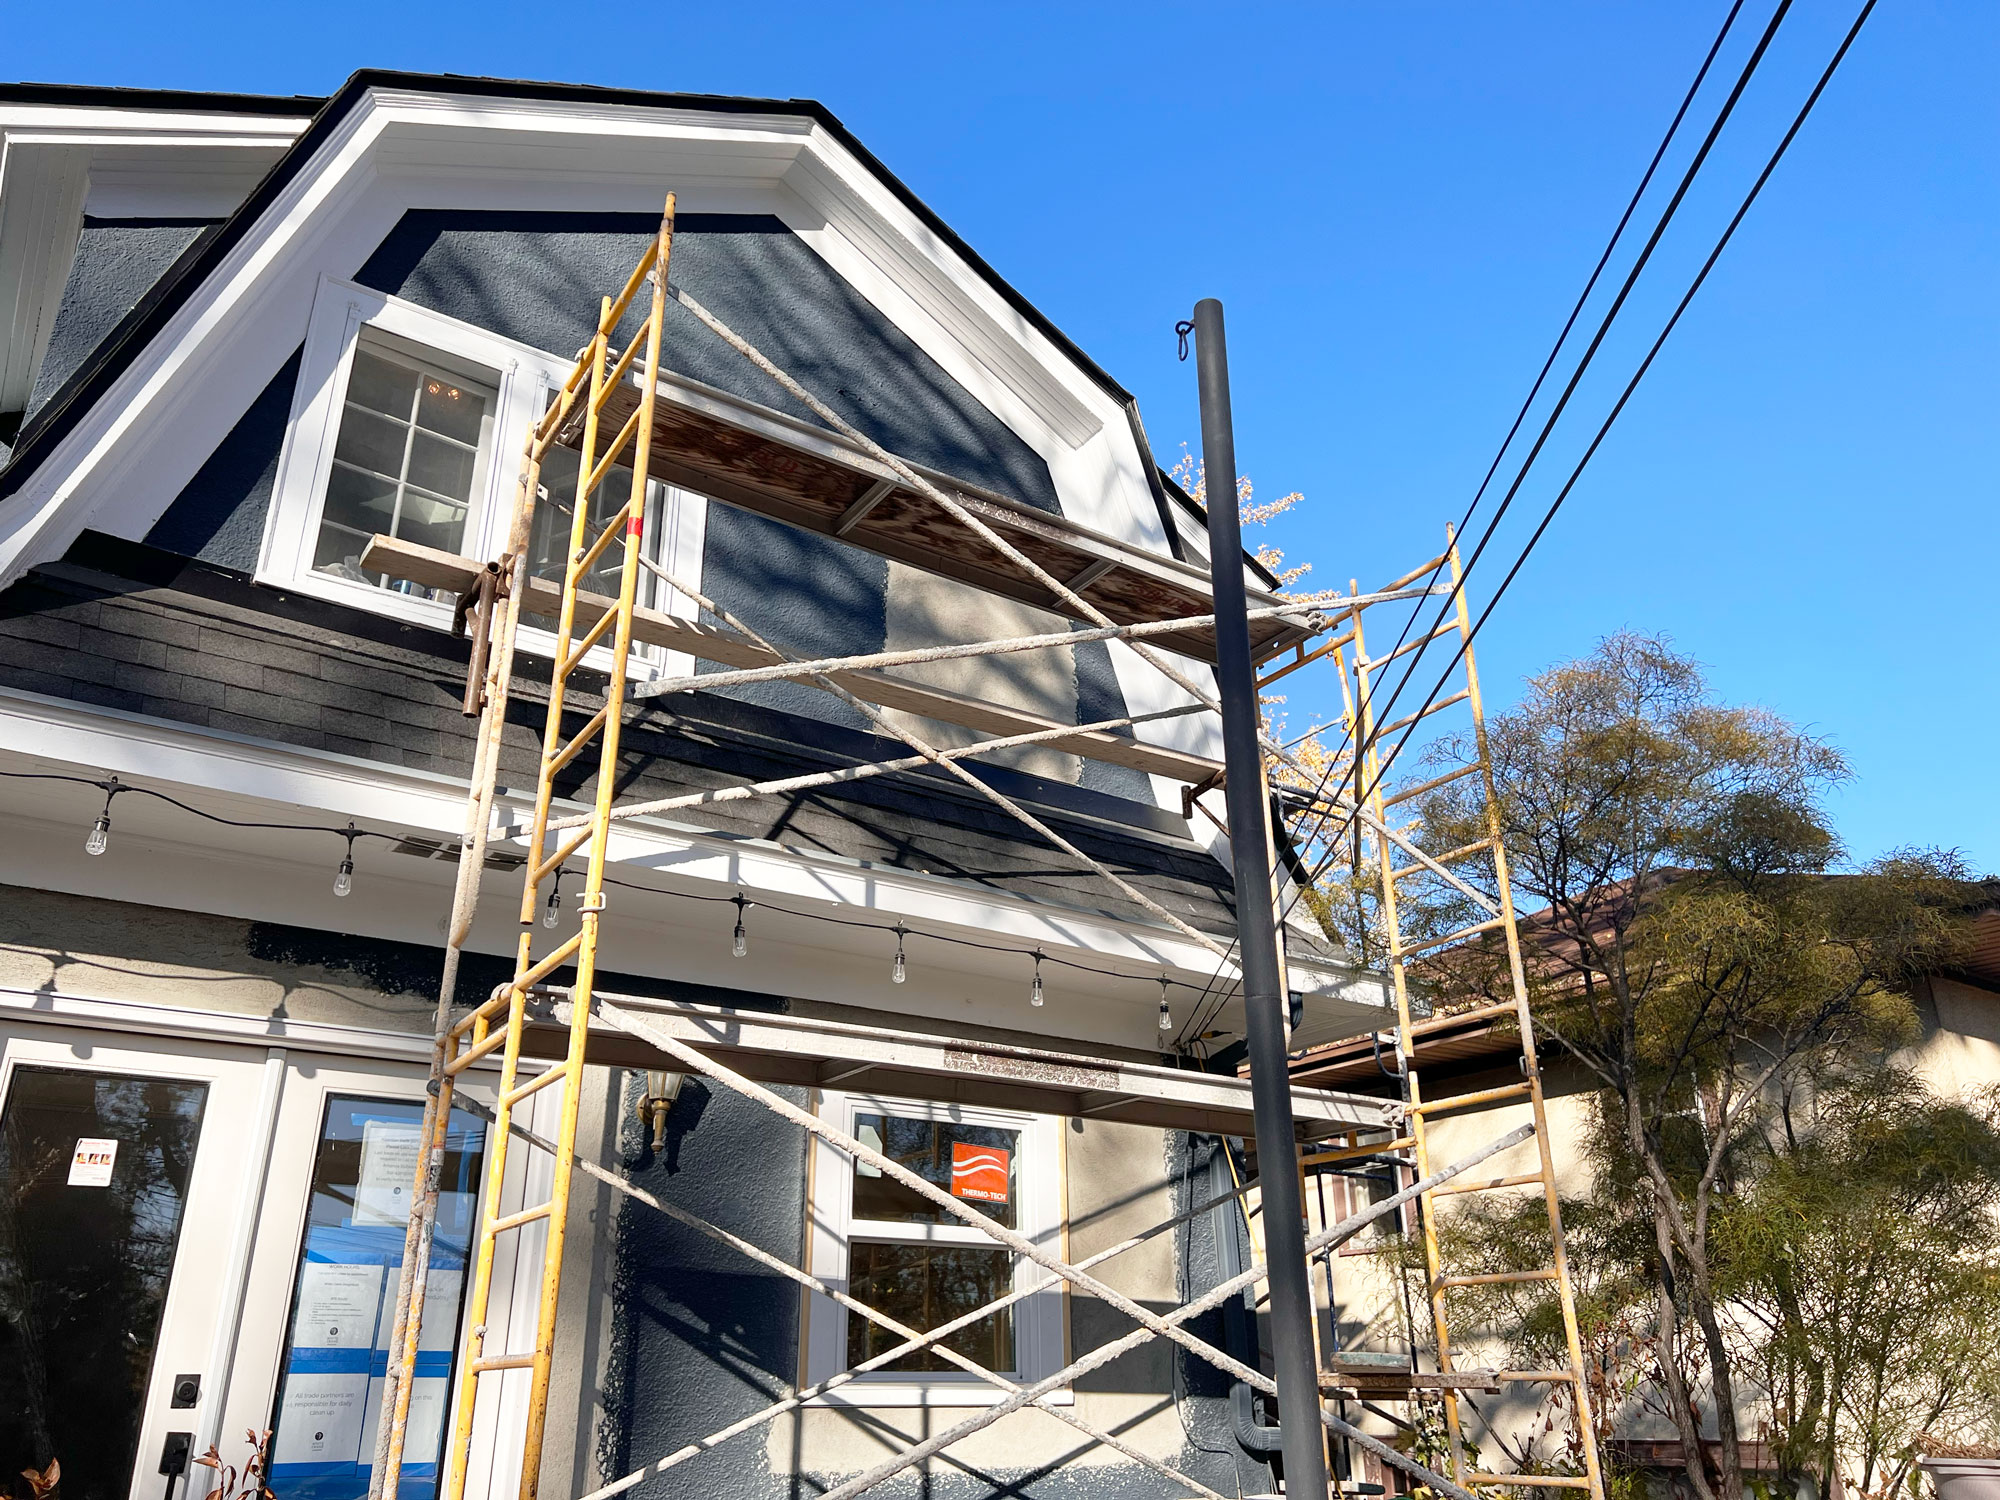
The stucco crew used scaffolding along the front and sides of the home to reach the second level.
We’re here to help! Check out our planning resources below, or reach out to us here.
So you’d love to upgrade your kitchen or add a shed dormer with a primary suite, but you’re not sure how to pay for it? Learn about three ways to finance your remodel.

Are you dreaming of a new kitchen and wondering how much you’ll need to invest? We breakdown the costs for two kitchen remodels and what factors drive those costs.

Here's the step-by-step process that ensures you’ll have a remodel you love.