Conway Whole House Remodel
A remodel is underway. Take a look inside.
Follow along as we remodel this Conway area home’s first floor and upper level.
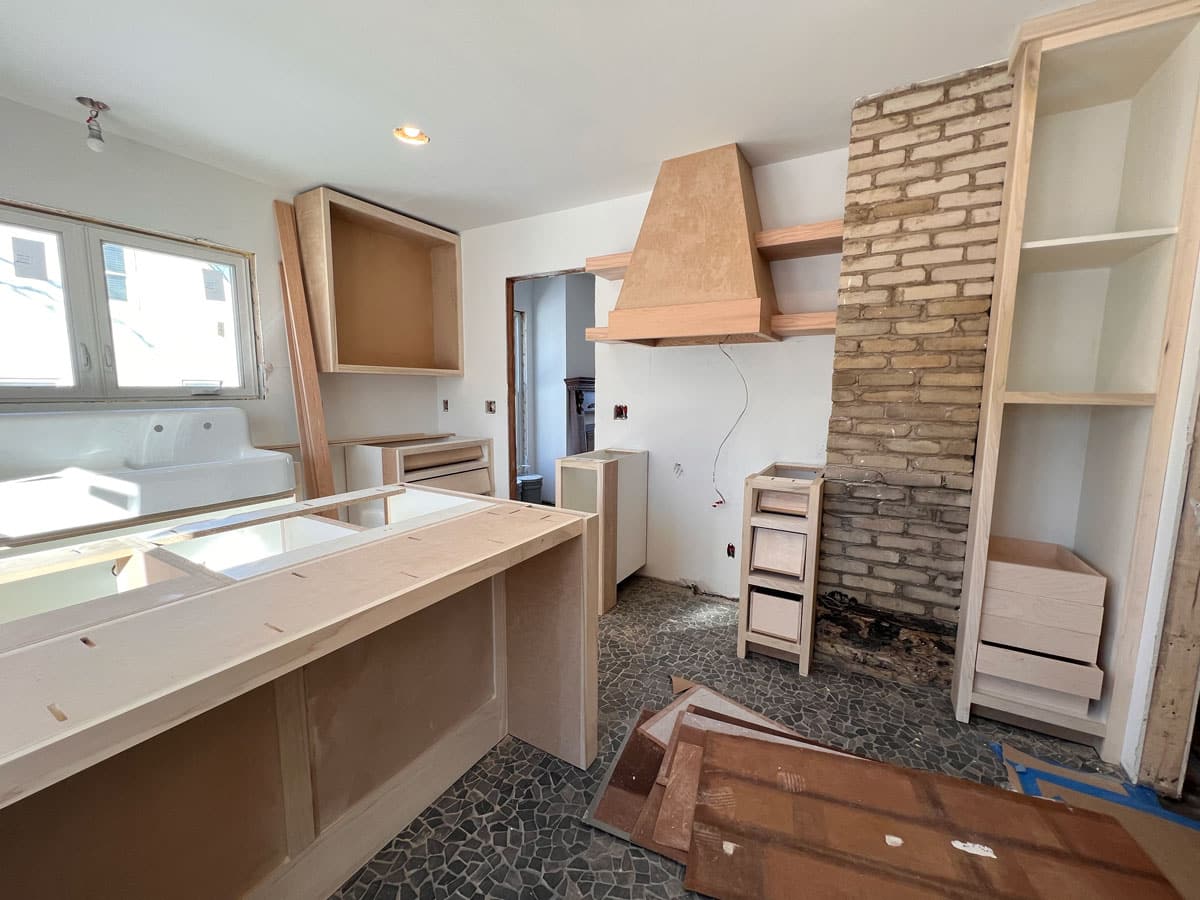
Cabinets
Cabinet design plays a considerable role in the design of this multi-level St. Paul remodel.
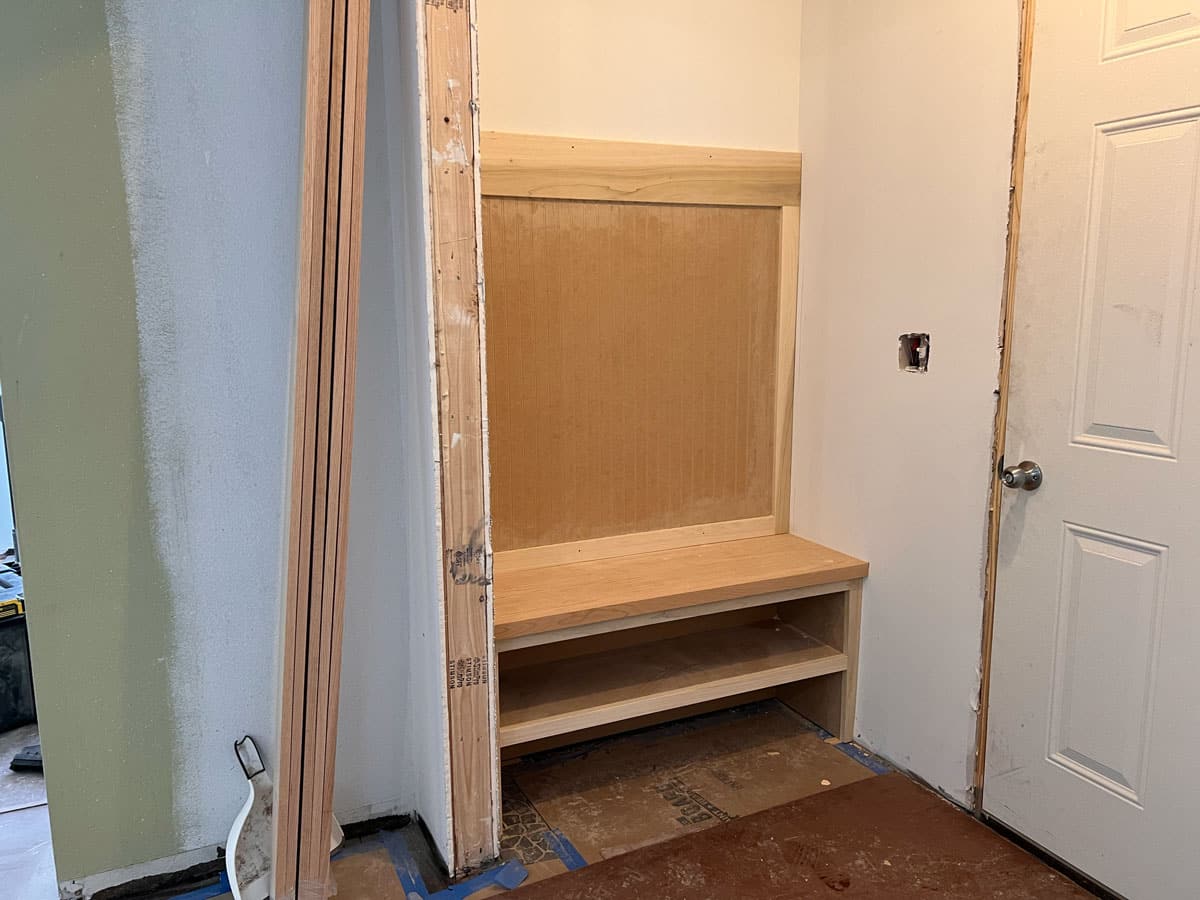
During the design phase, our designers worked with the homeowners to understand where cabinets would be needed, their configuration, and how they would look. This is a critical aspect of defining both the interior design of the home and the actual architectural documents. The team discussed big-picture ideas, like how replacing the entry closet with a storage bench could give the home a modest mudroom without needing an addition. That was a major win for our St. Paul family, who weren’t sure if they could get everything on their wishlist.
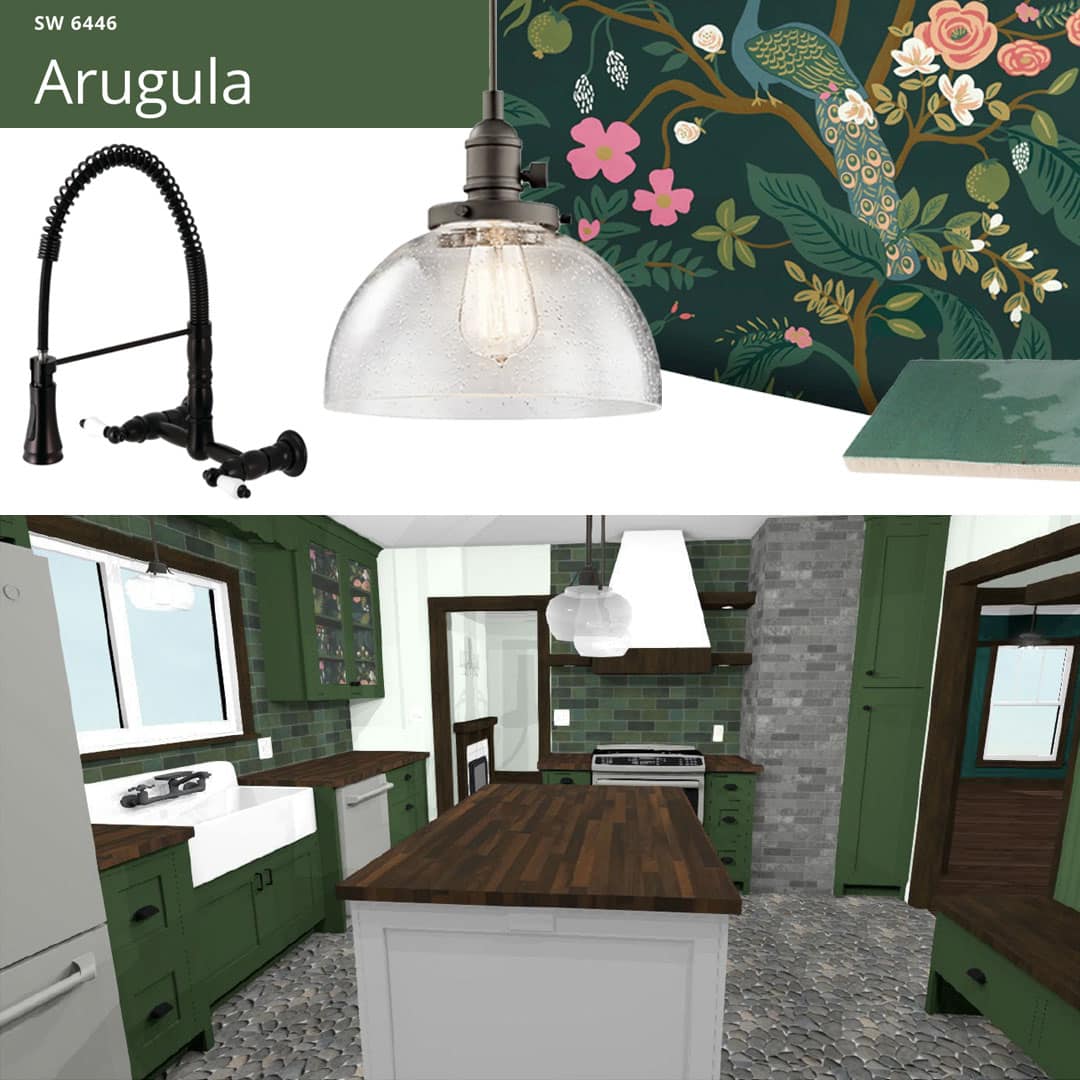
A rendering from the design phase previews what the updated kitchen will look like at the end of construction.
Right Down to the Details
We also talked through intricate details that made our client’s custom kitchen much more functional and specialized, like where the homeowners wanted to store their flatware or how roll-out shelf organizers would make accessing larger appliances easier. Changes, especially to things like color and layout, were reflected in 3-D modeling, where our Conway neighborhood clients could see their decisions in a life-like environment, make changes, and find the perfect arrangement for their family. This iterative process gives everyone an added level of confidence in the approval process and the final remodel.
“Instead of a knife block, we have a built-in knife area in our silverware drawer, but my favorite cabinet in the house is the pot and pan cabinet. I literally fit every single saucepan and sauté pan I have in there, and I still have room. It just pulls straight out and is the most beautiful cabinet in the entire kitchen.” – Conway Neighborhood Homeowner
Cabinet specs -What are they and what do they do?
In any project, we rely on detailed instructions to make sure we’re building exactly what our clients are expecting. Architectural documents and specifications give us those details, all of which are defined earlier in the process with our clients’ approval. Specifications are typically written details that outline critical construction information like material quantities, color, and other standards we need to meet the design and budget goals.
Cabinet specs would have details like these and more:
General: Shakers, paint grade, flush oak fronts with plywood boxes at drawers and melamine interiors for others | Glass lites on select uppers.
Upper Cabinet Wallpaper: Emerald Peacock Wallpaper by Rifle Paper Company
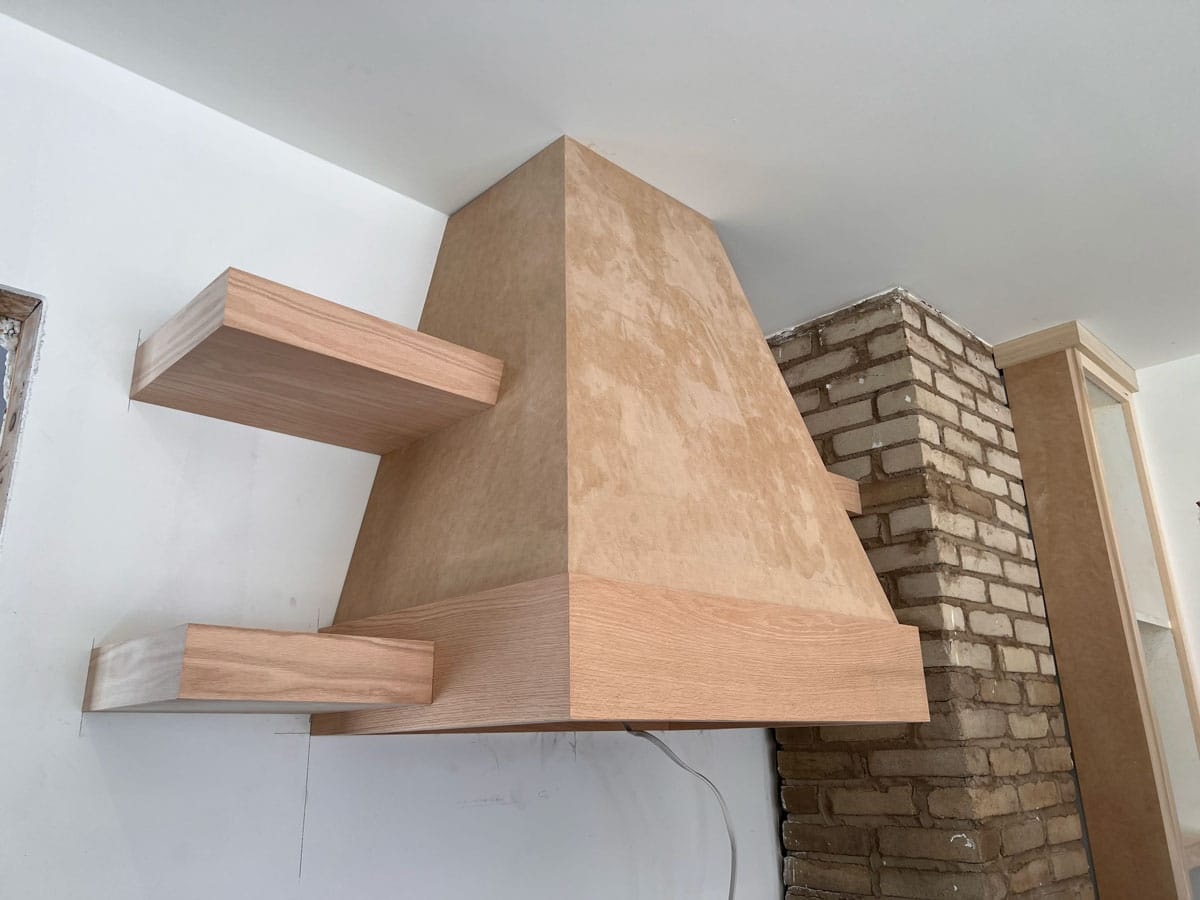
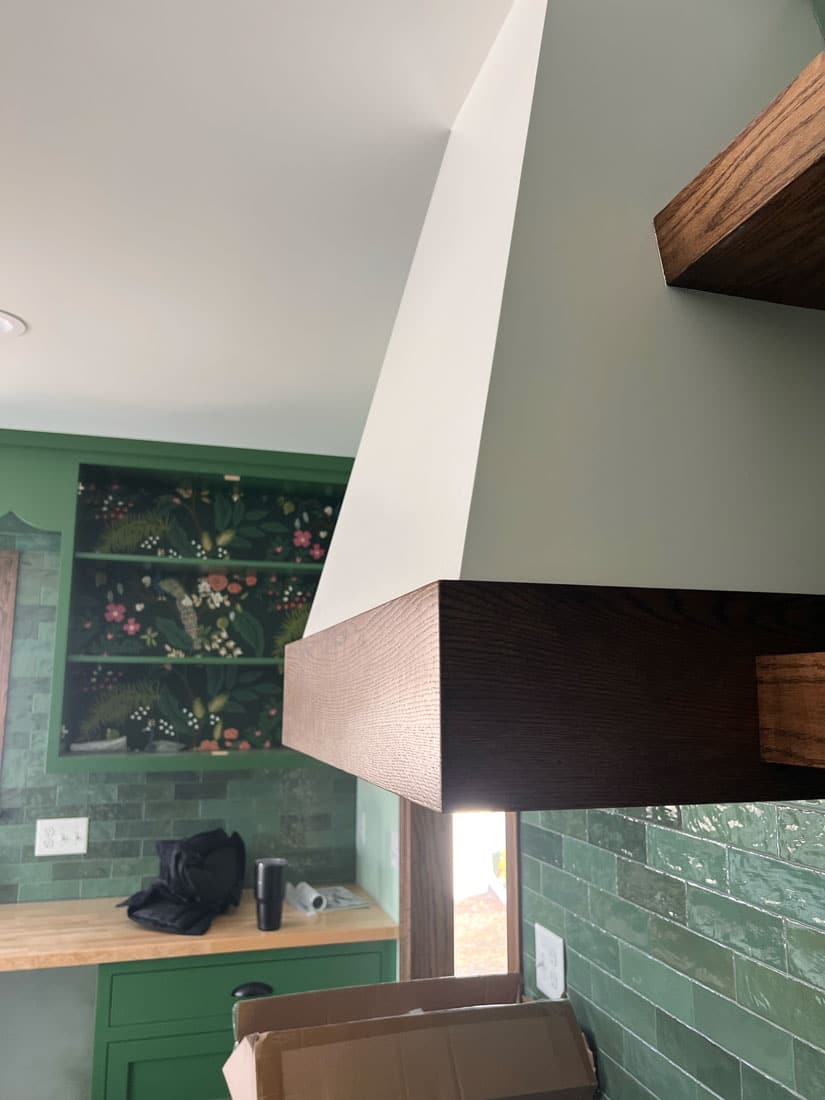
Paint: ProClassic Enamel, Arugula SW 6446 for the uppers and lowers | ProClassic Enamel, SW 7005 Pure White at the kitchen island and hood
Stain: Espresso by Sherwin Williams at hood and floating shelving
“We put rollouts in just about everything that would move. When I’m in my late 70s, it’s not going to be that easy to pull that KitchenAid mixer out anymore. So, I wanted to do things that were going to help us later.” – Conway Neighborhood Homeowner
Here’s how family, a love of nature, and an appreciation of older homes all shaped the final cabinet design.
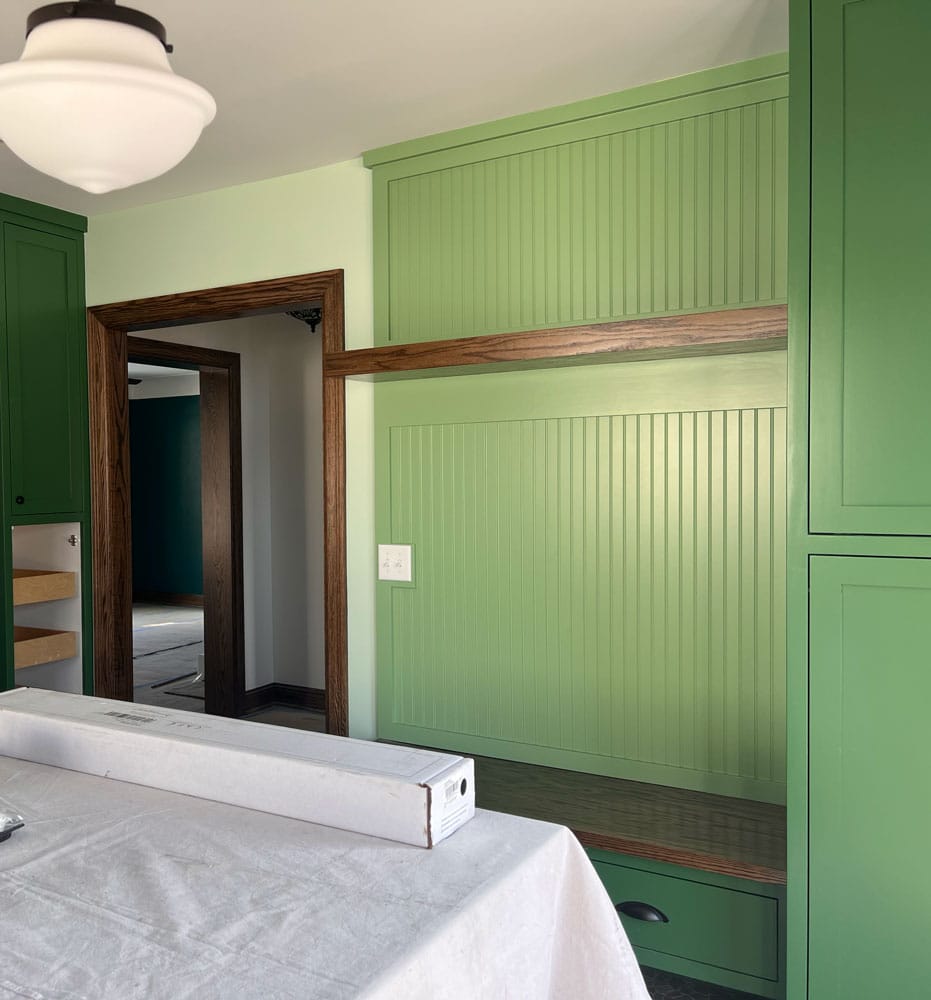
- The cabinets are painted in a rich green hue by Sherwin Williams, named Arugula. The selection is a nod to nature’s whimsical palette. The bold green cabinets complement the adjacent kitchen walls, painted in Sherwin Williams Mint Condition, itself inspired by a KitchenAid stand mixer given as a gift by one client’s parent.
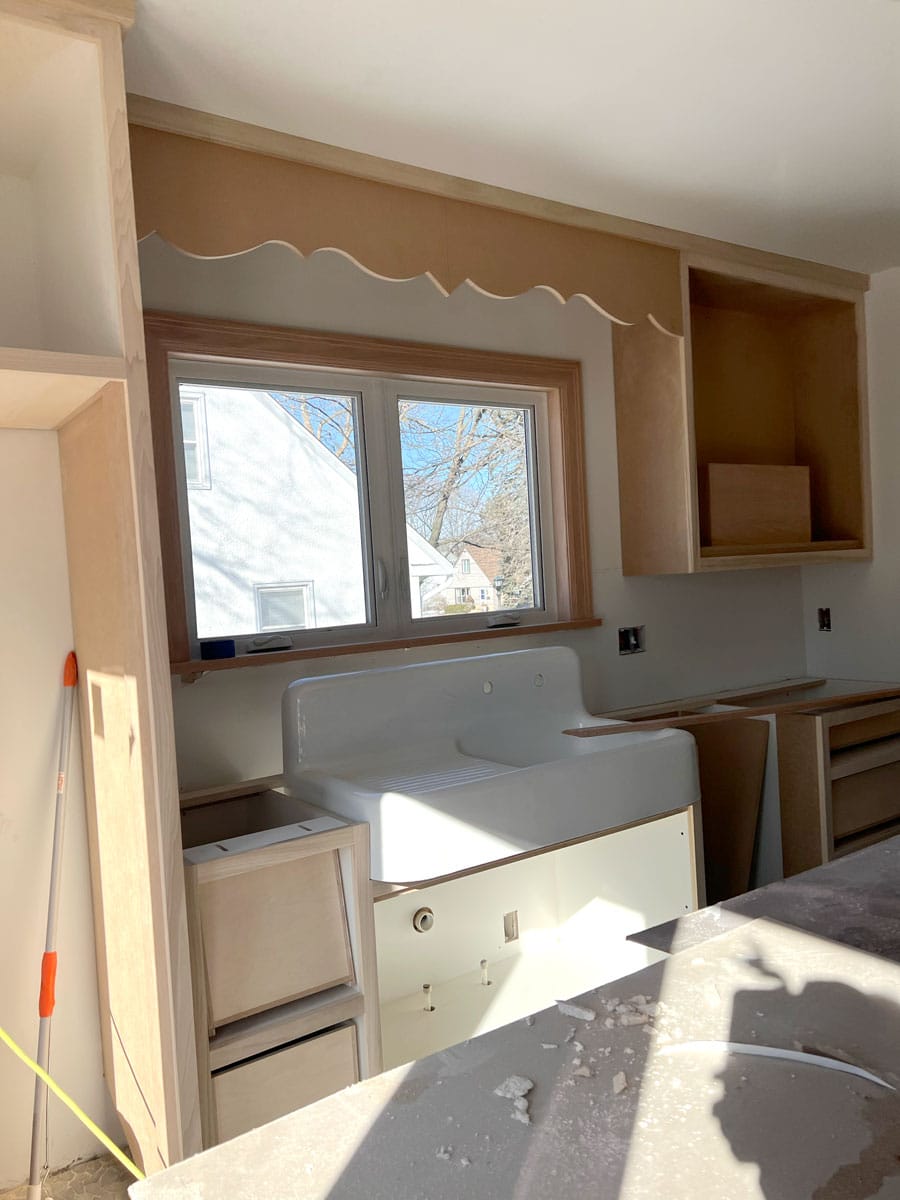
- The addition of a cabinet valence over the kitchen sink is a custom replica of a selection of trim at the home of a well-loved grandparent.
- Espresso staining on the vent hood and open shelving presents a layering effect that is typical of older homes.
- Pops of vivid wallpaper among the upper cabinets allow for an even greater exploration of our client’s nature-inspired interior.
“The color of the kitchen actually came off of my pistachio-colored KitchenAid mixer that my dad gave me for my birthday. I have always loved it, and when we were trying to think about the colors of the house, I was like, ‘let’s just do the kitchen green.’ And so that was kind of our jumping-off point color-wise.” – Conway Neighborhood Homeowner
With the design done, it’s time to build our bold green cabinets.
Let’s Measure!
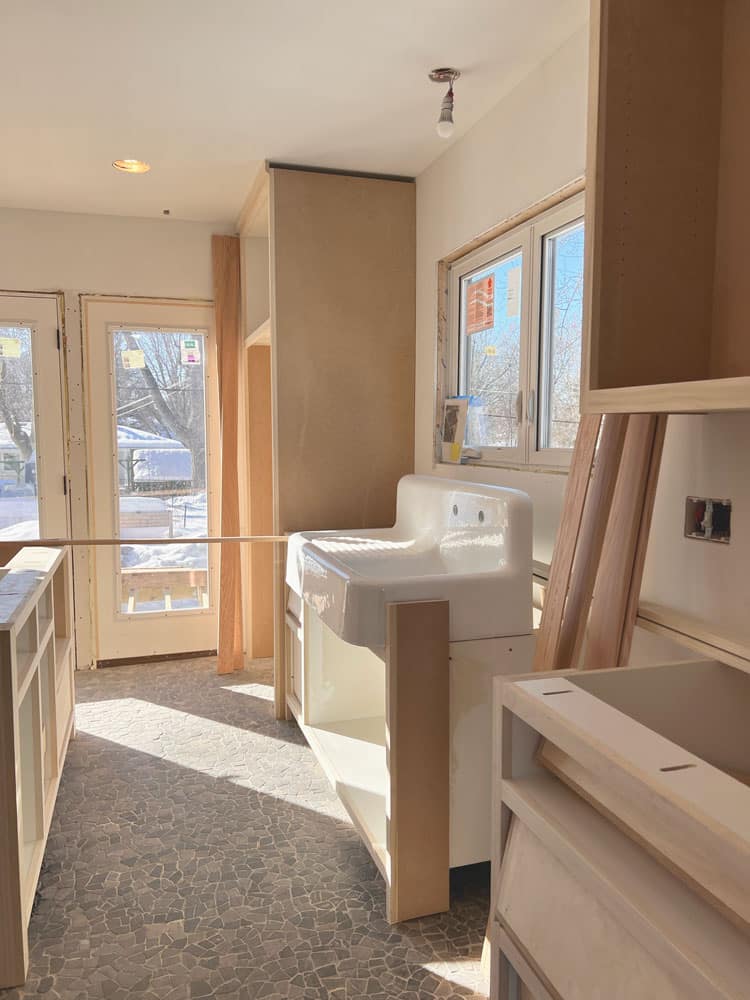
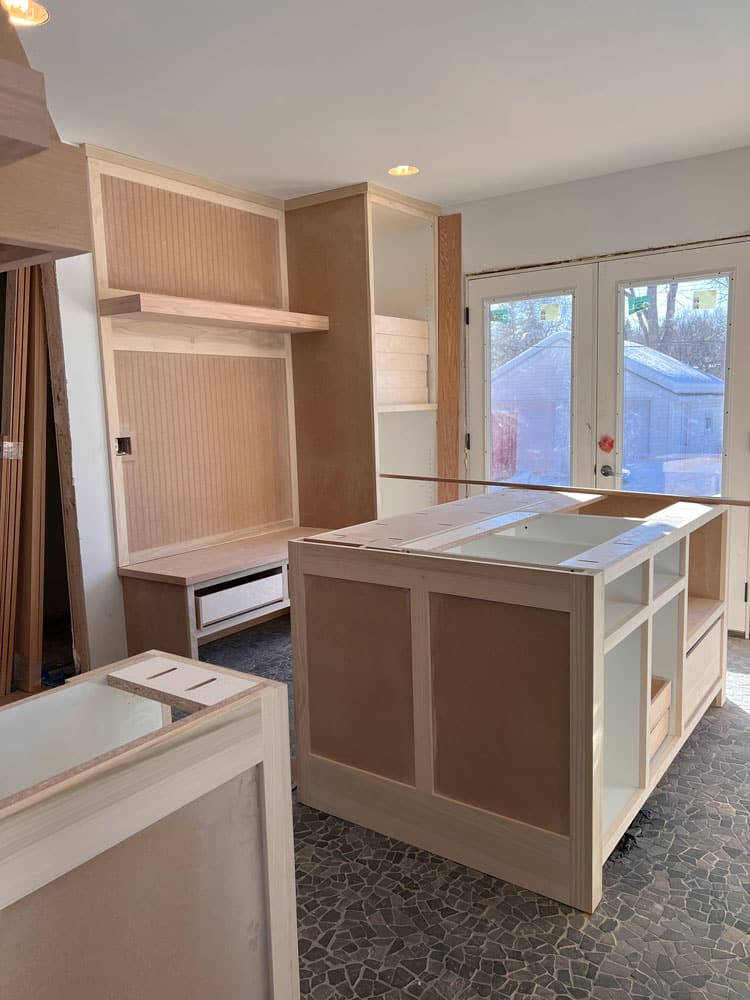
Just after framing and rough-ins, our cabinet maker came to the site to measure the kitchen. He let us know if there were any areas where the cabinet build-out might need to be adjusted to on-site realities. It’s not uncommon for measurements given on the drawings to shift a little when the cabinet maker takes his measurements, as both framing and rough-ins will have affected the final area available for future cabinets, from placement to sizing.
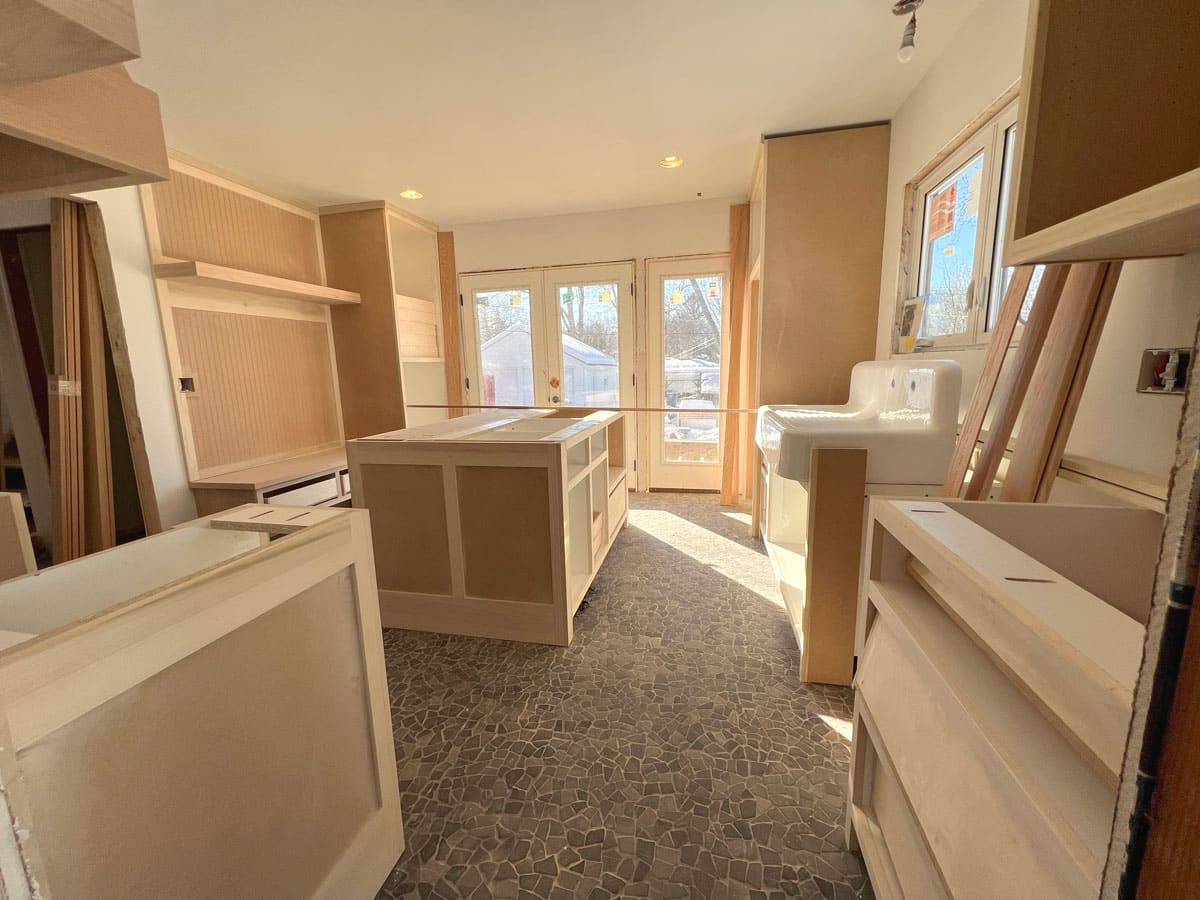
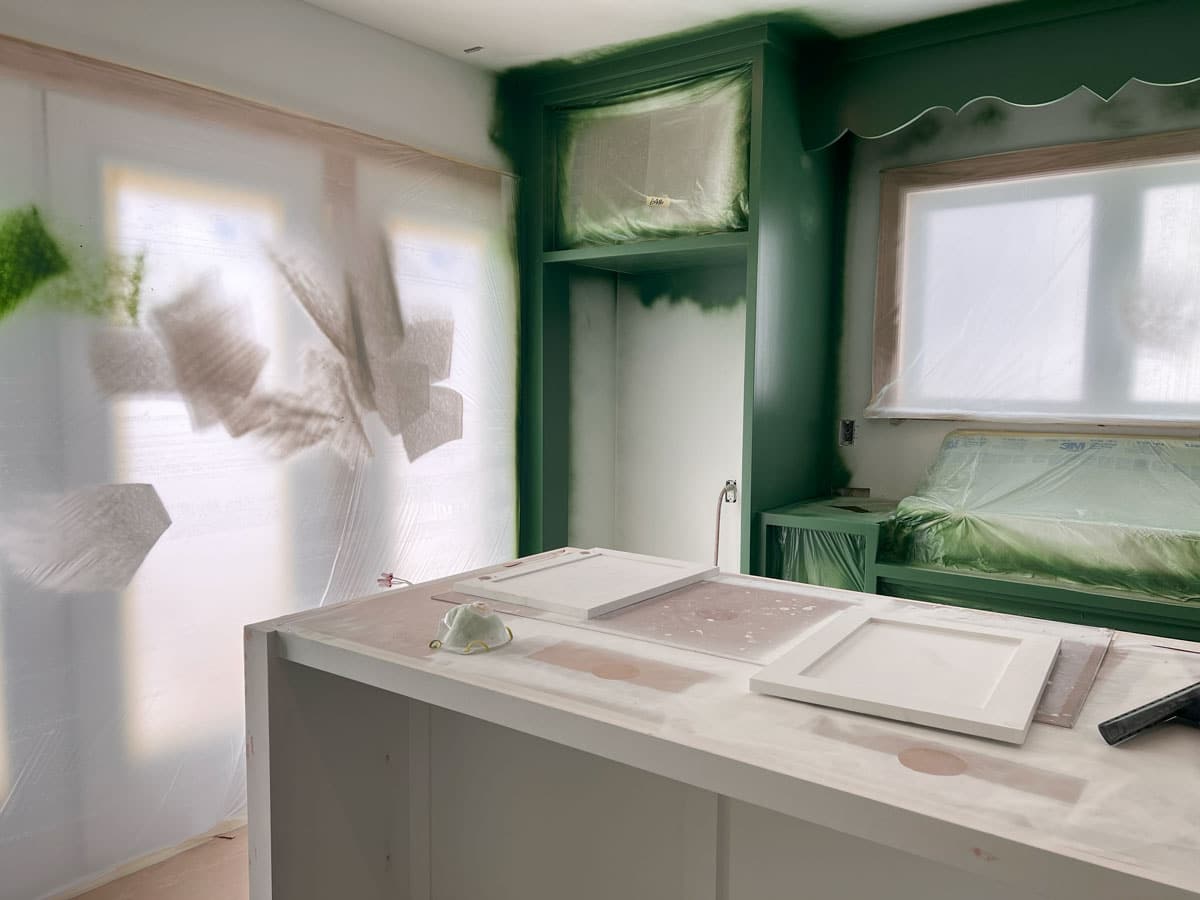
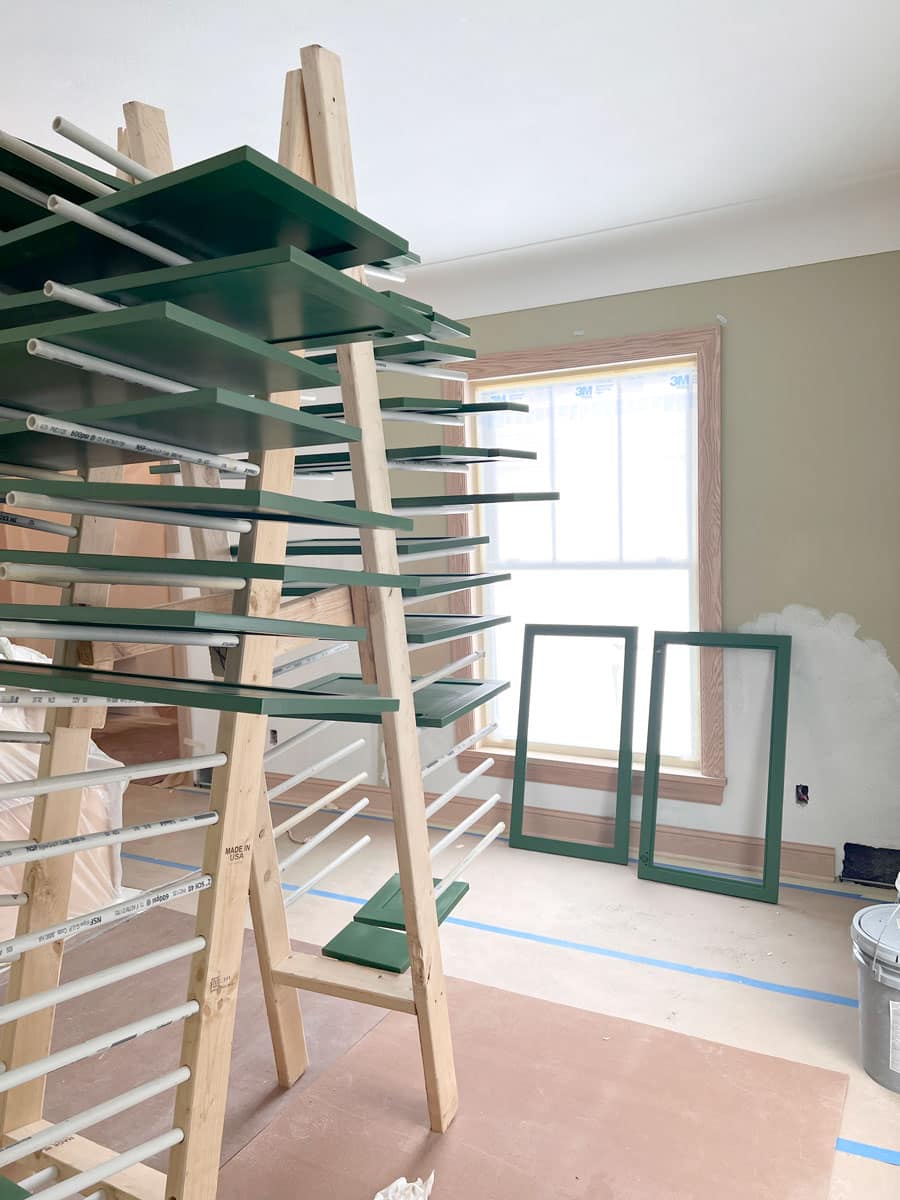
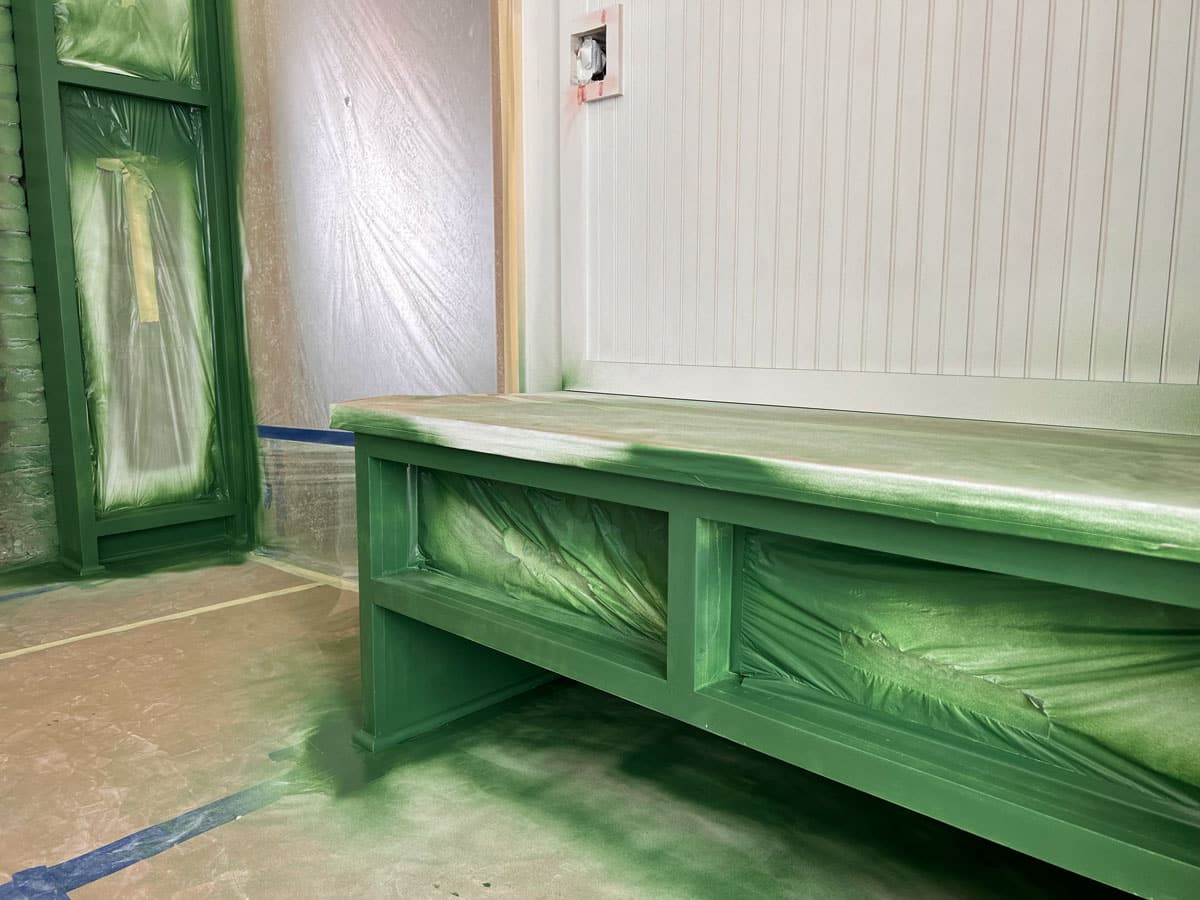
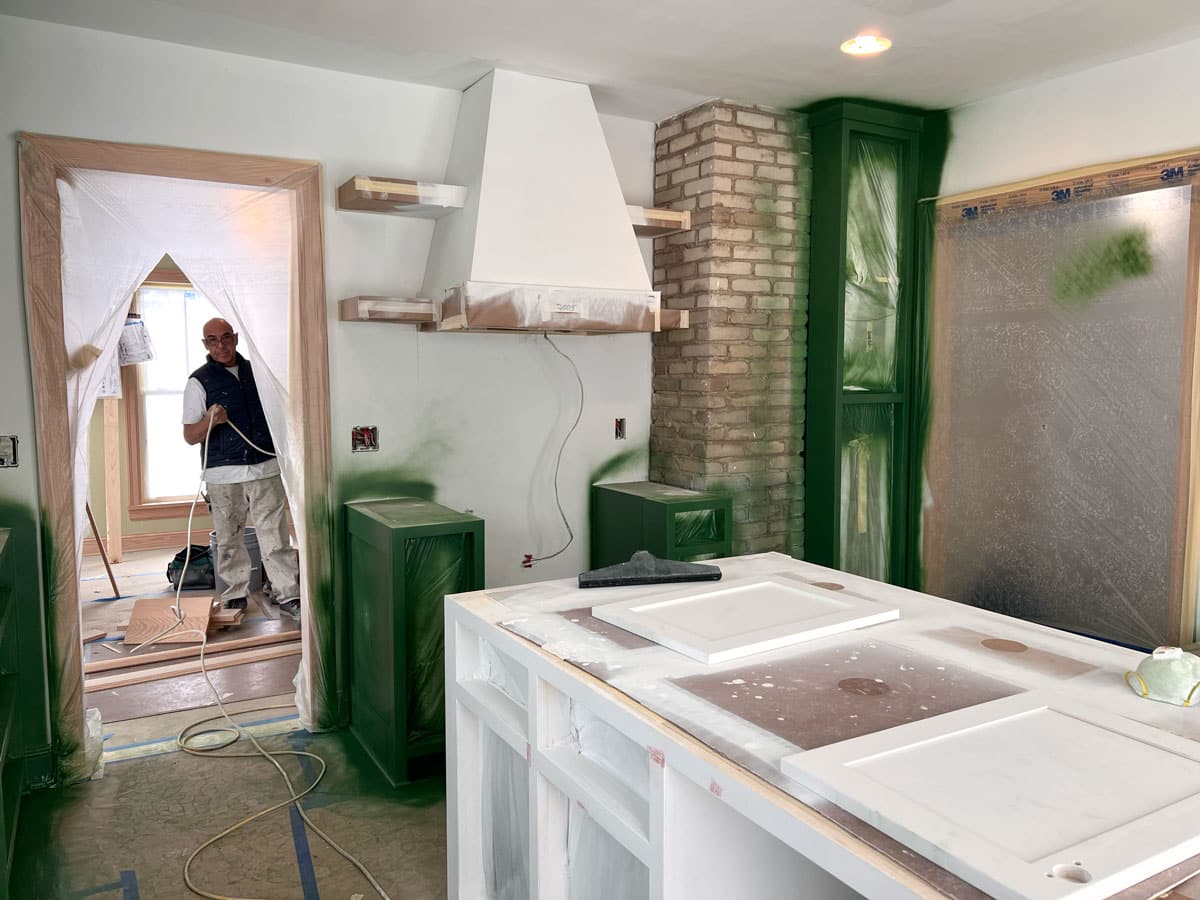
Build. Install. Finish.
Having taken measurements and reviewed all the final details with the rest of the team, the cabinet maker spent the following month building the cabinet boxes in his shop, delivering them to the site when completed. The unfinished cabinets were then secured directly into the stud walls. To finish the cabinets, the crew taped off any surfaces we didn’t want enameled with the Sherwin Williams, Arugula paint. The cabinet fronts were also painted, letting them dry separately before joining them to the cabinet boxes and installing hardware.
"Typically, with us, it's about 4 weeks from cabinet measure approval to build."
WHITE CRANE PROJECT MANAGER
“I have literally been pining for this wallpaper for five years! And I was just like, ‘If we ever redo the house, that wallpaper has to go somewhere in the house.'” – Conway Neighborhood Homeowner
Want to learn more about
this type of project?
We’re here to help! Check out our planning resources below, or reach out to us here.